

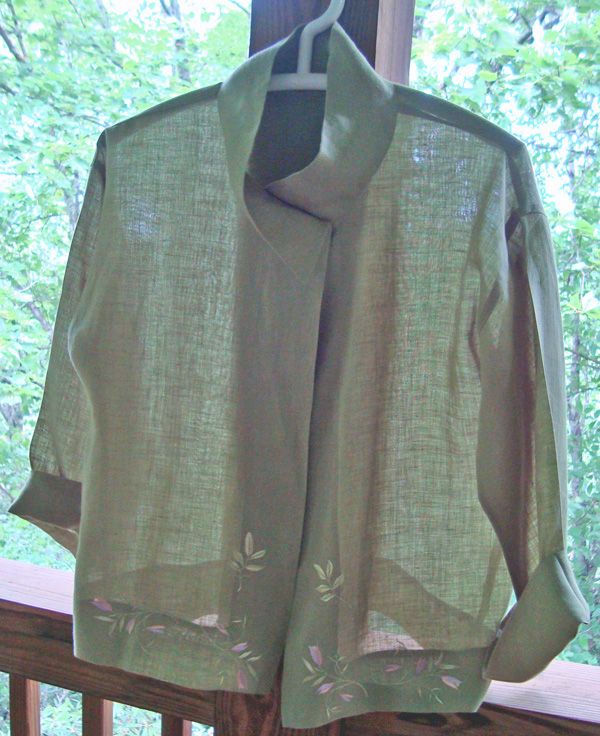
A wide hem on the front and lower edges adds a crisp finish to this airy, linen jacket.
Beautiful summer fabrics – like handkerchief linen – demand simple finishes. Here’s an easy way to deal with the edges of a loose-fitting boxy jacket. Start by adjusting your pattern to allow a substantial hem width and an equal amount on each front opening edge. Add ¼ inch on all sides for clean finishing. The vertical hems on the front take the place of the facings. You don’t need interfacing unless you want buttons and buttonholes. In that case, I’d suggest adding a layer of sheer silk organza to the fronts.

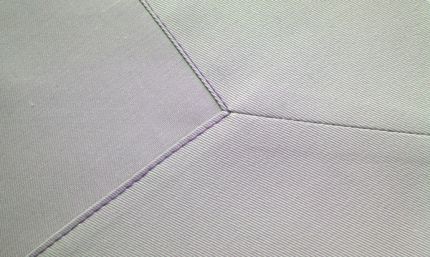
A mitered corner eliminates bulk.
To complete the miter:
Turn up the hem, turn in the fronts, and press.
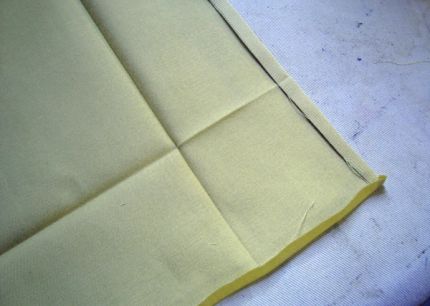
Turn in the edges the desired amount. Press.
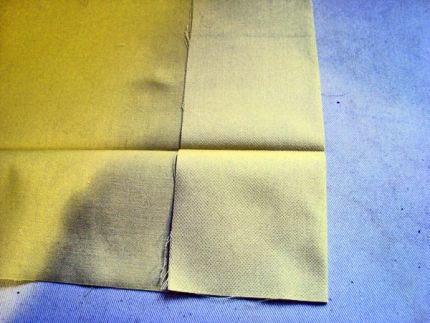
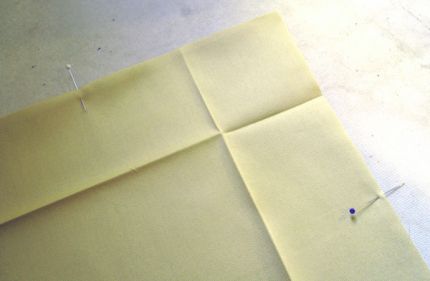
Turn in ¼ inch on all three edges and press.
Turn in 1/4 inch on all sides to clean finish the edges.
Fold the hems in place and mark the point where the inside edges meet with pins through each fold.
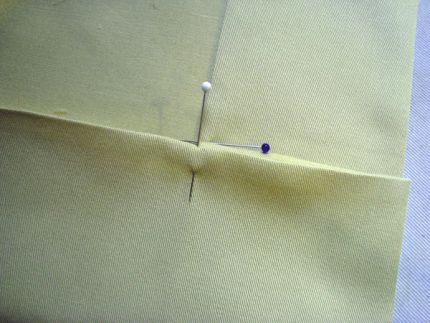
Mark with a pin through each fold at the inner corner where the edges intersect.
Open the corner.
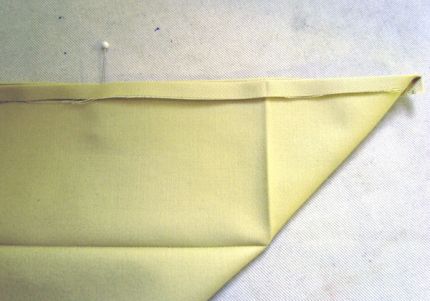
Fold diagonally, right sides together, matching the pins.
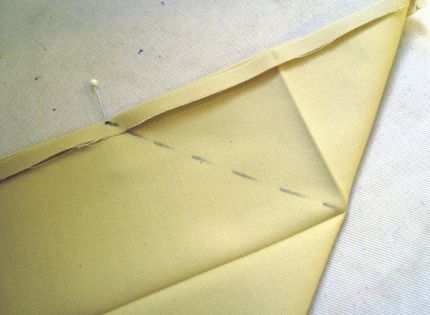
Mark a diagonal line from the pins to the inside corner.
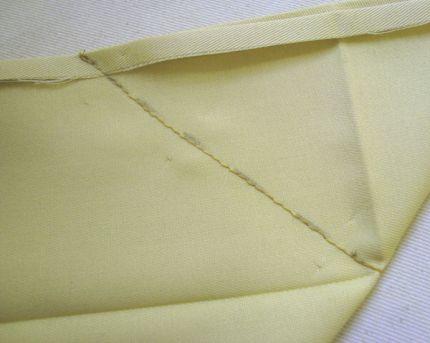
Stitch along the marked line through both thicknesses.
Turn up the hem to check the miter. It’s always a good idea to this before you cut – just to make sure you’ve stitched it correctly
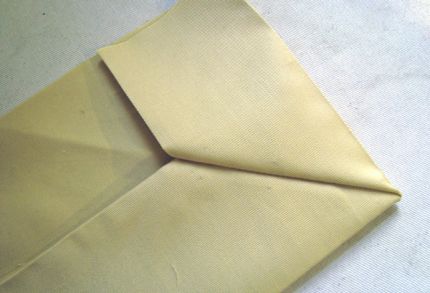
Turn the corner right sides out to check the miter.
If the corner looks good, trim away the excess fabric to create a ¼-inch seam allowance. Press the seam open.
Go back and trim to a 1/4 inch and press the seam open.
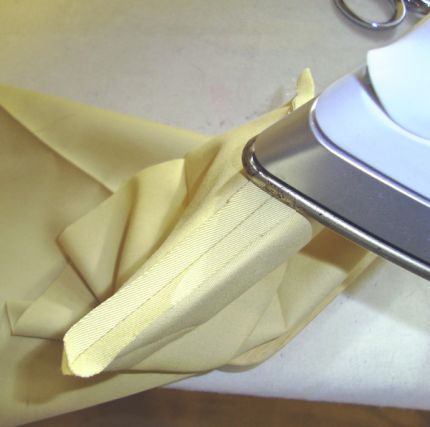
Machine stitch the hem in place along the inside folds, pivoting at the corners.
Start your 14-day FREE trial to access this story.
Start your FREE trial today and get instant access to this article plus access to all Threads Insider content.
Start Your Free TrialAlready an Insider? Log in


and they tell us this is hard. You make it look easy!
Thank you so much!!! Can't wait to try this out for myself using your wonderfully detailed and illustrated instructions.
I have bookmarked this page so the next time I need to miter a corner I can find this again to refresh my memory! Looking forward to trying it out!
This is the same technique that is illustrated in all Sewing Workshop and Shapes patterns with mitered hems. I always mark the point where the pin is placed with an air erasable marker, which is even easier and less cumbersome.
Didn't Louise Cutting and Linda Lee design this technique several years ago? Have they been given credit?
I would love to give Linda & Louise credit, but – and I’m sure they will both agree – much of what we have learned, as writers and teachers about sewing, has come from our mothers, grandmothers, aunts, high school home ec teachers, design schools, and industry careers as well as our own experimenting and tweaking of various methods. We are simply conduits of useful information. I certainly take no credit in inventing this mitering technique and I’m not sure where I learned it. But, I did some checking and found the same basic process in every sewing book that I own, including one that goes back to 1943.
Isn't it great to have technology inprove overtime with internet and computers to be able to talk and learn from anyone who has a good ability to be able to show in detail and give good advise about sewing and anything that we can give that maybe of help to someone else with an issue of sewing matters or anything in genral almost anything these days..Thankyou Maryray
Thanks for the instructions but I have a problem mitering blanket binding at the corners when I have to piece together the binding. I want the seam to be hidden inside the miter. My blanket is quite large and takes almost 8 yds, so since the binding is not a bias piece I need to join two pieces at 2 of the corners.How???
I've been searching the web for THIS specific method for over an hour! Thanks so much for the great turotial! I have some napkins and tray cloths to make and the corners I normally do is not nearly as neat as this. I am off to try it right away! Thanks a million again!!
This is great. It is simple, easy and to the point. Way to go girl.
This is great. It is simple, easy and to the point. Way to go girl.
This is great. It is simple. It is easy to follow. Way to go girl
Thanks a lot, what a super tutorial! :)
I have used this technique before ages ago but I've just realised it was your tip that I followed. I only joined today and was blown away by all the tricks and tips wishing I'd found this site sooner and it turns out I've used this site several times without realising what a little gem it was.
i need to know how to do mitered cornors with leater on a sisal rug
Thank goodness I found this site. I have printed out the directions so that I can sit at my sewing machines and execute a perfect mitered corner. I am making six flags for a non-profit organization. Thank you so much.
I think I remember learning this 50+ years ago but totally forgot about this trick. Now I am making a table topper and having the worst time making mitered corners. Please help before I loose all control and do something drastic!! How do you connect the ends to get the perfect angle. Mine want to turn in to boxed corners.
Thanks for the terrific article concerning the mitered corner! I needed a confirmation on my memory on this technique and your description was very clear and concise! Thanks again !