Plan and Sew Precise Mitered Corners
Plan the technique in paper first
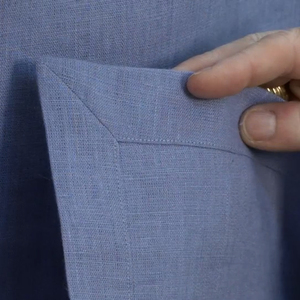
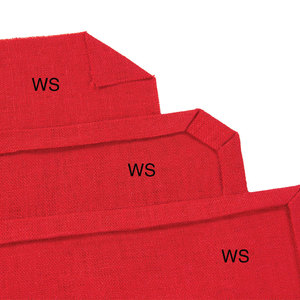
Nothing elevates the finish of a garment like a beautifully mitered corner. Show off your next-level sewing and attention to detail by adding a perfectly sewn miter to garments at hem edges and vent corners, or finish cocktail or dinner napkin corners precisely. Mitered corners can be of any angle, and the hem allowances can be whatever width you prefer, from narrow to several inches wide. A miter is also a great method for reducing bulk. Without a miter, a double-fold hem has nine layers of fabric to stitch through at the corner. With a miter, that number drops to four. Properly engineering a mitered corner at the pattern stage makes the sewing easier and neater.
Design and test
An easy way to plan perfect miters is to mock up the pattern shape and seam location and angle on graph paper. Accuracy is paramount when drawing the lines, to make sure you achieve flawless corners.
I’ll show you how to measure and mark for a perfect miter on any type of angle and with any hem allowance width. Each type can be made with a serged-edge finish or a clean finish.
The first thing to consider is whether your pattern has hem allowance widths you like, as you can work with them to create a miter. If you wish to change the hem widths or add a turn-under allowance for a clean finish, this must be done at the pattern stage. In this case, begin with the pattern pieces’ finished edges and add the allowances.
Create the miter in fabric
Once you have planned and tested the miter, sewing it is simple. Fold the corner with right sides together, ensuring that the corner falls directly at the intersection of the vertical and horizontal foldlines. It may help to mark…
Start your 14-day FREE trial to access this story.
Start your FREE trial today and get instant access to this article plus access to all Threads Insider content.
Start Your Free TrialAlready an Insider? Log in


Log in or become a member to post a comment.
Sign up Log in