The Tailored Jacket: How to Make a Surgeon’s Cuff, Part 1
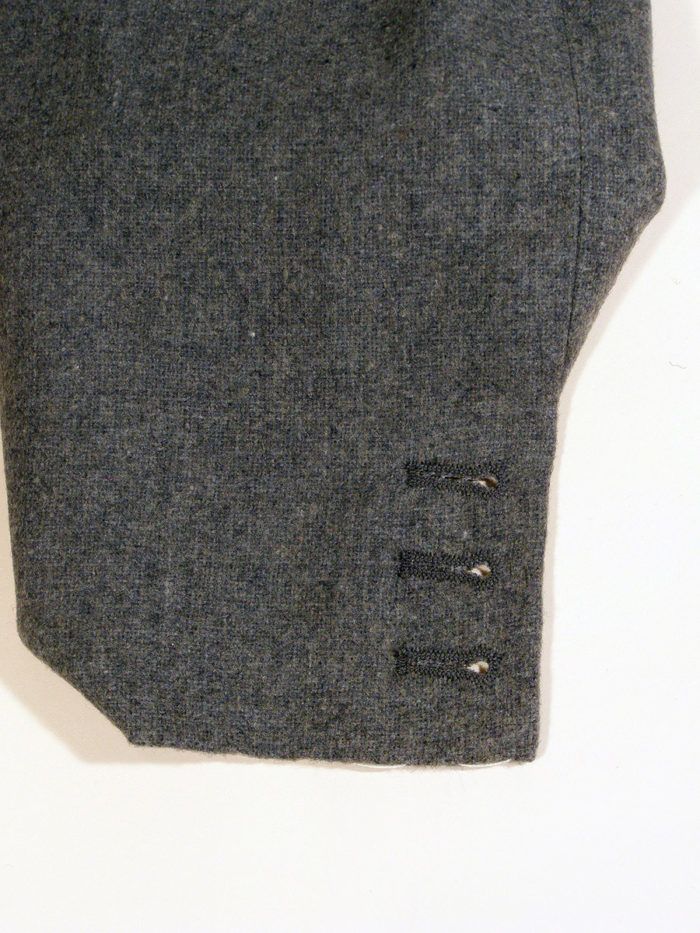
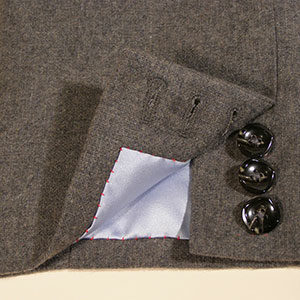
Generally, the cuffs found on tailored jackets are decorative, not functional. There is something appealing about having working cuff buttons on a tailored jacket. I’ll show you how to create this practical cuff detail.
Here’s a bit of trivia: A cuff with working buttonholes is called a surgeon’s cuff.
The Economist (posted December 16, 2010) explains:
“Savile Row was inhabited largely by surgeons before the tailors moved in during the 19th century, and their influence can be seen in the ‘surgeon’s cuff.’ On the most expensive suits the cuff buttons, which mirror the pips of military rank, can be undone, allowing the sleeve to be rolled back. This let surgeons attend patients spouting blood without removing their coats-an important distinction that set them apart from shirt-sleeved tradesmen of the lower orders.”
Now you know.
More tailoring techniques from Kenneth D. King:

• How to Make a Tailored Collar
• How to Replace a Sleeve Lining
• How to Make a Perfect Notched Lapel
• Eliminate Buildup in Your Seam Allowances
• How to Sew a Catch Stitch
The technique begins with the pattern. The height of the vent is “to taste,” depending on the number of buttons you want to use.
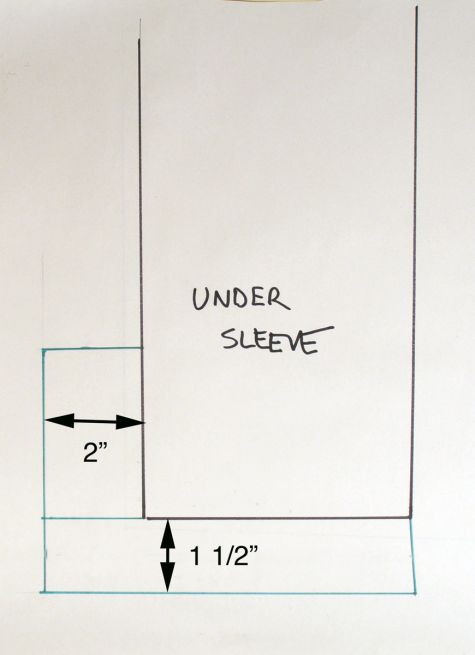
On the undersleeve, the hem allowance is 1-1/2 inches deep, and the vent underlap is 2 inches wide. Add these to the pattern, as shown.
The upper sleeve is handled differently.
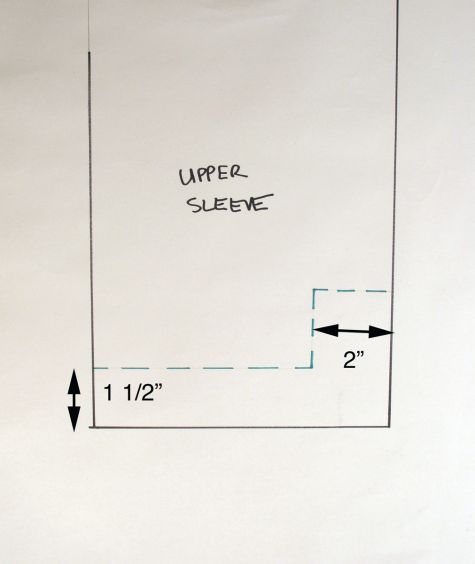
Draft a 1-1/2-inch hem allowance above the cuff line. Then, draft a 2-inch-wide cuff facing, as shown.
The dotted line will represent the finished facing.
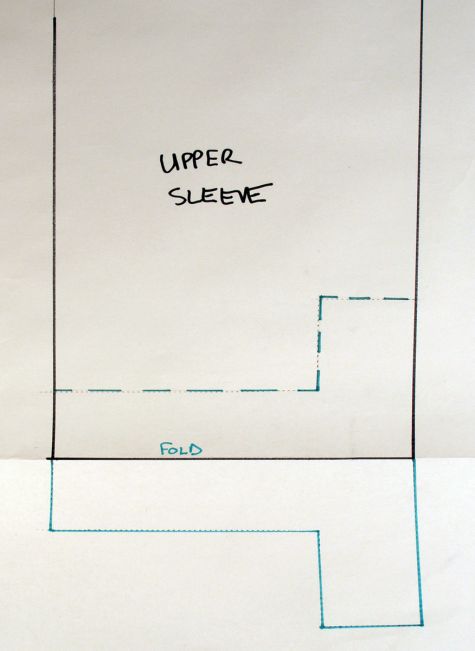
Fold the paper on the cuff line, and trace out the dotted area.
Next, unfold the paper to reveal the cuff facing for the upper sleeve.
Sew the front seam on the sleeve, and press it open. The thread basting represents the finished cuff foldline.
…
Start your 14-day FREE trial to access this story.
Start your FREE trial today and get instant access to this article plus access to all Threads Insider content.
Start Your Free TrialAlready an Insider? Log in




Thank you, Kenneth, as always, such a clearly written and carefully illustrated tutorial about an interesting detail that helps us all kick our sewing up a notch. Great story about Savile Row, as well! Looking forward to your technique on managing the tricky part of attaching the lining.
Thanks, Leine!
This lining installs somewhat like the sleeve lining I showed on the morning coat a time back--this is the link to that post:
https://www.threadsmagazine.com/item/29648/how-to-replace-a-sleeve-lining
Thank you, Professor King. I learn so much from your posts. I really appreciate the time you dedicate to sharing your knowledge.
Thank you, Professor King. I learn so much from your posts. I really appreciate the time you dedicate to sharing your knowledge.
Hi Kenneth. Thank you so much for this tutorial that it si well explained. Howewer, I have a question regarding the pattern of the uppersleve (second picture). Should the height of the vent from the cuff line should be the same than the height of the vent on the undersleeve (from the cuff line)?
Many thanks!