How to Sew Crisp and Clean Collars
Here's a step-by-step method for keeping the seamlines out of sight.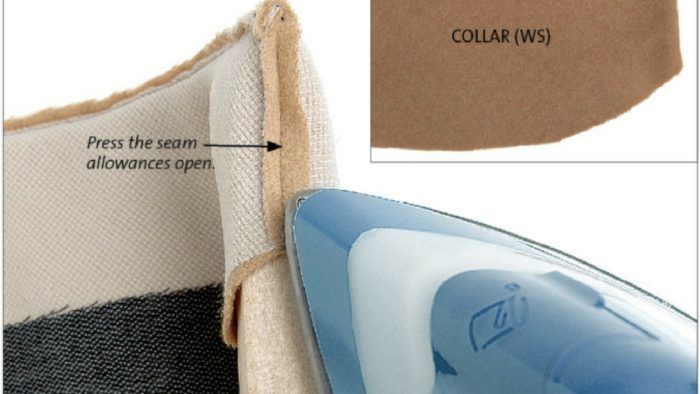
In “Precise Edges on Collars & Lapels,” Threads #194 (Dec. 2017/Jan. 2018), instructor Pamela Leggett walks through a detailed method for producing impeccably shaped lapels and nicely set collars without seamlines showing. Take a peek at the initial steps, which require a change in the collar sewing sequence. Begin by interfacing the upper and undercollar pieces. Then sew and press for a clean, crisp result.
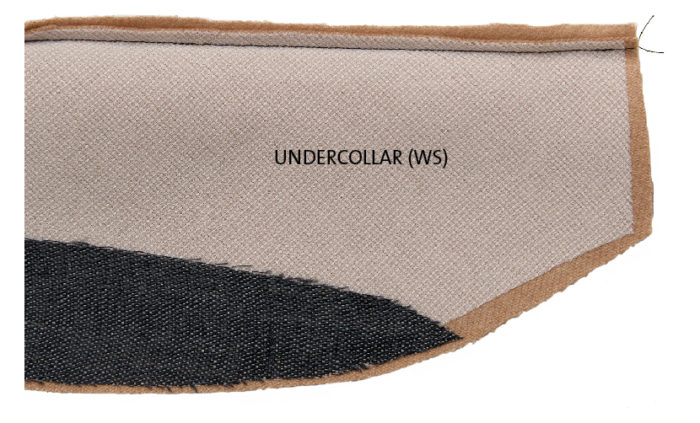 1. Stitch the collar’s outer seam. Grade the seam allowances: Trim the undercollar allowance to 1⁄4 inch wide, and the upper collar allowance to 3⁄8 inch wide. Finger-press the seam allowances toward the undercollar.
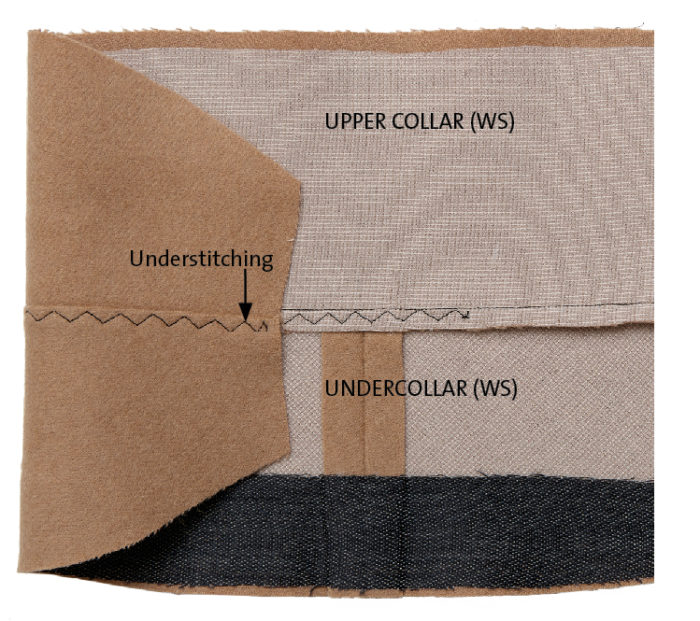 2. Understitch the seam allowances. Working from the collar’s right side, understitch the seam allowances to the undercollar with a three-step zigzag stitch, 3.0 mm to 4.0 mm wide by 2.0 mm to 2.5 mm long. (Contrasting thread was used for visibility on the examples shown.) The understitching keeps the seam allowances in position, creates a crisp edge, and prevents the undercollar from rolling out at the collar edge.
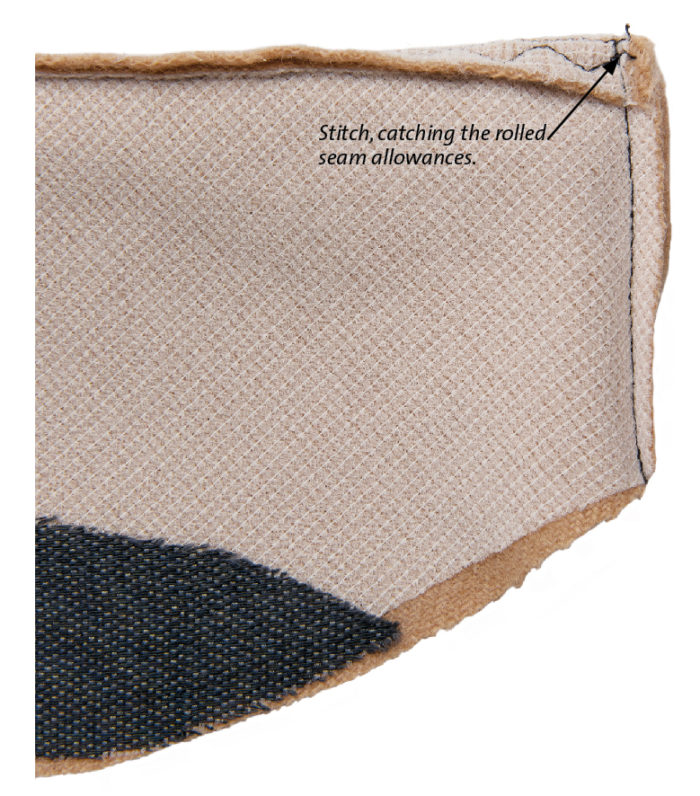 3. Sew the collar ends. With right sides together, fold the collar along the outer seamline. The seamline automatically rolls toward the undercollar. Stitch each end from the fold toward the neckline. Grade the seam allowances as described in step 1, and clip the corners.
4. Press the seam allowances open. Work over a point presser to reach all the way into the corners. Turn the corners with a point turner. Lay the piece on the ironing board with the undercollar up. The seamline rolls slightly toward the undercollar side. Steam and lightly press the collar. Turn the piece over and steam generously. Use the flat bottom of the point presser/clapper tool to pound the piece, then press down with the tool, holding it in place for a few seconds.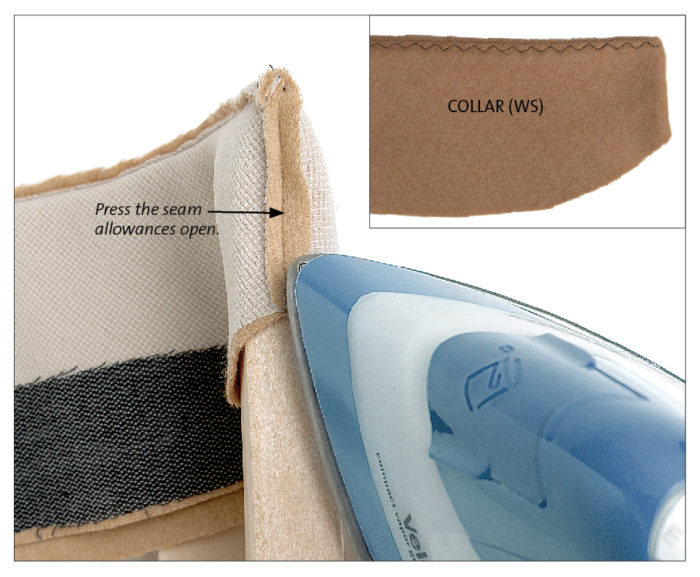




Ssuuuppeerbbb
Wow, super post
Super