Here are 10 tips and tricks for every sewing enthusiast directly from the sewing community.
More great sewing advice:
Simple Fixes and Mending Techniques
Quick Tips for Improving Your Stitches
1. A Guide for Hand Stitching
When I want to sew evenly spaced hand stitches, I machine-baste a line of stitches and use it as a guide. I set the stitch length the same as the hand stitch I plan to use. I pull the machine stitches a few at a time just before handsewing and follow the holes left behind. Or, I leave the stitches in place until I finish my handwork. The machine stitches work as a guide for different hand stitches, such as a blanket stitch, topstitch, or herringbone stitch. With this method, I always get perfectly spaced hand stitching.
—Janice Engle, Aurora, Illinois
2. Easy Tailor’s Tacks
I use an alternative version of tailor’s tacks that holds the threads in place more securely than traditional methods. After cutting each pattern piece, I use contrasting, unknotted, doubled thread in my hand needle and take a stitch through the pattern tissue and both layers of fabric. From the wrong side, I come back through the fabric and pattern and cut long thread tails. Next, I lift the pattern off the fabric, letting the tails slip through. Then I turn the fabric over. With a different color thread, I take a second stitch over each of the first in the same fashion from the wrong side, again leaving long tails. Pull the two fabric layers apart, and one set stays stitched to the top fabric layer, and the other set stays stitched to the bottom layer. The threads mark clear positions for my sewing that I can see from both sides.
—Laurie Wilcox, Palm Desert, California
3. Two Safety Pins Are Better Than One
When I pull elastic or cording through a casing, I use a safety pin to help guide it. If I’m too aggressive, however, the elastic or cord end at the starting point can get away from me and sneak into the casing. It is so difficult to “weave” backward that I usually have to start over. Now, I use a second safety pin to secure the elastic or cord tail to the casing. It holds securely, and I don’t ever have to worry about it accidentally sliding into the casing.
—Betty Bolden, Bolton, Connecticut
4. Make a Button Shank From Thread
To use a flat button on thick fabric, make a button shank from thread. Begin by threading a needle with a double strand of thread; knot the thread ends. Take a stitch on the right side of the fabric, at the button placement mark. This hides the knot under the button. Take a stitch through the button as you typically would, but don’t pull the thread tight. Next, choose a spacer to ensure there is ample space between the fabric and the button. For thin fabrics, use a straight pin or toothpick. For thicker fabrics, use a heavy darning needle, bobby pin, chopstick, or thin pen. Insert the spacer under the button, between the holes, and then tug slightly on the sewing needle to tighten the thread and secure the spacer. Continue sewing the button in the usual fashion. When the button is sewn securely (with the needle on the wrong side of the fabric), remove the spacer and hold the button away from the fabric, keeping the stitches taut. Then, bring the needle up between the fabric and the button. Wind the thread around the stitches until you’ve created a sturdy shank. If you want to give it a more finished look, particularly when you’ve used a large spacer, make closely spaced blanket stitches around the threads instead of simply winding the thread around the shank. When you’ve finished, secure the thread close to the shank.
—Jennifer Lobb, Nanaimo, British Columbia, Canada
5. Extreme Makeovers
Shop resale or consignment stores for used men’s shirts. Cut off the collars, cuffs, and sleeves. Open the side seams, and press everything flat. Lay out a basic blouse pattern over the remaining shirt, taking advantage of existing button plackets, and sometimes even the hems. I usually make a scoop-neck blouse and adapt the neckline as necessary to make the best use of the original button placement. I cut short sleeves from the original sleeves and often have enough fabric left to cut a new self-facing for the neckline. Pockets can be repositioned. Depending on how the original shirt fits, keep the original shoulders and yoke, and just adapt the neck, sleeves, and length.
—Jane Swanson, Lucca, Italy
6. Tape Guide for Topstitching
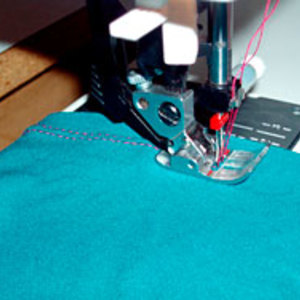
Sew perfectly straight topstitching on fabric without marking it by putting masking tape along the fabric to establish a topstitching guide to follow. Just stitch along the edge of the tape, and remove the tape when you are finished.
—Susan Morgan, Salt Lake City, Utah
7. Silicone Hem Guide
Metal hem guides get too hot for my fingers when I am pressing a hem. To eliminate this problem, I now use a strip of silicone pot holder instead. I first tried to use a whole pot holder by scoring a line marking the desired hem depth, but I accidentally cut too far. That turned out to be a blessing in disguise; I decided to cut the rest of the pot holder into different size hem guides. One pot holder has given me templates for all of the standard hem sizes I use. My iron doesn’t harm them, and they always remain cool to the touch.
—Christianne DeHart, Chico, California
8. Prevent Disappearing Ink From Vanishing
I was recently measuring and marking topstitching lines on a project
using an air-soluble, disappearing purple ink marking pen. Time got away from me, and I realized I had to leave my sewing room for an appointment. I didn’t want the marks to disappear while I was gone, so I applied a strip of Scotch Magic Tape over each mark. When I returned to my sewing room the next afternoon, I was thrilled to find every mark as bright as it had been the day before, and the tape pulled off without leaving any residue. It took me much less time to remove the tape than it would have to reconstruct the marks, and I was able to finish the project in no time.
—Norma Bucko, Threads seamstress
9. One-Woman Hem-Marking Device
To mark a hem without a helper, stretch a string tautly across a doorway at the desired hem height, and tack or tape it to the jamb on both sides. Then dust bath powder onto the string. With the unhemmed garment on, brush lightly against the powdered string, which transfers a light dusting onto the garment at the correct height. Remove the garment and finish the hem. It will be perfectly parallel to the floor. This works great for skirts, dresses, and coats.
—Bonnie Wheaton, Wheaton, Illinois
10. Crochet Hook to Remove Basting
I have found that using a crochet hook works great to remove basting threads, ease stitching threads, and to open seams. I use the rounded point to push under the stitch and the hook to remove the thread. This eliminates the danger of snagging the fabric’s threads or accidentally cutting a hole in my fabric, both of which can happen with a seam ripper. I use a size 9 hook, but smaller crochet hooks work equally well.
—Norma Taylor, Oro Valley, Arizona
Do you have any sewing tips you’d like to share? If so, leave a comment below!


Thank you for these as there are always new ways of looking at doing things, love especially Nos 7 and 8, thanks again ladies
7. & and 9. are my favorites that I will definitely use! I'd love to learn more about altering used clothing like in 5.
@Steffabrication and @Becci: Glad you both enjoyed the tips!
Thanks,
Evamarie Gomez
Web Prodducer
These are all good points for an old lady. I especially liked #1 as My arthritic fingers don't work as neatly as they once did. A Threads Fan
This has got to be the best website ever!!! for so so much info on all kinds of techniques for sewing. I wished I had signed up a lot sooner. What can I say I'm hooked and I will tell all my sewing friends about this great website !!!!!!!!
Thanks For sharing this Superb article.I use this Article to show my assignment in college.it is useful For me
Great Work.
Excellent article. Very interesting to read. I really love to read such a nice article.
Thanks! keep rocking.
Best sewing machine
An alternative to using tape to prevent disappearing marker from disappearing is to put it in a dark plastic container. Light and air is what makes it disappear, so take away the light and air and it will last longer. I once made it last for a month.
Another way of marking fabrics is to use the new erasable pens. The come in several colours and the marks will remain where you put them - until you iron the fabric. The marks disappear with the heat, and if you make the mistake of ironing the fabric before you want the marks to go, you can make them come back by putting the fabric in the freezer for a while!
Thanks for sharing such a useful info! The best sewing machine for beginners: https://sewingtopgear.com/sewing-machine-for-beginners/