

Ponchos are often worn on the catwalk during fashion week or on celebrities attempting to be incognito. But ponchos are a fantastic wardrobe staple, even for those of us who aren’t high-fashion models or celebrities. These warm, oversized garments come in all shapes and sizes, as shown in this pattern roundup, and they can be made on a budget in under an hour.
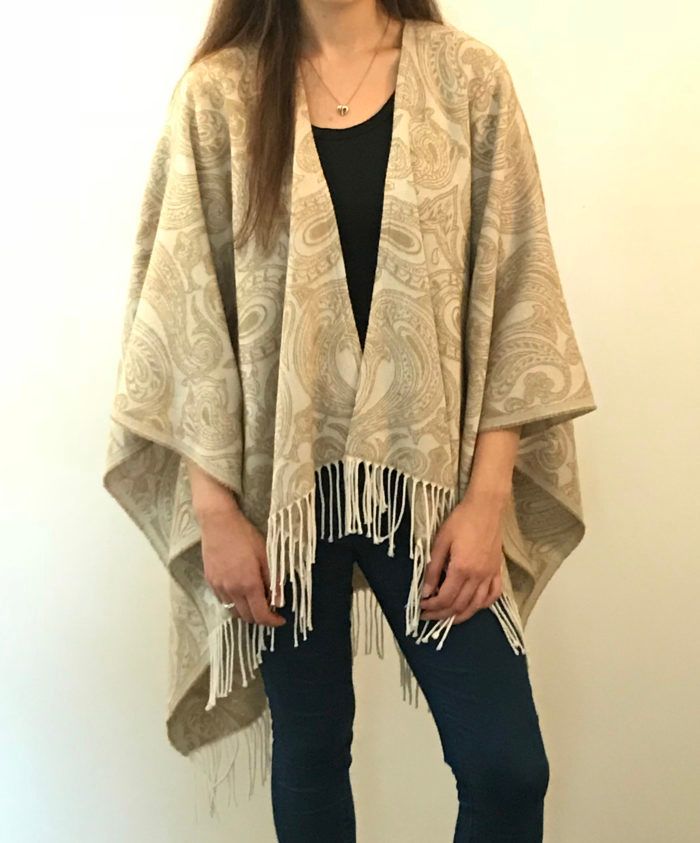
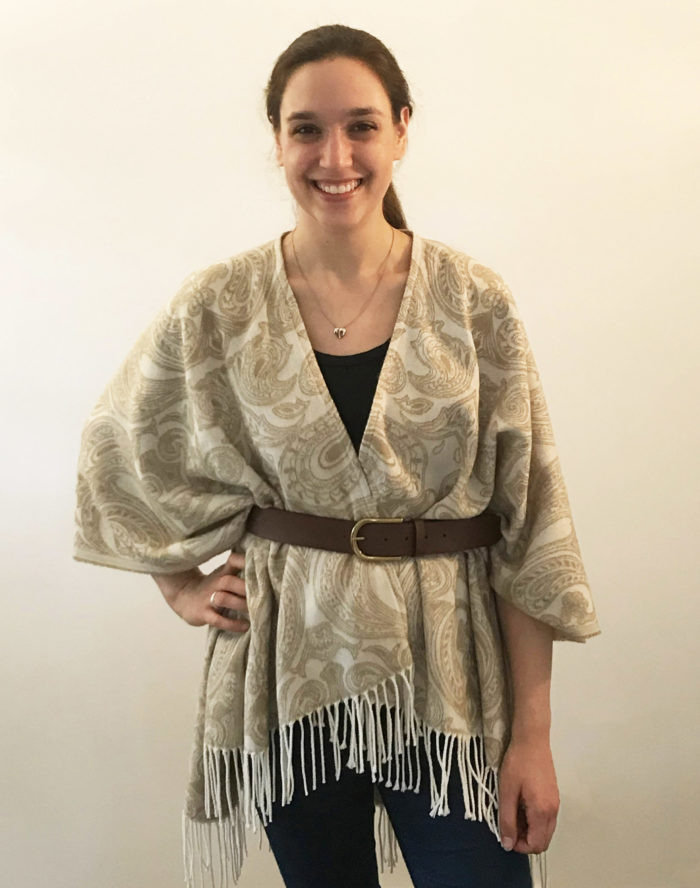
The project shown is technically a ruana, a poncho-like wrap that has a full center-front opening. It’s equally versatile and elegant, and you’ll find many ways to wear it.
To make this open-front poncho, simply find a soft, thin throw blanket with fringe that is 55 inches to 60 inches square. Then find a tape measure, a straight and a curved ruler, a marking tool, and shears to get started.
1. Choose the right side. If the blanket’s front and back side differ, choose which one you prefer. For reference, wrap the blanket around your shoulders and look in a mirror to see which side looks better with your coloring.
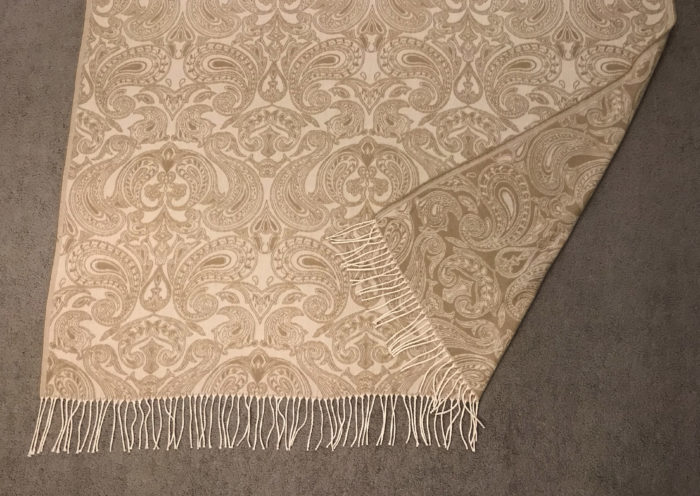
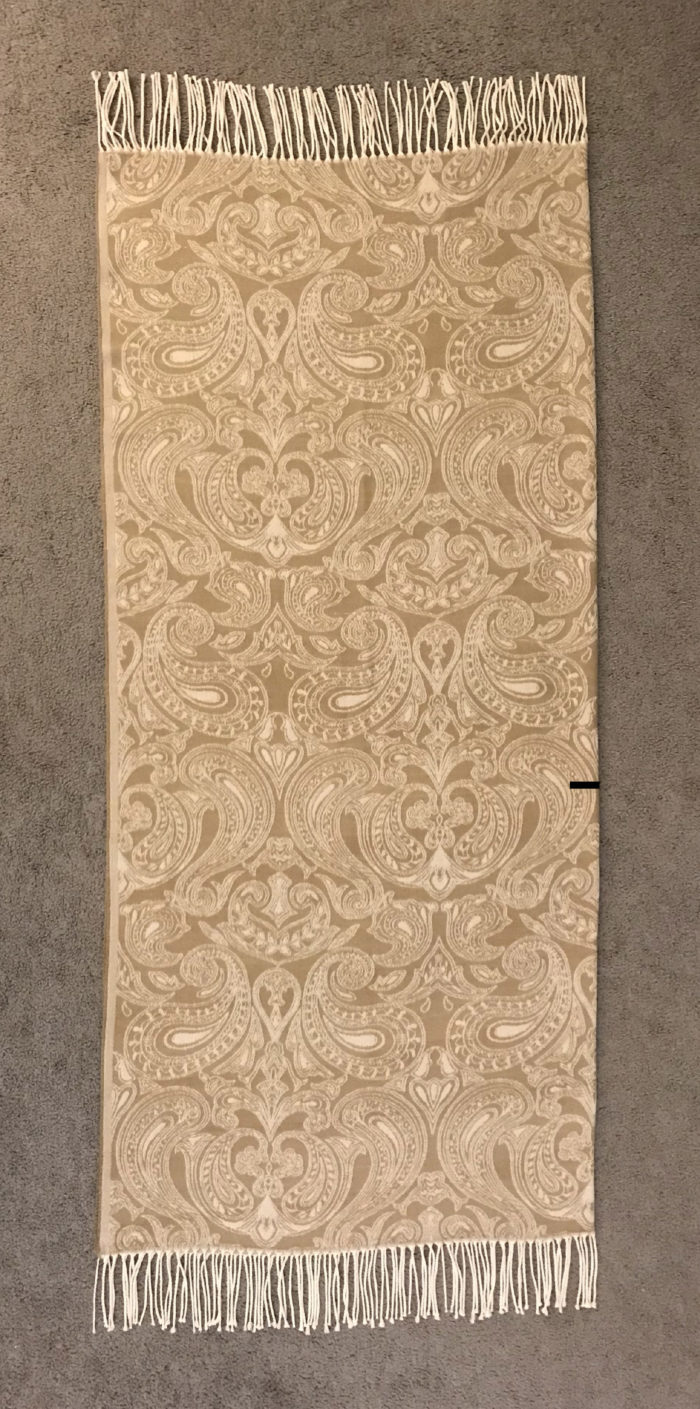
2. Measure the blanket. The blanket shown was approximately 58 inches long by 54 inches wide. I personally chose not to change either of these dimensions based on my height and weight. However, you could shorten one or both sides if desired. The length measurement will be distributed between the front and back of the poncho, and the width represents your armspan.
Once the width measurement is ideal, determine how long you want the poncho’s front and back lengths. You can always make these even. Otherwise, it helps to either drape a tape measure over your shoulder and use your shoulder’s midpoint to determine the desired front and back lengths, or to drape the blanket’s length over your shoulder and adjust the midpoint as desired. In this example, I made the front 24 1/2 inches long, while the remaining 33 1/2 inches falls to the back. This front measurement will be used in step 3.
![]()

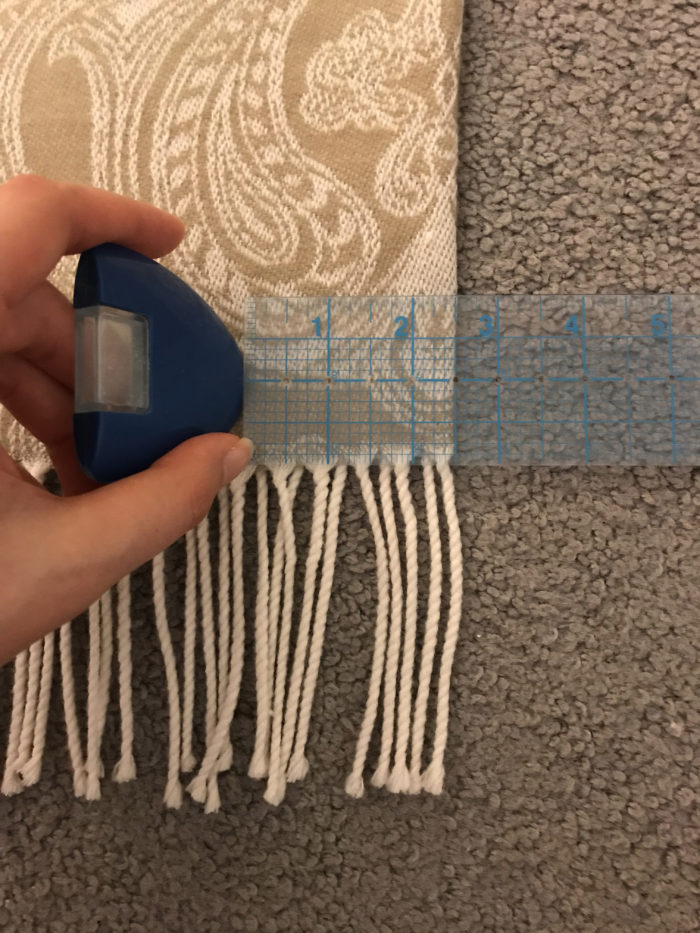
3. Fold and mark. With right sides together, fold the blanket in half lengthwise. Then measure up from the bottom edge along the fold the desired front measurement (from step 2) minus 1 inch (to account for the edge finish). For me, this would be 24 1/2 inches − 1 inch = 23 1/2 inches. Do not include the fringe in the length measurement. Mark this point with chalk along the fold.
4. Create the neckline. Starting at the blanket’s bottom edge, measure 2 1/2 inches over from the fold and mark this point with chalk. Continue vertically marking this 2 1/2-inch width until you reach the horizontal mark from step 3.
5. Round the top. Use a curved ruler to round off where the 2 1/2-inch-wide mark meets the front-length mark. This becomes the front neckline.
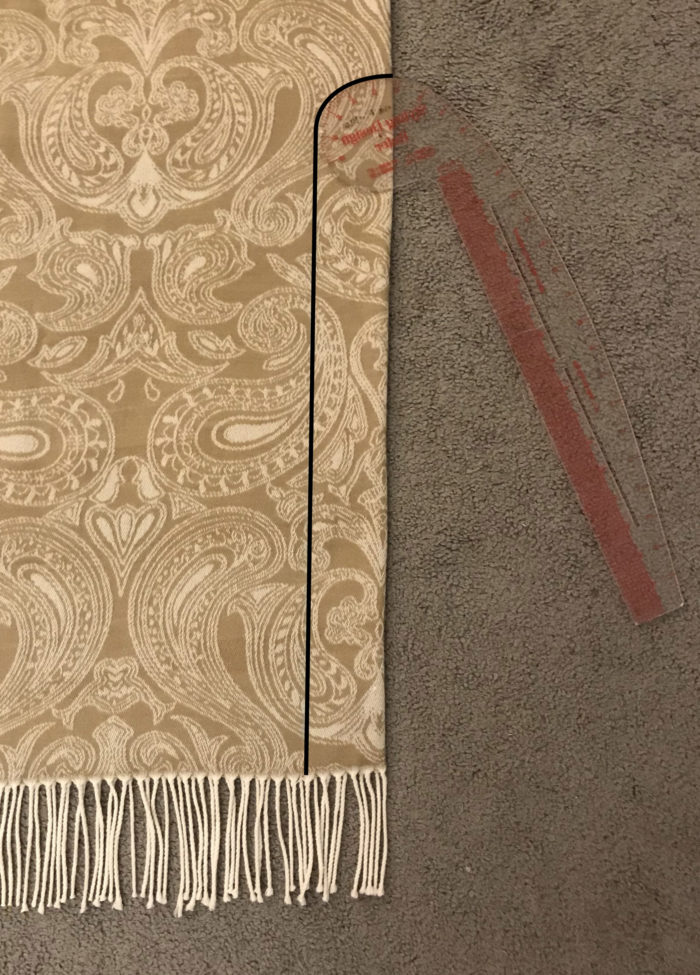
6. Cut the center. Use a pair of shears to cut along the front neckline marking, through both layers.

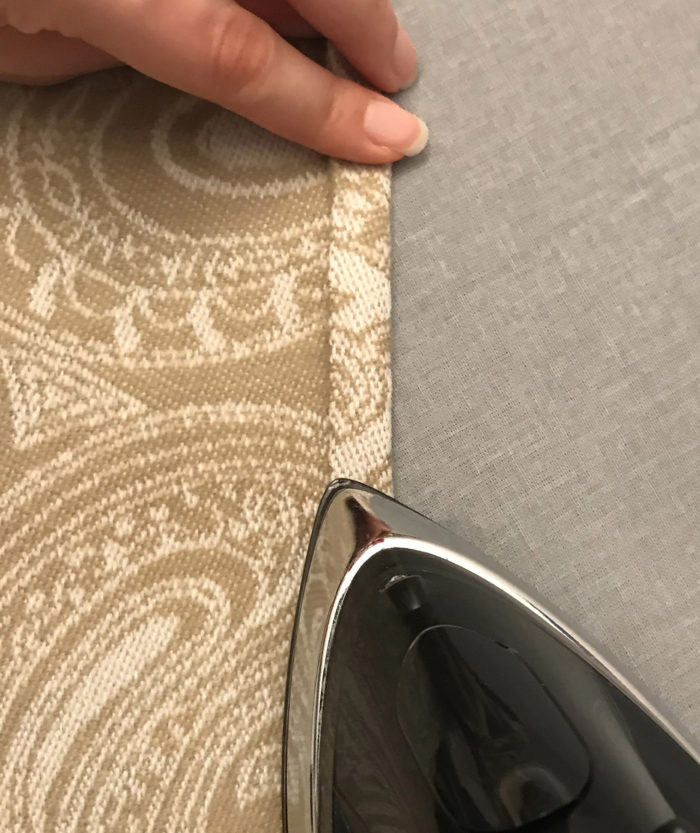
7. Create a double-fold hem. Turn the entire neck edge under 1/2 inch to the garment’s wrong side and press. Repeat this a second time. Then, with the garment right side up, stitch a scant 1/2 inch from the fold.
8. Finish the poncho. Give the poncho a final press, and you’re done. Style the poncho by wrapping it around your neck and letting it hang, or secure it with a belt for a more pulled together look.
Bonus tips:
Consider creating an exterior patch pocket using the leftover neckline fabric to keep your necessities close by.
If you prefer, you can bind the front/neckline edge. In that case, cut the front and neckline opening 1 inch larger than the instructions provided. Then apply a decorative binding.
Do you have a blanket that would make a perfect poncho? How would you modify this design to fit your aesthetic? Please share your thoughts below.


I wonder how you would turn under twice 1/2 inch around the round neckline section without causing some serious puckers. The straight sections are easy, but I have my reservations for a smooth back neck section. Any suggestions?
I was lucky in that my fabric was extremely soft and malleable, and therefore, didn’t create puckers in the curved area. However, an alternative option would be to use single-fold bias tape along the neckline edge to act as a narrow facing that would similarly be turned to the garment’s wrong side. Pressing your fabric throughout is also very important.