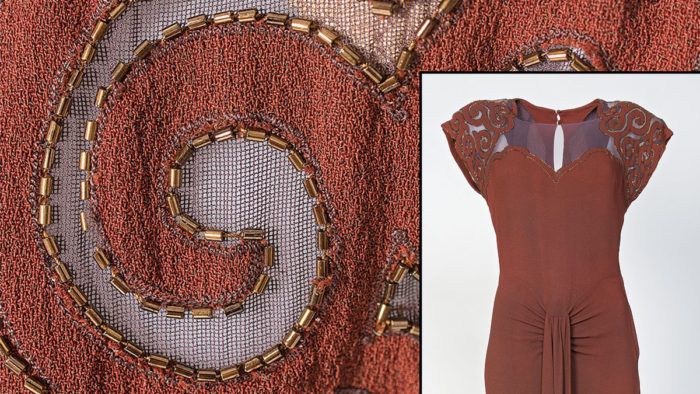
A Better Way to Appliqué
Face, fuse, and bead the motifs
Embellished appliqué on a filmy background is lovely but may not seem easy to accomplish. Traditional appliqué methods require invisible hand stitches or heavy machine-sewn satin stitches— both of which are difficult to work on sheer fabrics. When you update the technique and introduce fusible materials, however, the process becomes simpler, and your results improve dramatically.
Follow these steps to create your own gorgeous designs. Consider using velvet, satin, crepe, even cotton or denim appliqués on sheer silk organza, mesh, or chiffon. Appliqué sleeves, a neckline, or a full garment overlay—whatever you can imagine.
1: Make an appliqué pattern
Draw a design on card stock or oaktag. The motif is most useful when it is reversible, rotatable, and has elements at least 1/2 inch wide. You can add an optional transition piece to fill empty spaces; I made a large dot. Cut out the design.
2: Trace the design pattern on the appliqué fabric’s right side
Work with a tool that makes removable marks (a FriXion pen is ideal). Repeat the main and transition motifs as desired, flipping and rotating the shapes to create an overall design.
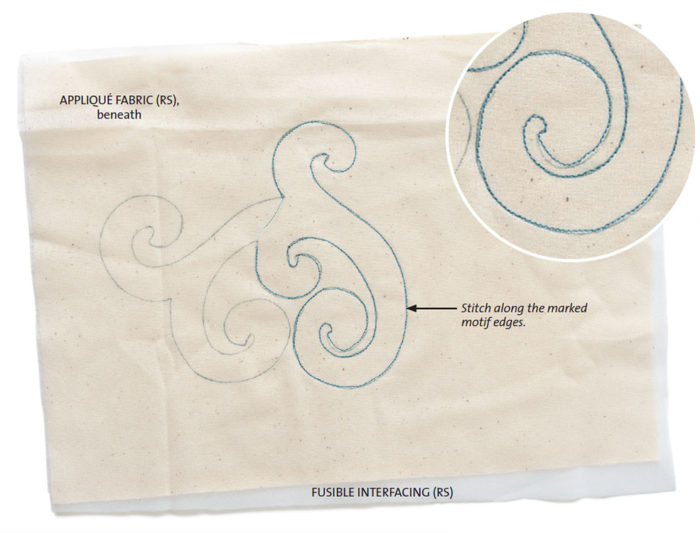
3: Sew the motif
Place a layer of ultrasheer fusible interfacing atop the marked design, fusible side down. Machine-stitch along the lines through both layers, to create the outlined motif.
4: Trim the appliqué edges
Trim the fashion fabric to about 1/8 inch from the stitching line and clip perpendicular to the stitching about every 1/8 inch to 1/4 inch. With a hera-type pressing device, crease the fashion fabric along the seamline toward the interior of the motif. You may also use a small roller. Do not use an iron for this step; it’s important not to melt the fusible adhesive yet. Then trim the interfacing to 1/8 inch.
 |  |
5: Turn the appliqué right side out
Choose one of…
Start your 14-day FREE trial to access this story.
Start your FREE trial today and get instant access to this article plus access to all Threads Insider content.
Start Your Free TrialAlready an Insider? Log in


Log in or become a member to post a comment.
Sign up Log in