

I started teaching myself how to sew in late 2019, so it’s been just over three years since I first touched a sewing machine. Although it’s a relatively short amount of time, it was an intense three years, packed with experimenting, failing, researching, and always learning. Because I am completely self- and community-taught, I made a lot of mistakes at the beginning. One thing that has helped me immensely throughout my sewing journey has been to approach mistakes as learning and teaching opportunities. I will share three big mistakes I made as a beginner sewist and what I learned from them—plus, a few more quick ones at the end.
A quick disclaimer before we dive in: Learning is a highly personal experience and what works for one person may not work for someone else. These are simply pointers I would have loved to have when I was a true beginner at sewing. I hope they can prevent some heartbreak for beginner sewists teaching themselves how to sew. 🙂
1. Tracing and cutting around existing clothes isn’t necessarily easier than using sewing patterns.
One of my introductions to the world of garment sewing was YouTube videos showing how to “clone” existing clothes by laying them on fabric and cutting around them. In the videos and in their comment sections, there was a strong emphasis on the idea that this was a simpler way of starting to sew, and that many beginners found sewing patterns highly intimidating. As a beginner with zero experience, I believed them.
On a cloning kick
My first six months of sewing were spent trying to create my own patterns by tracing clothes I already owned, and I was ambitious about it. I made trousers, blazers, shirts, vests, jeans, tops, sweatshirts and so much more using this technique. Now, I think there’s definitely a time and place for rubbing off existing garments and making your own patterns like this, but I strongly disagree that this is an easier way of learning how to sew.
Drawbacks to tracing garments
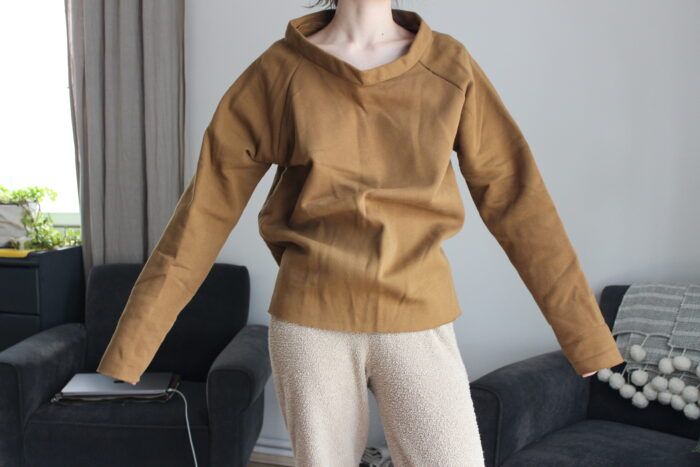
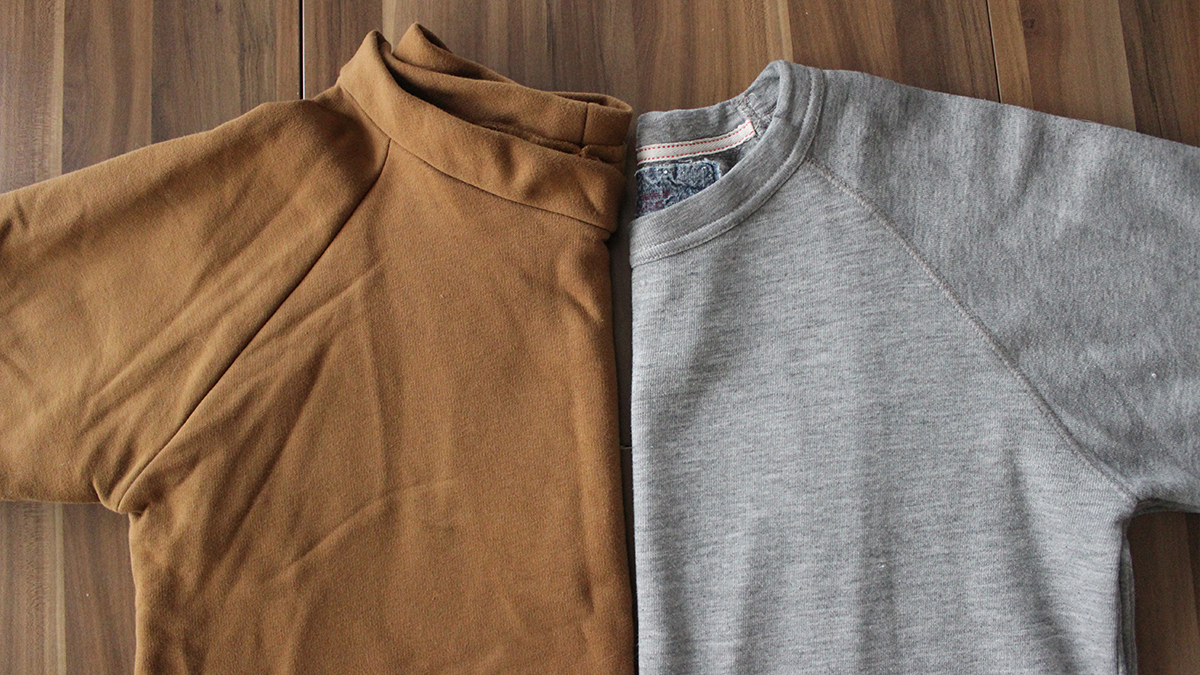
You need to pay attention to so many little details, and it makes it difficult to learn about crucial concepts like grainlines. It’s also challenging to fold a 3D object in such a way that you can lay it flat on a piece of paper, and I often ended up with entirely wrong pattern pieces, leading to disastrous attempts. My favorite disaster of the bunch is this raglan crewneck sweatshirt I attempted to make by tracing my favorite vintage sweatshirt.

I should note that this wasn’t even my first attempt at this pattern, and I had made more complicated pieces before this. Long story short—sewing patterns are there to help you, and they are not scary. Just pick one that is beginner-friendly with good instructions, and you’ll be fine.
2. Inappropriate seam finishes do just as much harm as they do good.
I could write a whole series of articles on seam finishes, and a few of them would be focused on mistakes I’ve made about learning how to finish seams. Let’s focus on one: Not every seam finish is suitable for every fabric, garment, or seam.
Preoccupied with French seams
As a beginner sewist, I’ve come across a lot of advice about using French seams as a substitute for overlocked (serged) seams. This catapulted me into trying to sew French seams on every article of clothing I’ve made for months and being disappointed with the results. I find this advice flawed for a couple reasons:
- It assumes an overlocked seam is the be-all and end-all of seam finishes, and that you only need to use other seam finishes if you don’t have access to an overlocker.
- It ignores the reason why there are tens of different ways of finish a seam. They all have advantages and shortcomings, and no single one is the “correct” option for those who don’t have an overlocker.
They don’t work everywhere
Yes, a French seam is a beautiful way of finishing lightweight fabrics with relatively straight seams, but it’s far from the best option for a pair of trousers made of wool tweed. Sure, it will prevent the fabric from fraying, but it will also leave you with bulky seams that may cause the garment to hang oddly.
3. Avoiding hand sewing or hand basting isn’t worth it in the long run.
At the beginning, I was stubborn about not doing any hand basting or hand sewing on my sewing projects. I was convinced I could get similar results using a sewing machine. Now, in the hands of a skilled operator a sewing machine can do wonders in mimicking hand sewing, but I was nowhere near that level of skill or precision.
Basting misconceptions
I thought hand basting and hand sewing would take me ages, and that hand-sewn seams wouldn’t be as strong as machine-sewn ones, neither of which is necessarily true. The moment I gave in and adopted these techniques, sewing stopped being a stressful, high-risk activity for me. I started achieving predictable, reliable results and actually enjoying the pieces I was creating.
Slow and steady wins
As a beginner you may be tempted to go as fast as you can and finish items in record times so that you can wear them straight away. Trust me, a tiny bit of slow handwork will make you want to wear your projects for a much longer amount of time.
I’ve become increasingly passionate about hand basting over the past couple of years, and I’m happy to announce that my next article here on Threads will be a short guide on hand basting. Mark your calendars for May 5. 🙂
Lightning round
Here are a few, more self-explanatory lessons I learned from my failed sewing experiments from the early days:
- In 99 percent of cases, pressing isn’t optional—it’s literally half the garment construction.
- Paying attention to seam, hem, and pressing allowances will get you far in the name of precision.
- Vertical measurements are just as important as horizontal ones. Just because the circumference of your chest, waist, and hips are in line with the size chart of a pattern doesn’t mean your torso length or rise will be a perfect match. When in doubt, measure, measure, measure your pattern pieces.
- Not all fabric is created equally. Just because the fiber content is the same, it doesn’t mean two different fabrics will perform the same way. A heavyweight, stiff linen will give you dramatically different results from a lightweight, drapey linen. The weight, weave, and sometimes even the color will make a difference in how two fabrics of same fiber content will behave.

Follow Threads Digital Ambassador Nisan Aktürk at ThreadsMagazine.com or via her Instagram, @the.social.fabric, and blog, the socialfabric.net.


SUCH great tips! Why have I never considered hand-basting for those foldover components?! I'm FOREVER missing chunks and have never gotten it right. I'm looking forward to the May 5 article!
Ahh hand basting is the BEST for that problem, it makes the entire process so stress-free :) I hope you enjoy the Basting 101 article, it's coming soon!
Thank you for sharing so openly. Pressing is not optional. It's amazing how seams don't line up when you don't press. When I first started, I got a sewing machine, some fabric and a cute pattern in my RTW size and was shocked when it didn't fit. So then I took a course and learned old methods but it made a good foundation. I didn't even know about interfacing. It's been awhile since I've done any real sewing, so I'm going slowly again and practicing measuring and fitting my larger bust and still short but larger waist.
Couldn't agree more! Half the mistakes I made at the beginning were due to non-existent or poor pressing :) Good luck to you in your new sewing adventures, I'm sure you'll make some beautiful pieces!
Accurate measurements including the seam allowances are essential for a garment to fit. In certain cases temporary glue may help instead of hand basting. If hand basting, avoid sewing over the hand baste. You may baste with the sewing machine, the longest straight stitch, mine is 6, no back stitching. If serging the seams, be careful not to serge beyond the seam allowance: I either trace the seam line on the fabric or machine baste before serving.
To copy an existing garment I don't trace around but use my ironing board, place first tracing paper or test fabric on the board, then the garment and put long pins in the seams, then I slightly lift the garment part I copy and mark with a frixion pen (erasable when ironing) where the pins are. I end with a pattern . Straight of grain should be center front and center back and I fold the sleeve in half in the length. Be aware that the front and the back of the sleeve have different armhole curves. If the garment has darts, I need to reposition and maybe change their value, because the darts are already sewn and sometimes partly cut . A commercial pattern requires quite a number of changes too because it is based on a standard figure and we are all different. Besides mastering sewing techniques, solving fitting issues is also important for achieving a professional garment.
Such great tips for beginners and beyond, thanks for sharing them! :)
This is, by far, the best article on sewing! I’ve copied a few of my favorite garments. The new versions don’t fit.
Sewing different fabric types together is another learning experience!
I joined a local garment sewing group and there is a lot of assumed knowledge. I need the details girls! Go take classes. For a large city, there are very few classes that teach garment sewing. Again, there is a lot of assumed knowledge.
I can now make a tee shirt and it almost fits!
You mention needing details. On sewing techniques, on using machine feet, on fitting? Check on YouTube. You can actually see how things are done, how to use your sewing machine(s), fitting techniques. You may check on YouTube the site of Surefitdesigns owned by Glenda Sparling. Besides having a truly good system to draw patterns that actually fit, she has a lot of free videos you can learn from, in particular as a beginner. Check "Make it sew" series. She is to the point and as detailed as need be. On her website she has a learning center. also free. Lifting Pins and Needles is also a good channel. Joy Bernhardt has a nice channel where, a.o., she explains in great detail how she fits her garments, adjusts the commercial patterns accordingly and sews them.