

It’s time to finish up the embellished skirt…
In my previous post, “Working with Heavily Embellished Fabrics, Part 1,” I shared how to plan and start with fabric encrusted with beads, sequins and embroidery. This post picks up after the side seams on a simple skirt are completed.
Here in Part 2, I will show you how to:
1. Stabilize the heavy fabric
2. Sew in the zipper
3. Use a facing for the hem
4. Sew and place the lining
5. Stitch the lining securely
6. Add a finishing touch
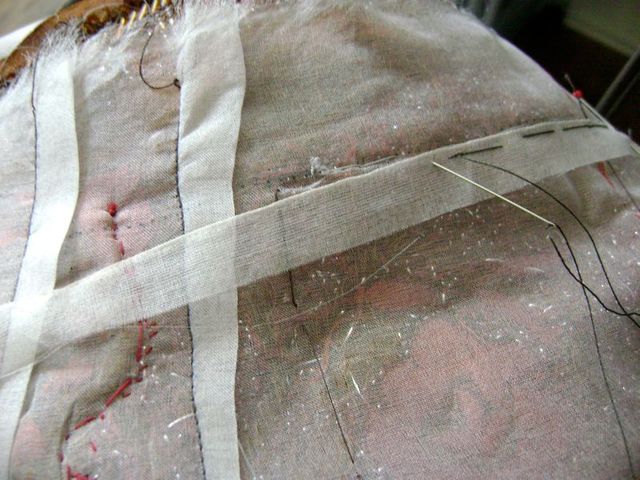
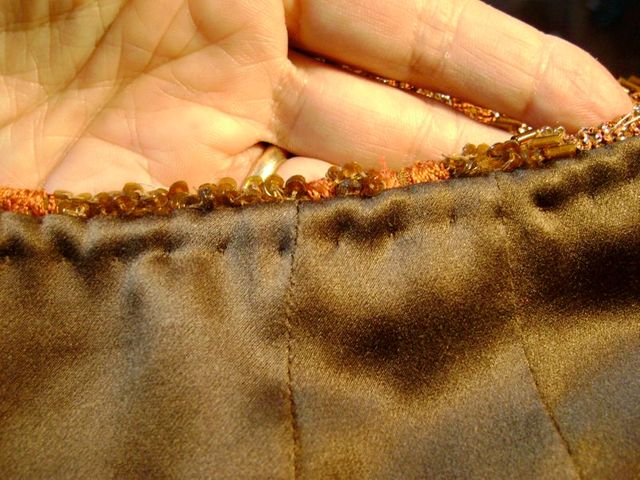
1. Now that both side seams have been machine sewn and catchstitched, it’s time to stabilize the top edge of the skirt. Not only are these sorts of fabrics tricky to deal with because of the embellishments, their heaviness can be problematic as well. You want to do whatever is necessary to keep things from stretching, pulling, and becoming misshapen.
In addition to thoroughly tacking a silk organza underlining to the fashion fabric, baste a strip of silk organza selvedge (one of my favorite stabilizing tools) close to the top edge.

This is a quick way to keep the waistline from pulling out of shape–and as the silk organza is sheer and lightweight, it doesn’t add any bulk.
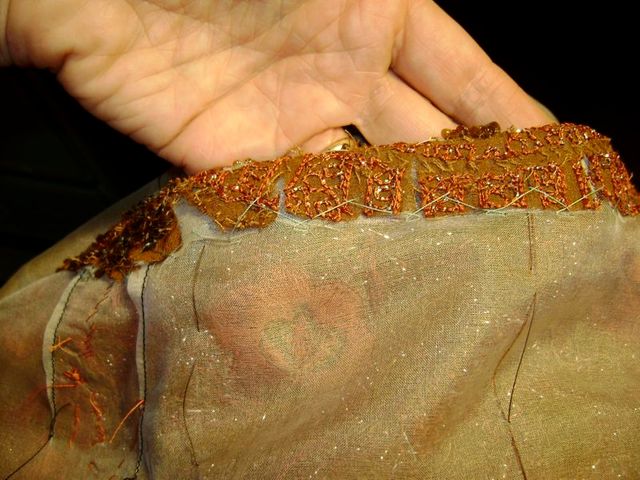
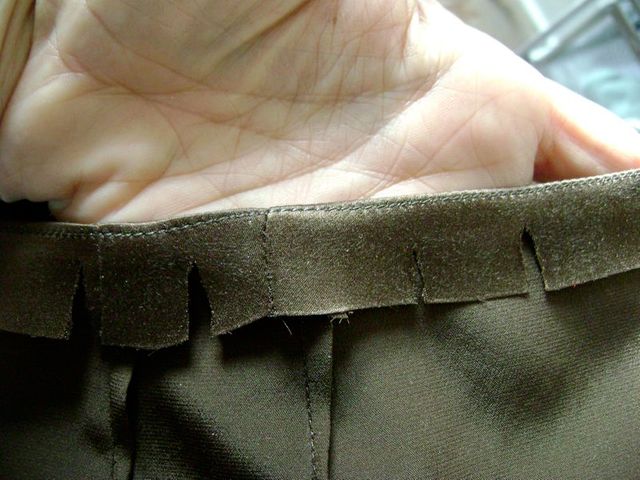
Trim down the seam allowance (in this case, the area above the waistline) and remove the beads (just as with the side seams). Fold the seam allowance down, clip it so that it follows the contours of the skirt, and catchstitch it to the silk organza. Press the reinforced edge on a ham, to mimic the contours of the waistline.

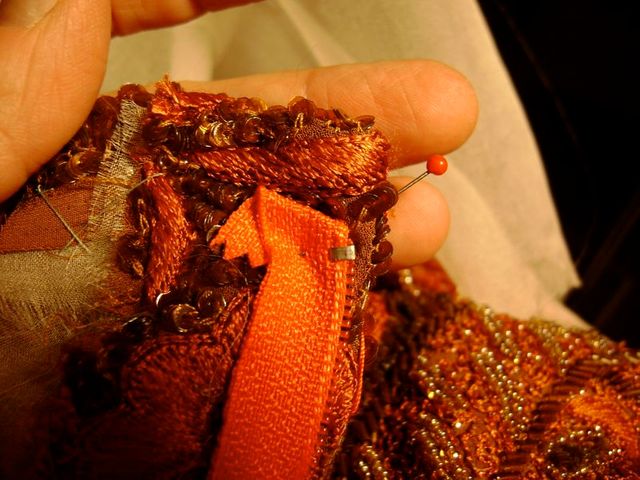
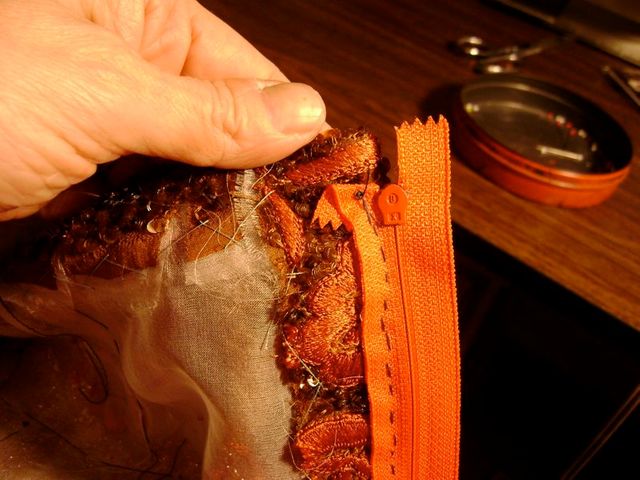
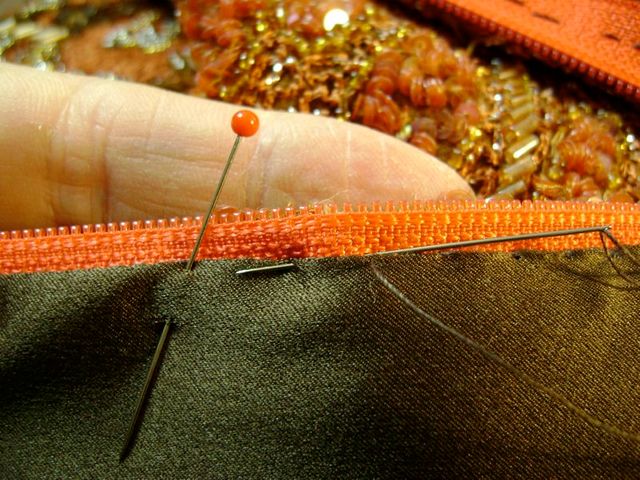
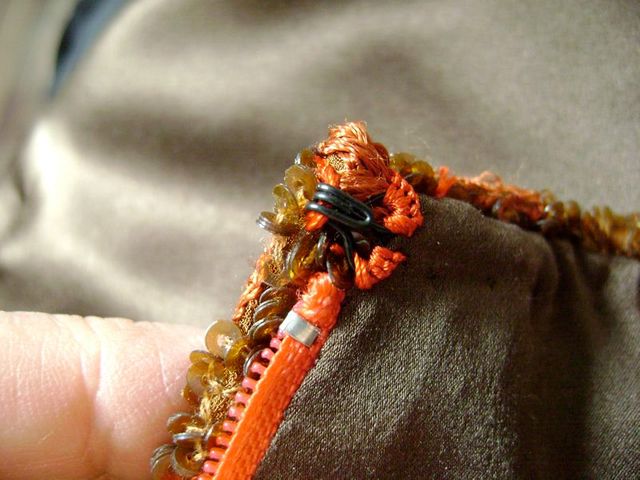
2. Put the zipper in by hand.

I use double thread that I coat with beeswax, then press. Obviously, sewing this zipper by machine would be impossible; happily, this treatment is really pretty easy. Put your stitches (which will be totally invisible from the right side of the fabric) fairly close together–there’s a lot pulling on them, and you don’t want them to come undone.

Leave room for the hook and eye, and fold the zipper tape out of the way.

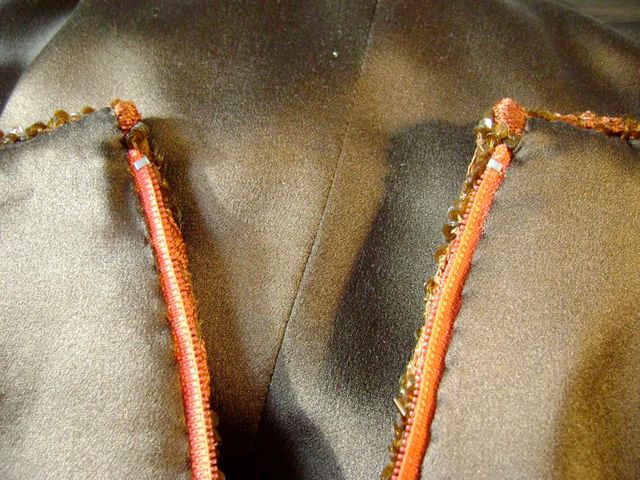
It may not be the most beautifully stitched zipper, but if the zipper tape is hidden, the patterns in the embroidery match, and it’s good and sturdy–it does the job.

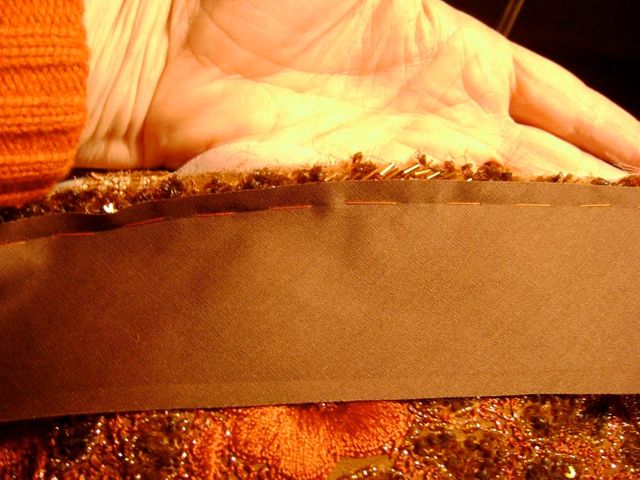
3. Hem with a facing. I suggest this for two reasons. It will keep from wasting any of the embellished fabric in the hem allowance, and it will cut down on the weight of the skirt overall. There’s no advantage in this case in having a heavy hem allowance.
Hand-baste a piece of bias hem facing to the right side of the skirt.

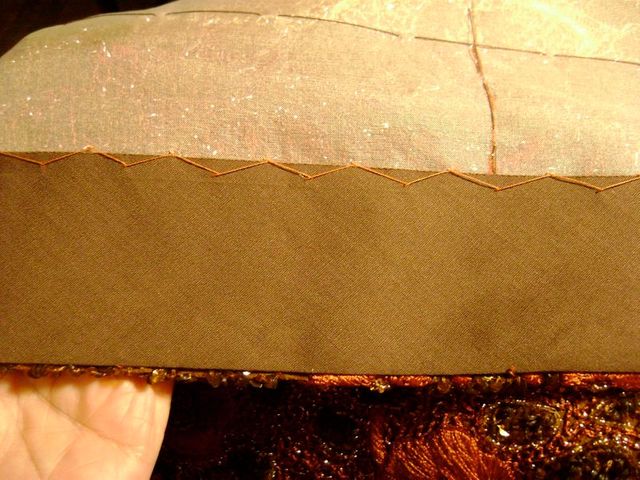
Press the seam allowances toward the facing, then press the facing into place, favoring the fold slightly so that it’s on the inside of the skirt. Finally, catch-stitch the top edge of the facing to the organza underlining.

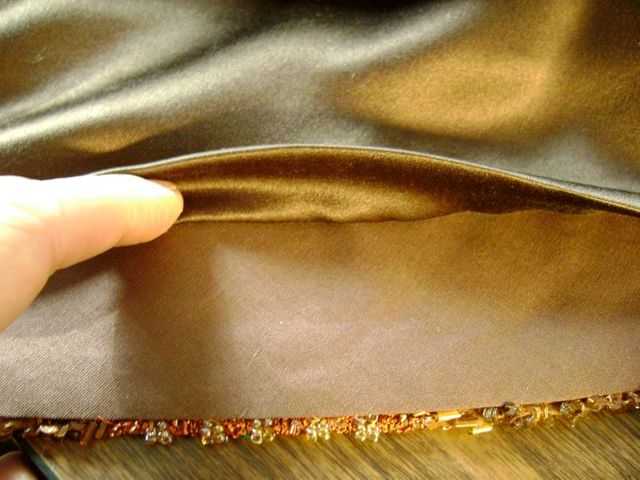
4. Put the lining together in a mirror image of the skirt (the lining’s right side will face the interior of the garment). Staystitch the top edge, clip it, and press it into place.

Place it slightly below the foldline so that it is not visible from the right side of the skirt.

Sew it in by hand with small, firm fell stitches. Sew down along both sides of the zipper tape on the inside of the skirt (those nasty zipper stitches are now covered up!).

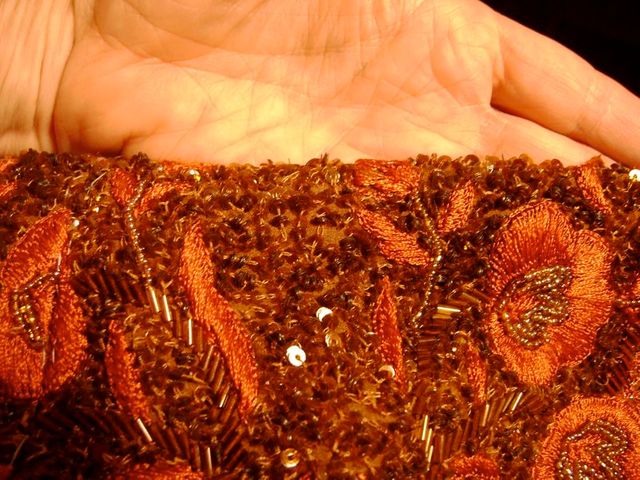
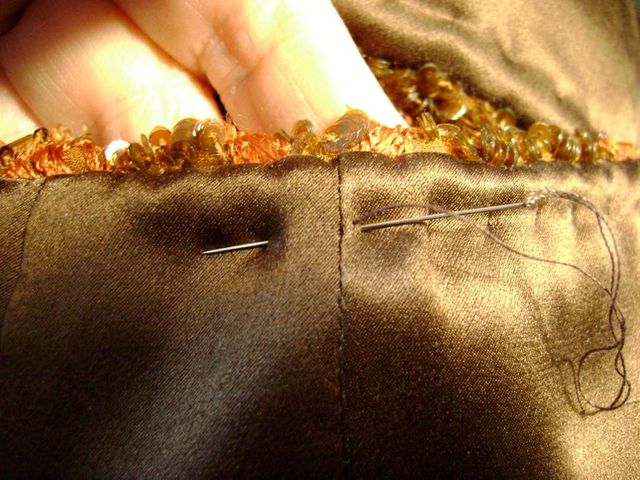
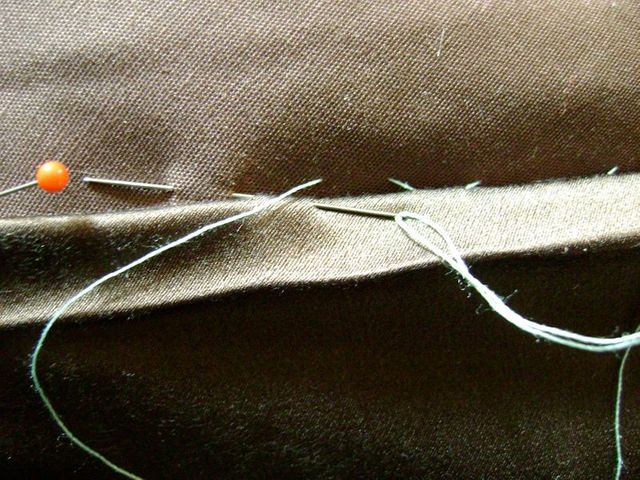
5. To keep the lining from shifting, prickstitch it along the top edge, about ½ inch below the waistline.

My stitches, which are about 1/2 inch apart, go through all but the outermost layer of fashion fabric.

It’s not the easiest seam to stitch, as I hit beads and sequins, but wiggling the needle around usually allows me to find a clear path through the embellishments.
Sew the lining in place along the hemline, adding a jump pleat for ease. Use a loose running stitch to keep a little movement between the layers.


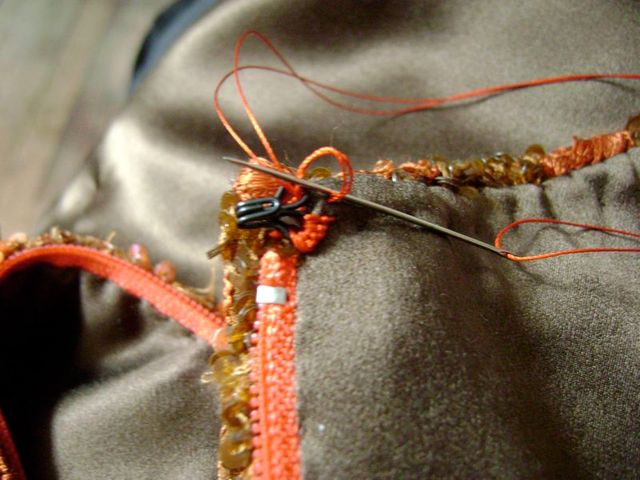
Add a hook and eye at the head of the zipper.


Use lock stitches to keep them in place.
6. Last but not least, add a label! (Mine were unearthed in my studio clean-up, as was the fabric for this project.)
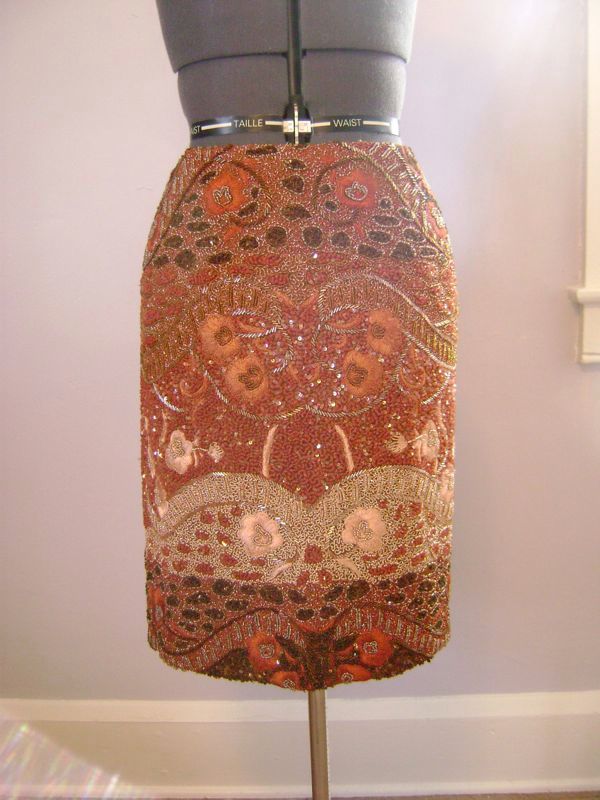
The finished skirt–ready for an elegant occasion!


Fabulous doesn't do this justice!!! It's absolutely gorgeous. Gorgeous doesn't do it either!!! I love your techniques, they're so couture! Where on earth did you find the fabric?
Wonderful garment but I have two questions that I have to admit I am a bit embarrassed for even asking.
Is the basting that holds the underlining to the fashion fabric removed? Considering the weight of the fabric and the fact that there are only the two side seams I am wondering about it stretching and sagging particularly in the back.
Ditto with the organza selvedge.
Thanks
Dear Susan,
This is a beautifully written and documented piece-thank you! I suggest that before doing the hand stitch on the zipper, you make a machine stitch thru the seam allowance and zipper tape only, not the outer layer of the skirt. Then make the hand pick stitching for the zipper. The machine stitch helps you get a smooth application, and is good insurance in case the pickstitch gets broken. This is the method I learned while working as a patternmaker at Geoffrey Beene. Your buttonhole stitch on the hook and eye is impeccable. Well done! Where did you train?
Best, Gail Gondek
I was wondering about just using a small hammer to pound out the beads and using a small pair of scissors to nip in and remove the sequins.
I used to do after five and bridal alterations and this was the way I was taught to remove embellishments if needed.
That way no snipped threads to miss.
Susan, I bought your book and followed your directions, like those above, when making my daughter's wedding gown. The result was just as I'd envisioned it. Your skirt is fabulous. I just adore the fabric and the idea of having a fancy skirt rather than an entire dress. I'd love to see ideas for the top you'd wear with this skirt.
I'm so glad you're enjoying the post - it was a fun project. To answer a few questions:
- I stand by my no-smashing-of-beads policy (see my longer comment in part 1)
- I got the fabric at Mendel-Goldberg in New York
- I don't do any extra machine stitching with the zipper - I've found that double thread, coated with beeswax and then pressed, really is strong enough; kind of amazing, but if you ever take one of those zippers out, then you realize how sturdy they are
- and the basting that holds the fashion fabric to the underlining stays in; it's done so that very little thread is on the public side of the fabric (nothing to snag); almost all of the threads, therefore, is on the inside
- and finally, I trained in couture in New York, at a wonderful small couture house called Chez Cez et Bez. Sadly, it's no longer there, but I use what I was taught there every time I sew.
I can’t believe my eyes. I have never studied in a school, but after years of teaching and sewing and reading everything I could get my hands on, I didn’t think that there was much more to learn. I must now repent my arrogant ways and go back to reading everything I can get my hands on. Bravo!! First I must applaud you for giving me a new trick (or two) and second for writing such clear instructions. I love this skirt and your beautiful stitching. I must also agree with you about cutting off the beads rather than smashing them. I do try to unchain them instead of cutting them so that I have the thread tail captured and can stop the chain from coming undone. Additionally, without the extra beads to cover the seam, your work is not as “finished”.
Thank You so much--I can't wait until I have fabric to put into pratice. I love your articles in Threads--wish I was located where I could take a class from you. Thank you..
Dear Susan, Love your work.
first introduced to it almost 15 years ago. I signed up to take classes with you,had classes, roommate and everything paid for when got the terrible new my dear cousins cancer was terminal and I was to care for her to the end. You are not only very talented but I would like the readers to know you are also caring and compassionate. You refunded my money and personally called with your encouragement and concern. I have bought your books and learned a lot,but regret never meeting you and learning from you. Thank you again. Sincerely, Carol Kulick
Dear Susan, once again you created magic!! I have had the pleasure of taking classes from Susan. One was her couture class and another was a courset class. If I could I'd go to as many as possible, there is always tons to learn, and I met some true artist in her classes. She is on classie lady. If you ever get an oppertunity to take a class from her, jump in and go, it is worth every minute!!!!
Susan, after reading this I might try to take some of this lace that I have for Tutus and try to make something else to wear. I still have that wonderful black lace with the crystals that I bought in St. Louis, I will HAVE to fine something wonderful to do with it before I die. ........I hope to be able to take more classes in the future, but times being what they are, I will read your wonderful articles in THREAD; Thank you for you help,
Hi there Susan,
Thank you for such a fabulous tutorial; I love embellished/evening wear and have never tackled such a project; but I will now!
I am heading over to New York in April from my home in Turkey and hopefully I can pick up some stunning fabric to bring back with me. I also hope at some point to get over for a class or two or maybe join the trips you organize to Paris.
Thank you for sharing your immense talent.
The skirt is to die for!
Gorgeous! I'm jonesing now!!! I WANT to have one of these-
Where did she get this fabric?????
With such a magnificent - I'm really surprised that she didn't first underlinethe pieces before construction! I can't think of a garment which would have benefited more. Adding it later seems like such a headache compared to first reinforcing and protecting the fabric this way. I was taught a well constructed garment is ALWAYS underlined! (the true meaning of the term "underling", BTW) Unless it's too fine, draped, or too casual/temporary, such as a child's Halloween costume. (Although, lame slips and unravels --- so even on a child's costume it's saved the day!) On anything this complex I wouldn't dream of doing LESS than that.
I wanted tomention this because if you are going to attempt this sort of project - it may make the job go more smoothly and preserve the finished garment longer.
Cheers :-)
Fifidala, note that this is Part 2- in Part 1 she explains the earlier stages, including the underlining. :-)
I just wish I ran across fabric like this- absolutely gorgeous!
Beautiful. What inspiration you provide.
Lovely skirt. Thanks for the great and very clear instructions.
Fabulous article. This is exactly the type of insight and teach I expect from Threads! Now I have the confidence to try this myself. Well done!