


Interface the zipper area
At one time or another, every sewer will probably need to insert a zipper into a garment, and with a little bit of preparation, you’ll be able to do it easily with great results. I’ll show you how to sew in a standard zipper, using both the centered and lapped methods, as well as how to insert the popular invisible zipper that “disappears” into the garment seam. But first, here are some helpful tips regardless of the type of zipper or insertion method you choose.
 More on Zippers:
• 9 Zipper Installation Techniques
• Lapped Zippers Rule
• A Handpicked Zipper is Worth the Effort
• Move a Zipper’s Location
Both standard and invisible zippers come in a variety of lengths. I suggest starting with a zipper that’s slightly longer than the zipper opening on your garment, especially when working with a standard centered or lapped application (it’s usually easier to shorten a zipper than it is to insert it precisely into a given space). For example, if your garment has a waistband, insert a longer-than-needed zipper that extends beyond the waistline seam, stitch over the zipper, and trim away the excess when you attach the waistband. You can cut a zipper at the bottom to shorten it as well; just be sure to add a new zipper stop by whipstitching over the teeth at the bottom of the zipper, then cutting it 1/2 in. to 1 in. below this new stop. Don’t miss other sewing tips and techniques like this by ordering a subscription of Threads magazine. Print subscriptions come with FREE access to our tablet editions.
Interface the zipper area
Before inserting a zipper, it’s a good idea to add a strip of interfacing along the seam allowance, especially when using a lightweight or unstable fabric, to help support the zipper’s weight and stabilize the fabric. I use a strip of lightweight, fusible interfacing that’s about 1 in. wide and the length of the zipper opening. Fuse the interfacing strip to the zipper-opening seam allowances, extending over the seamline about 3/8 in. For a crisp opening edge, interface only the seam allowances.


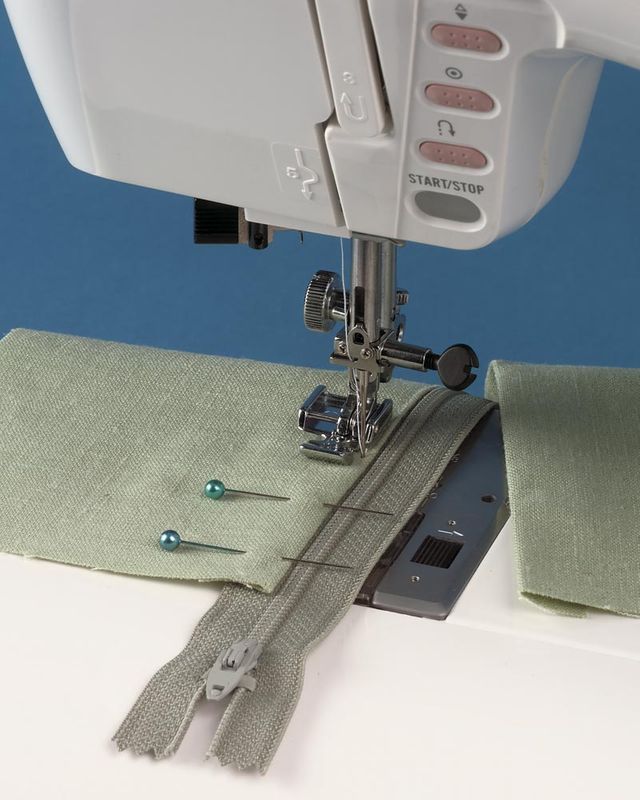
Machine-baste the zipper tape to both seam allowances, stitching through the tape and seam allowance only.
Draw a chalk guideline on the fabric 3/8 in. from the seamline and topstitch the zipper in place, starting at the bottom and stitching to the top on each side.
The centered zipper
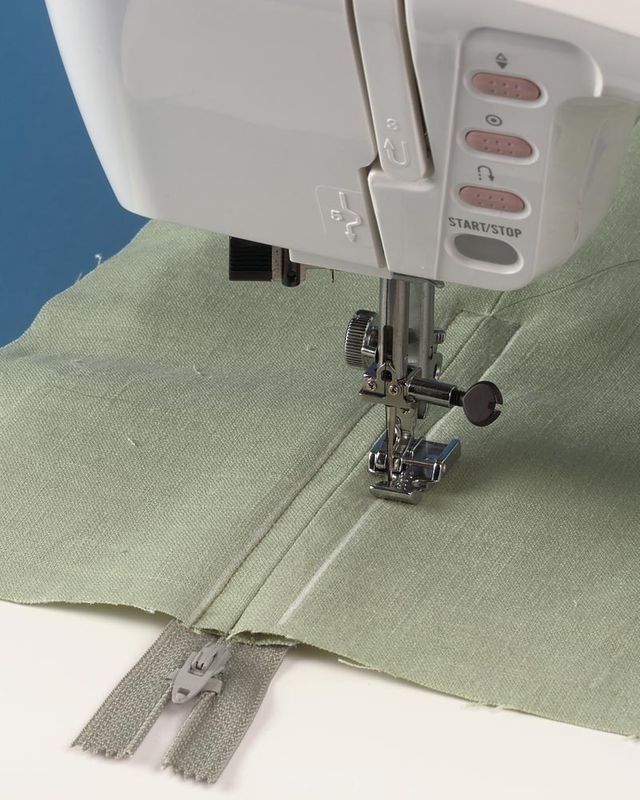
Sew the garment seam, machine-baste the zipper opening’s seam allowances together, and press the seam open. Use a two-step process for this method, machine-basting the zipper tape to the seam allow-ances first, then topstitching the zipper in place from the right side of the garment. For best results, and to avoid rippled edges, topstitch directionally from bottom to top on each side through all thicknesses. Use your machine’s zipper foot, which allows you to stitch close to the zipper teeth, and remove the seamline basting stitches once the zipper is inserted.
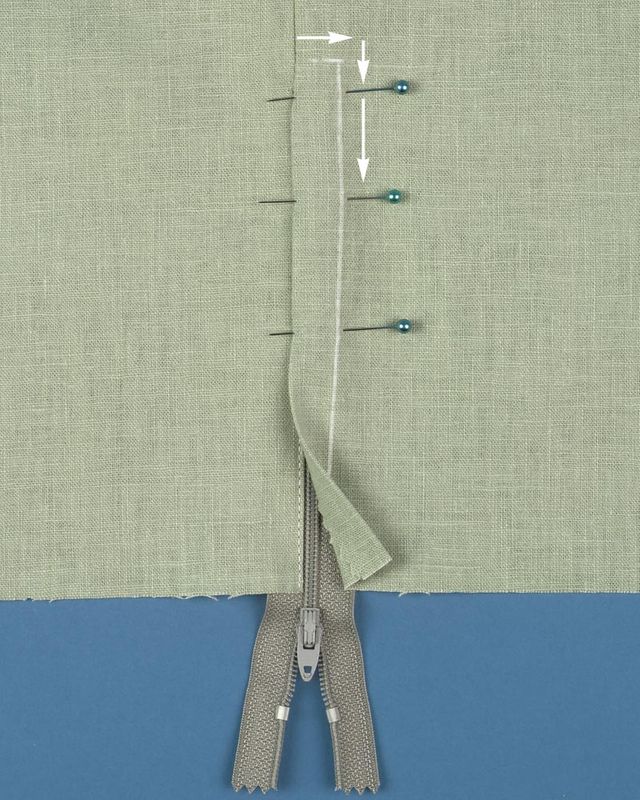
The lapped zipper
Sew the garment seam using 5/8-inch seam allowances, basting the zipper opening, and press the seam allowances open. From the wrong side of the garment, place the closed zipper face down over the seam allowances, aligning the right tape edge to the right seam allowance edge. Sew the zipper tape to the seam allowance only, using a 1/4-inch seam allowance, and taking care not to catch fabric from the garment body. Flip the zipper over so it’s right-side up. Sew the unstitched side of the zipper to the remaining seam allowance by stitching directly over the seam basting, or as close as possible to it. Unfold the fabric so the garment is right side up. To topstitch the lap, sew across the bottom of zipper first, pivot and stitch 3/8 inch from the seamline to the top of the zipper. Remove the basting stitches from the seamline.
Sew the garment seam, baste the opening seam allowances together, and press them open. Place the closed zipper face down over the seam allowance and align the right tape edge to the right seam allowance edge and sew the two together using a 1/4-inch seam allowance. With the zipper face up sew the other side of the zipper to the remaining seam allowance by stitching right over the seam basting. To topstitch the lap, sew across the bottom of zipper first, pivot and stitch 3/8- inch from the seamline to the top of the zipper. Remove seamline basting.


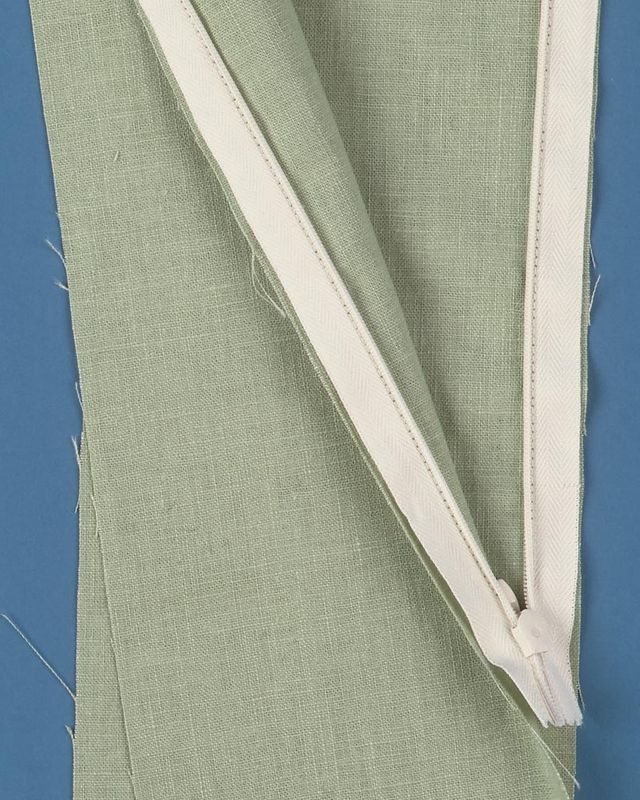
Pin and stitch the right side of the zipper opening to the zipper tape, with the fold near the zipper teeth and the stitching close to the fold.
To make the lap on a lapped zipper, adjust the remaining seam allowance to 1/2 in. and pin in place, covering the zipper teeth and the first row of stitching.
The invisible zipper
This is the easiest and fastest zipper application, because there’s no need to baste or topstitch. Use an invisible zipper foot (available from your local fabric store or Clotilde, 800-772-2891; www.clotilde.com) that lets you sew extremely close to the zipper coils, making them invisible from the right side.
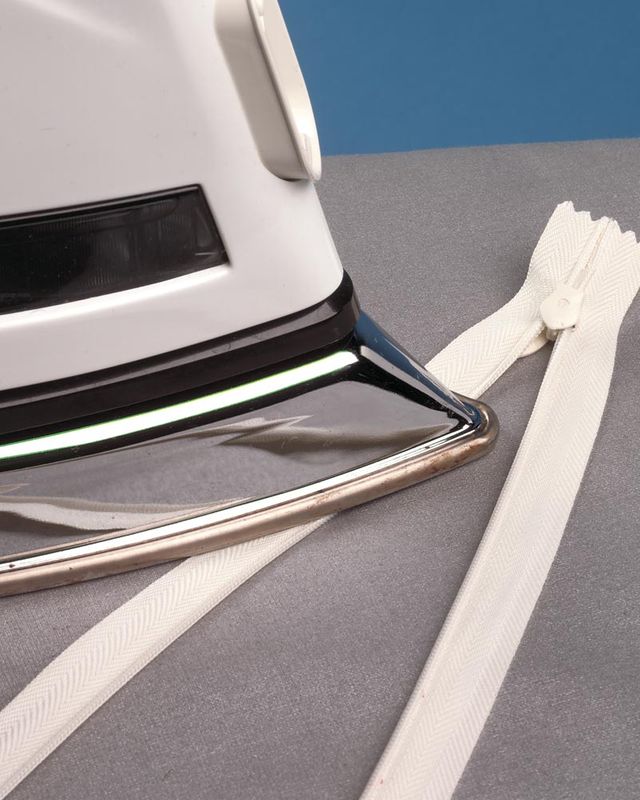
Insert this zipper before sewing the garment seam. First unzip the zipper and press the coils as flat as possible with a cool iron, and don’t close the zipper again until after inserting it.


Before inserting an invisible zipper, press the zipper’s coils as flat as possible with a cool iron.
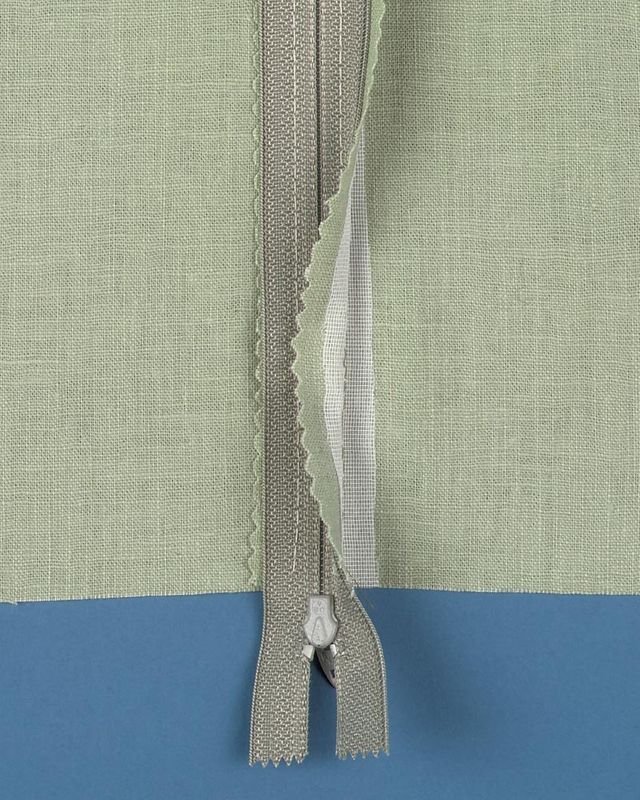
Stitch down each side of the invisible zipper with coils along the seamline, right sides of zipper tape and fabric together. Stitch as far as the zipper stop will allow you to stitch.
Positioning this zipper might be confusing at first. Just remember to always keep the zipper and the garment right sides together with the zipper coils along the seamlines. And position the zipper foot for each side of the zipper so the needle clears the center hole and the coils glide under the groove.
Sew the left side of the zipper to the right garment section, top to bottom, until you get to the zipper stop. Align the remaining tape to the left side of the garment and sew in place. Then complete the garment seam.
Keep in mind that you cannot stitch the seam so it connects smoothly to the zipper stitching without leaving a gap. I recommend starting the seam as close to the zipper stop as possible, then hand-sewing the gap closed. Or machine-stitch the seam completely, but switch to a zipper foot to get those final stitches as close to the stop as possible.
Celeste Percy works at 27th Street Fabrics in Eugene, Oregon.
from Threads #89, pgs. 14 and 16


Using fusible interfacing before sewing the zipper ended up doing a sticky job on my needles ...
I am a begginer and i've had troubles with how to sew zippers so thanks for explain it so clearly. I think this article it is very useful for me.
I've put in a few invisible zippers before but I can't understand how to do it when a full lining is involved. I'm baffled.
I know this article is a bit dated, but I am looking for information on how to apply a zipper when a full lining is involved as well! Just curious if anyone has any info on this. thanks!
I too would like to know about zippers and linings. I have always had a difficult time with this.
TO Lorraine, you have to let the fusible interfacing cool before sewing. THis should help a lot.
I've been trying everywhere to get instructions on how to handle a center back zipper when a sleeveless dress is completely lined. I seen RTW made this way (on better RTW) and I would love to learn what the steps are in creating a garment like this. The RTW appears to have no hand-stitching when inserting the zipper. Please help this Grandmother achieve this goal.
Do you have instructions on how to attach the waistband after I install a centered zipper as above.
I have made a zippered dress where the bodice was lined. I've only done it once but if my memory serves me correctly, you baste the zipper to the dress first and then with the zipper sandwiched in the middle you stitch the dress & lining together. I'm probably not explaining it well, but the pattern I used was Simplicity 2401. Hope that helps.
Thanks for the nice tutorial the interfacing and chalk lines were very good tips. I am going to try them then next time I make a project with a zipper.
Nice tutorial great tips
I usually sewed a zipper in by hand,not machine.Unless its got a lot of pressure on the zipper.like jeans,ive found doing it carefully by hand just as good.I don't usually have interfacing, we have all these experts on the site,why not ask them?
Thanks for sharing your tutorial with steps...