
A Hand-Picked Zipper is Worth the Effort

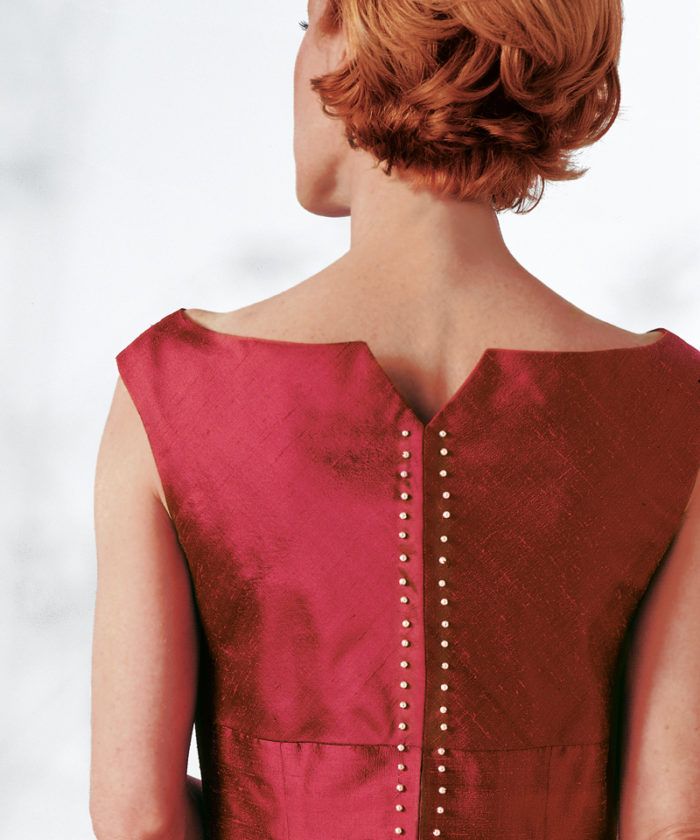
A hand-picked, or hand-sewn, zipper is an easy-to-learn technique that calls attention to your handiwork.
A hand-picked, or hand-sewn, zipper is sturdy and easy to master. It doesn’t distort or pucker, is great for heavily embellished or delicate fabrics, and- best of all- calls attention to your handiwork.
More on Zippers:
• 8 Zipper Installation Techniques
• Lapped Zippers Rule
• A Handpicked Zipper is Worth the Effort
• Move a Zipper’s Location
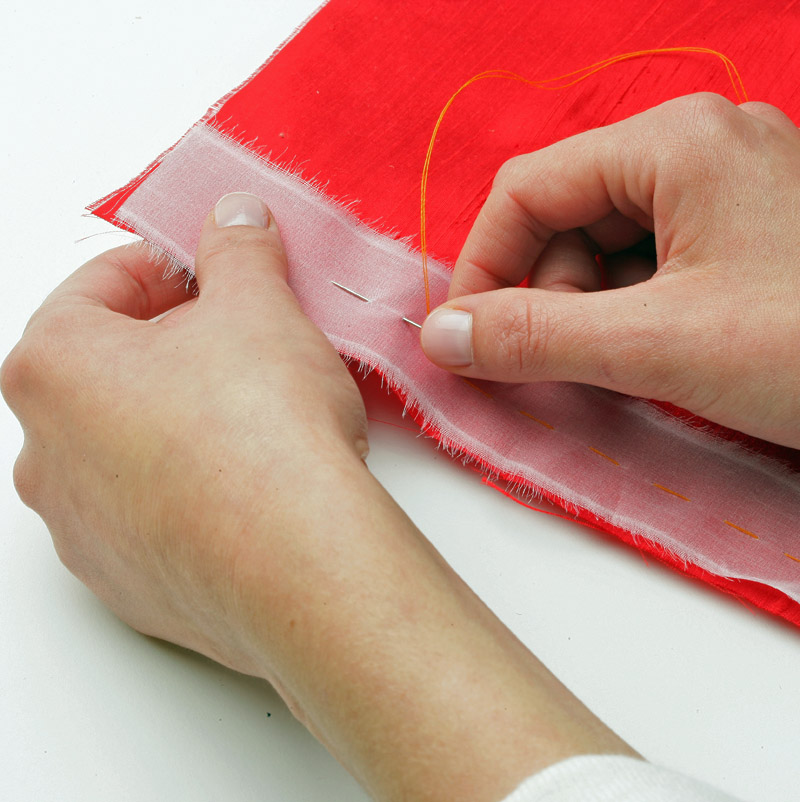
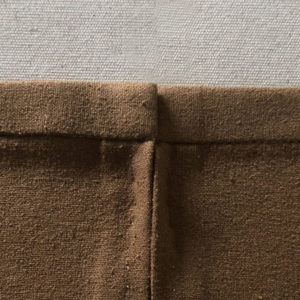
1. Stabilize the zipper area with a strip of silk organza, chiffon crepe de chine or non-stretch, fusible interfacing. This prevents distorting and rippling over time. Gently tack in place along the foldline.
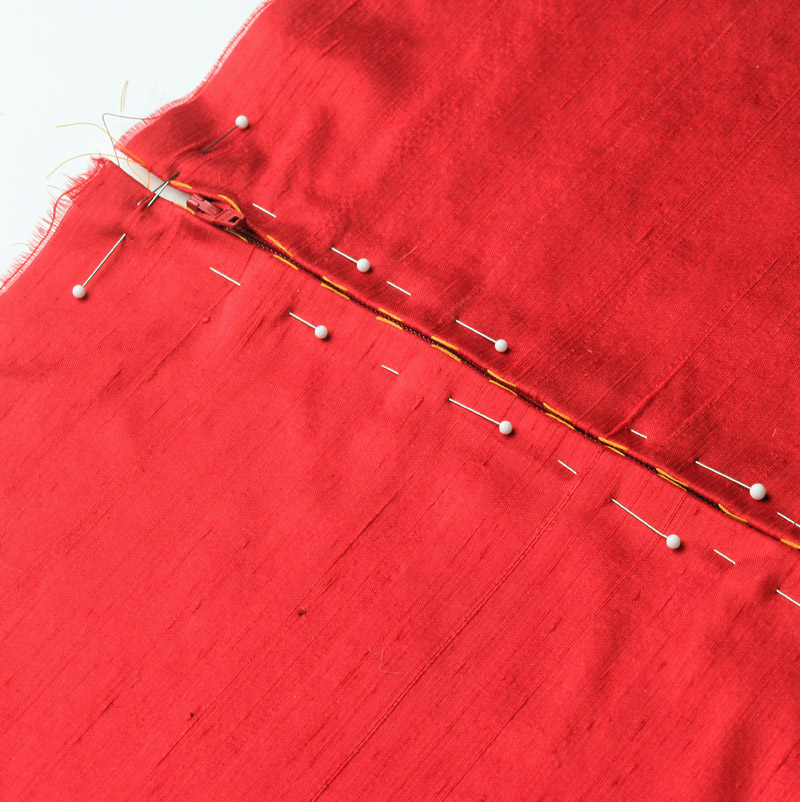
2. Pin the closed zipper in place from the garment’s right side. Starting at the zipper’s upper right-hand side, center the folded edge of the fabric over the zipper pull and teeth. Lower the tape at the top to accommodate the pull; it will look right if you keep the stitches at an even distance from the fabric’s folded edge.
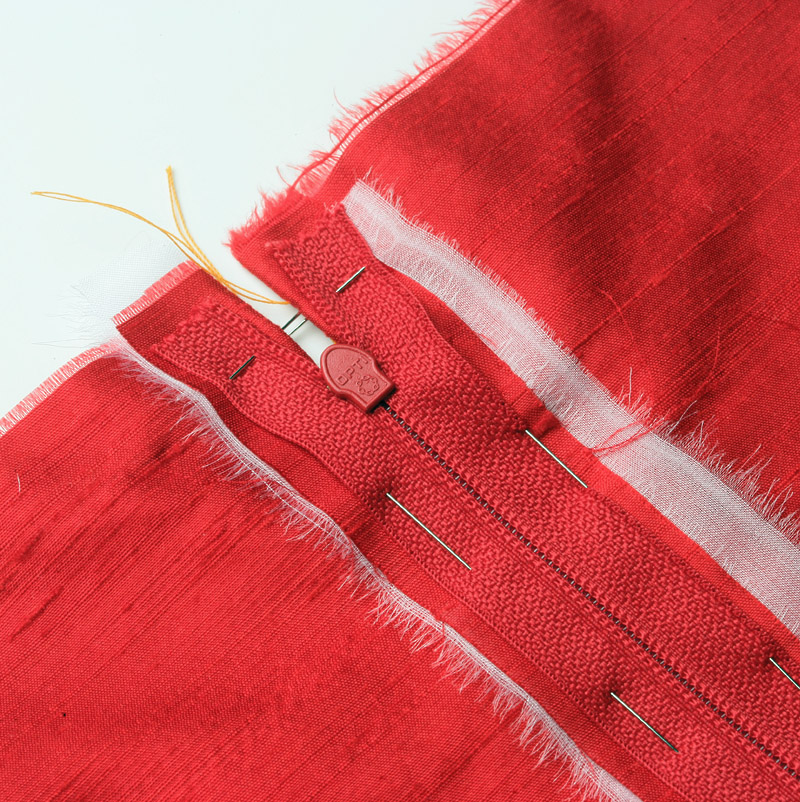
3. Sew with a doubled thread. Starting at the top of the tape, stitch the zipper (unzipped) with a prickstitch on the fabric’s right side. A prickstitch is a variation on the backstitch where you backtrack only slightly. The goal is to just barely see a bead of thread at each stitch. Stitches spaced 3D 8 inch apart and from the zipper’s opening work well. 4. Make a stitch just below the open seam of the zipper and tie a knot; stitching across the zipper’s base is unnecessary and only invites puckers. Next, stitch the zipper’s other side. Start at the bottom left of the zipper and sew to the top. It’s common to find a slight mismatch of the two zipper tape sides at the top edges, but it’s easy to mask with the waistband or facing. If the mismatch is more than slight (if the fabric is distorted), take…
Start your 14-day FREE trial to access this story.
Start your FREE trial today and get instant access to this article plus access to all Threads Insider content.
Start Your Free TrialAlready an Insider? Log in


Thanks for this technique.
Thanks for this wonderful idea. I just made a wool blouse for the Oregon Make it with wool contest and did this technique and won the state contest and had great praise over my zipper.
Wow! I'll try that for the dress I want to make!! This technique is original and beautiful