

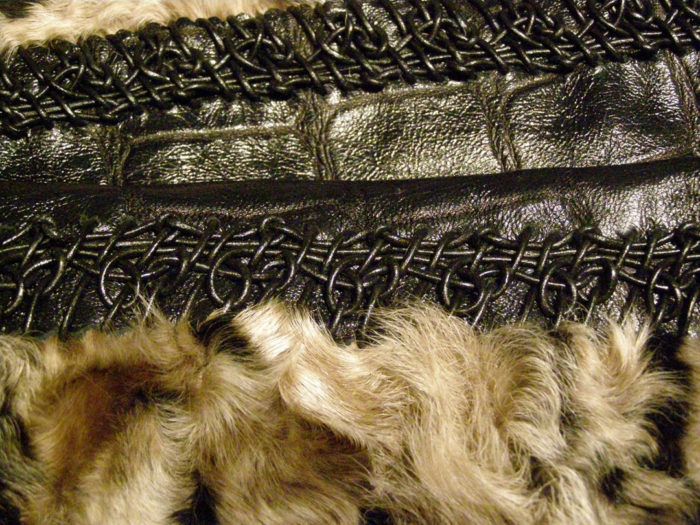
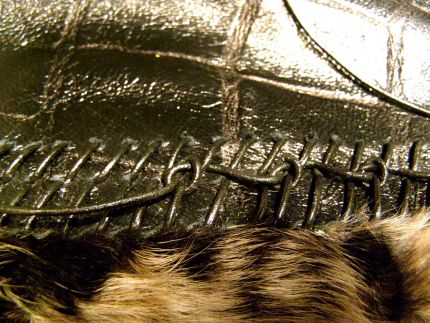
This a photo of the finished trim on the garment. The shine of the 2mm thick leather cord is a nice contrast to the matte of the fur, and works well texturally with the leather.
This trim evolved during a project I’ve been working on–a broadtail fur and alligator-stamped leather jacket. I wanted a softer transition from the leather to the fur, so I developed this particular design for the project.
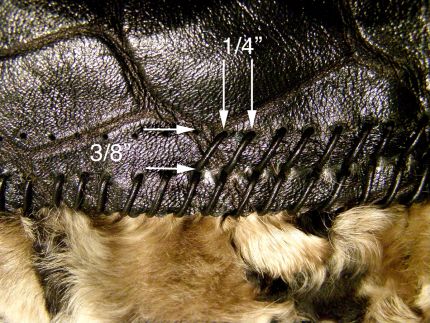
1. To prepare the leather, mark lines on the wrong side parallel to the edge. Mark the first line 3/8″ from the leather edge and the second 3/8″ away and parallel to the first line. Then mark points along these lines, ¼” apart. Punch these with a small diameter hole puncher.
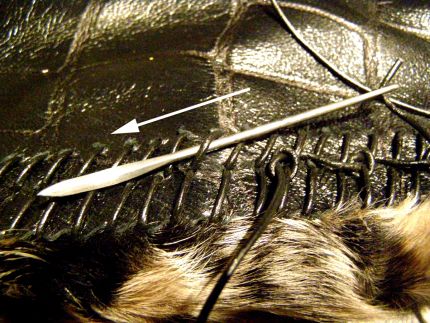
2. Sew the 2mm round leather cord, with a “packing and sacking” needle from the specialty needle packages you can buy in any sewing store. When sewing the leather to the fur, use a diagonal stitch over the cut edge of the leather, and sew the edge to the fur. Next, sew the second row of diagonal stitches, as shown, to make two rows of diagonal stitches. This is the foundation for the passementerie.
3. Here you can see the packing and sacking needle sewing the cord. After sewing the foundation stitching through all thicknesses, weave the rest of the cording through the foundation stitching, not through the leather.
4. Sew the first row of knots through the intersection of every fourth diagonal.
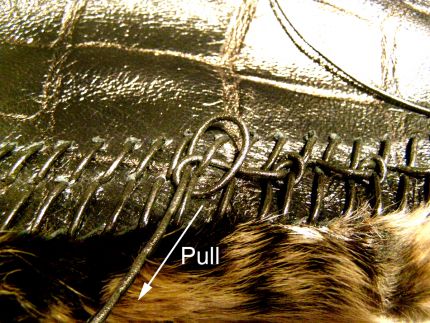
5. Pass the needle right to left under the cord on the top row of foundation stitching and back left to right through the bottom row of foundation stitching to form a loop.
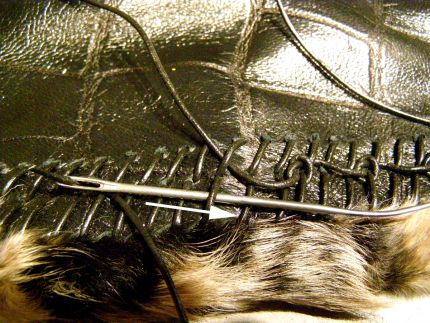
6. Next, pass the needle over the foundation stitching and through the loop.

7. Pull the cord to close the loop and form the knot.
This is what the first row looks like.
8. For the next row of knots, channel the needle under three of the top foundation row as shown, emerge one cord before the knot below. Then change needle direction and…
Start your 14-day FREE trial to access this story.
Start your FREE trial today and get instant access to this article plus access to all Threads Insider content.
Start Your Free TrialAlready an Insider? Log in


unique - wonderful treatment and visually exciting
Kenneth is at it again! You ARE the master. I've learned so much with this article. Thank you
This is my first time on this site and I am very impressed. My husband and I do mountain man primitive rendevous and he will flip when he sees this as he love to do leather work. I will bookmark this article for him. Thanks
What an amazing idea! It looks wonderful on the fur...but I could see using it on the outside seam or pocket edges of a pair of pants - or on the seams or edges of a tweedy jacket. Thank you for sharing!
I cannot wait to try this!!! Kenneth always presents ideas that astound me!
Thanks Kenneth, you are wonderful, your tricks, technology is wonderful, thanks to those of us you show everything you create is always interesting to me, you beautifully in this jacket, your artistic talent is unique!
greet from The Nederlands
Thank you for sharing, it's a wonderful technique. I can't wait to try it. The softness it adds to an otherwise strong contrast of fur and leather is beautiful. An artistic delight.