

When working with looser shapes in knits, it helps to have stabilized seams when you sew. Staying the seams will allow you to have more structured lines when the garment is worn. These techniques don’t work with body-conscious shapes or clothes that rely heavily on the stretch factor to get on and off. In those cases, the stretch is always functioning. Avoid using this technique for performance wear and underwear.
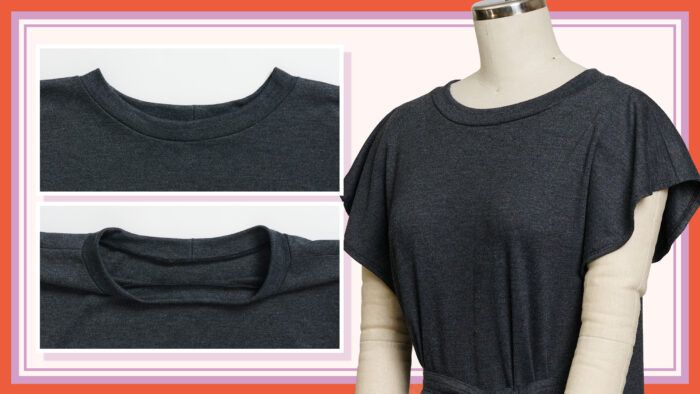
The top I made for the 2022 Threads Digital Ambassadors’ Luxury Loungewear Challenge is loose and only uses the stretch factor in passing. However, the leggings I made rely on the stretch to function and, therefore, are not candidates for this technique. Stabilizing knit seams is as simple as using fusible interfacing, but the choice of interfacing is key.
Choose stabilizer, or interfacing, carefully
Do not use nonwoven interfacing to stabilize the seams unless the knit can sustain the weight. If you are working with an interlock or a double knit, you could probably get away with it, but as a rule, I avoid it. You can stabilize lengthwise seams, like side seams, and hems. Unless there is a keyhole or zipper at the neck, you won’t be able to stabilize the neck seam. All of this depends on the pattern you are using, so a little experimentation might be necessary.
The best interfacing to use for stabilizing a knit seam is a knit interfacing. Knit interfacing is a tricot knit base with a resin glue coating on one side. Because of the flexibility of the textile base, the interfacing will stabilize the seam and allow for the knit to flex. The tricot knit is not the stretchiest knit, but for our purposes, it’s a good option. Pellon EK130 Easy-Knit is my go-to knit interfacing, but there are several brands on the market that have the same hand and fusibility.
Cutting and fusing the interfacing
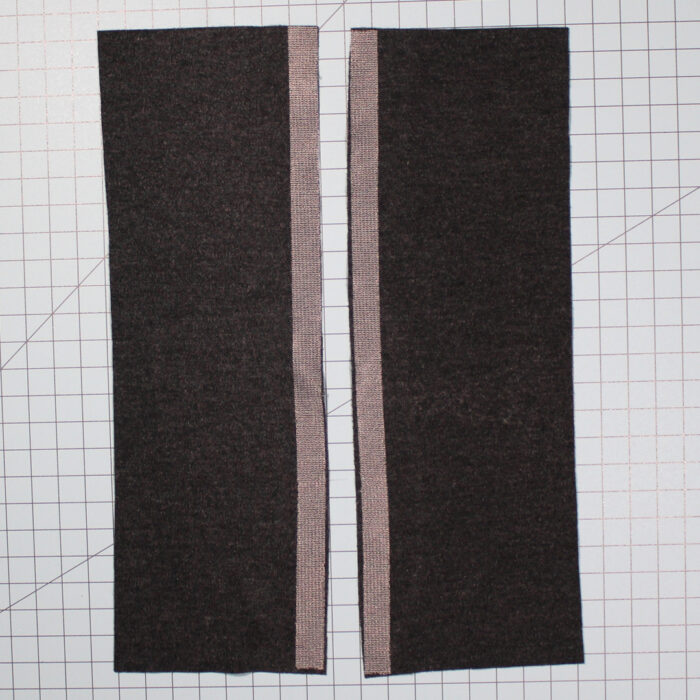
To stabilize a basic seam, cut the interfacing the width of the seam allowance. Keep the direction of the interfacing’s stretch going around the body if you want more flexibility. To fully stabilize the seam and prevent it from flexing, cut the interfacing so that stretch goes up and down. This will ensure you negate the stretch.
Follow the manufacturer’s instructions to fuse the interfacing to the wrong side of the garment along the seam, matching raw edges.
Sewing with the interfacing
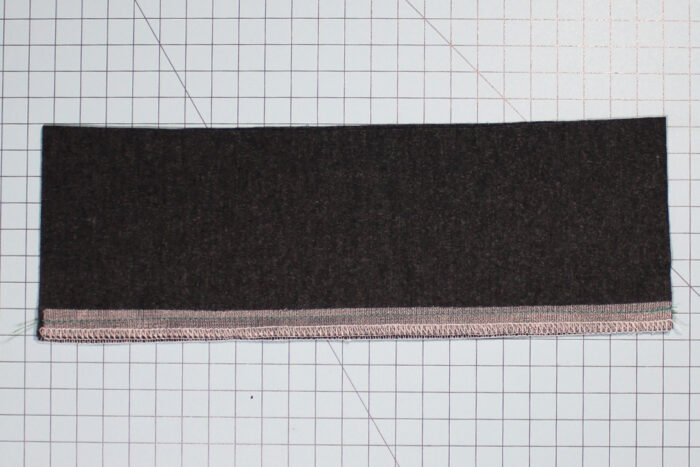
Serge the raw edges only after applying the interfacing. This helps keep the interfacing from pulling away from the raw edge.

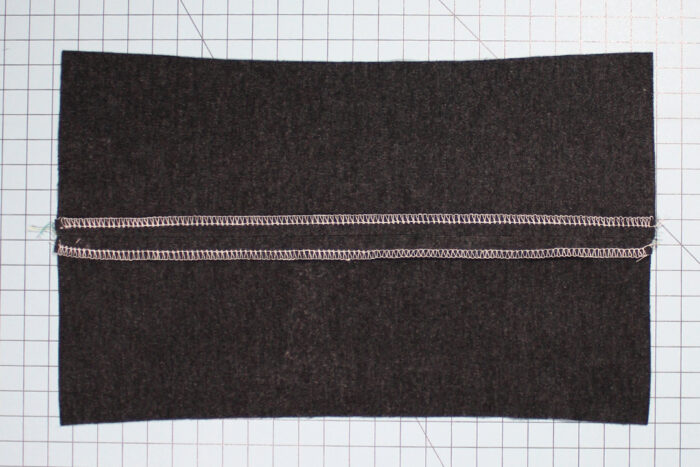
Sew the seam as normal, then press the seam allowances open as needed.
Note: For these examples, I am using contrast interfacing and thread so you can see it. The Easy-Knit comes in black and white, so it is easier to get closer to the color value you are using.)
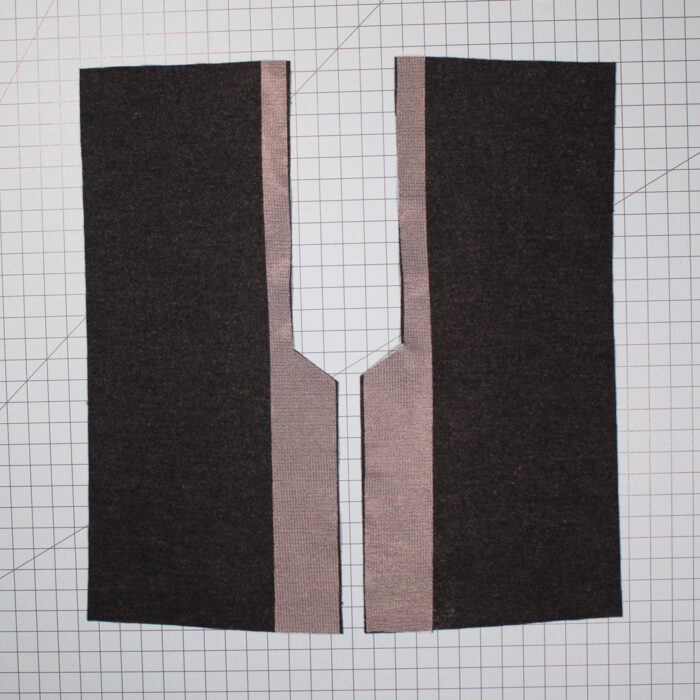
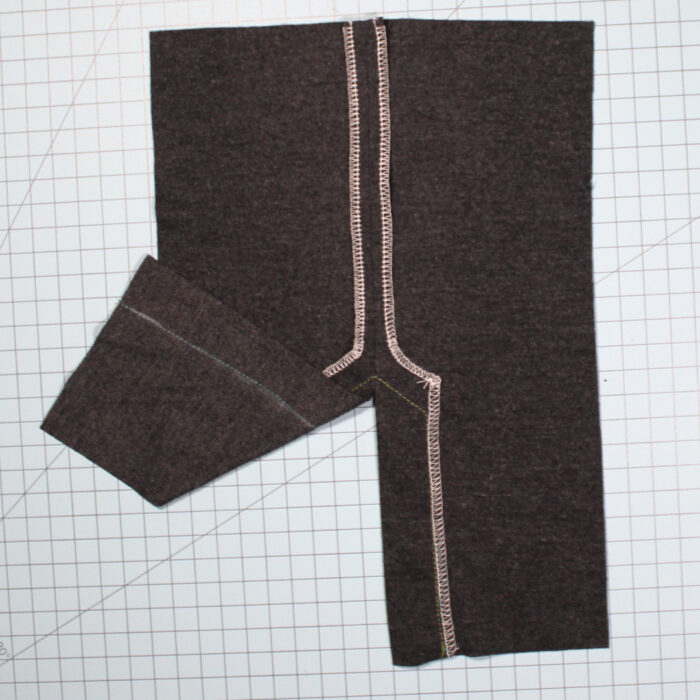
Stabilize a vent
To stabilize a vent on a side seam, cut the interfacing following the shape of the vent facing and the seam allowance.
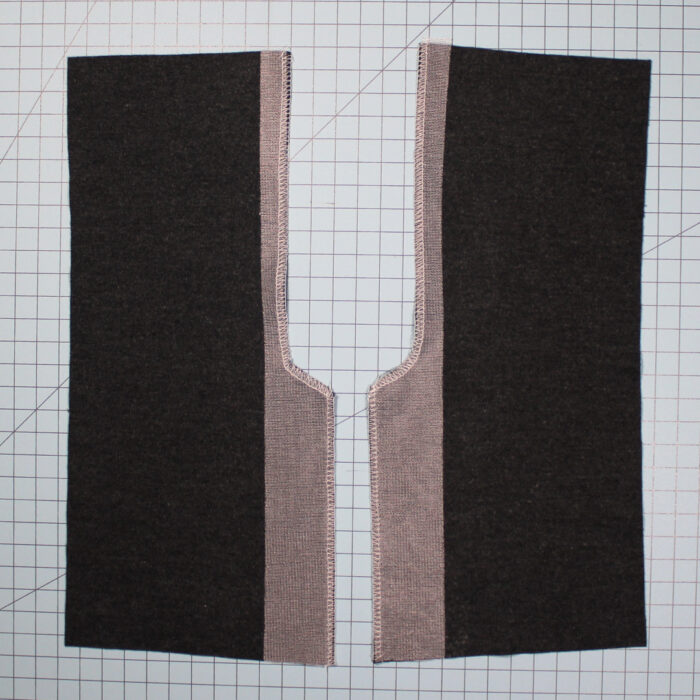
Serge the raw edge, pivoting at the corner to cover the entire edge.
Sew the seam past the top of the vent facing.
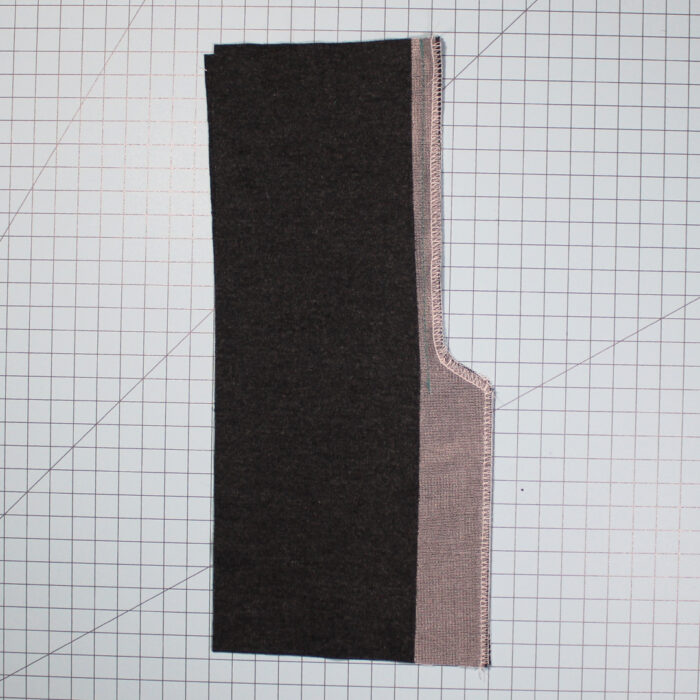
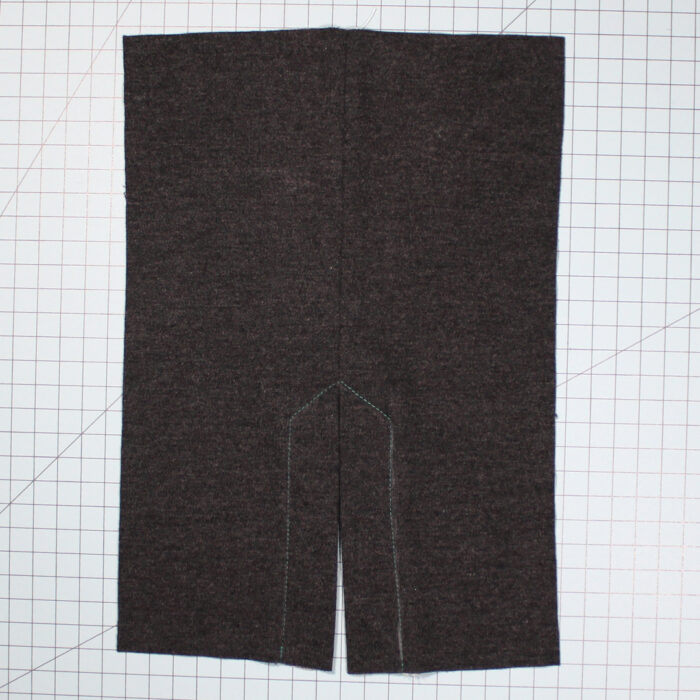
Press open the seam and topstitch the shape of the vent facings. You can go straight across the top or stitch a triangle to the seam. Use chalk or a disappearing marking pen to get the shape correct. You can see the remains of the chalk line I used.
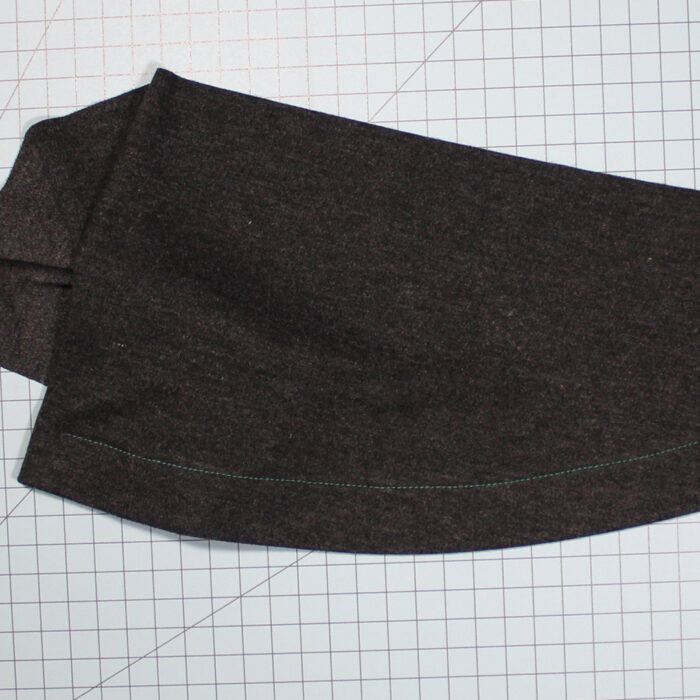
Stabilize a hem
To stabilize a hem, even a curved one, cut the interfacing the width of the hem and press on the wrong side, to the raw edge. You can piece the interfacing as needed by overlapping by 1/8 inch. Because there is flexibility in the knit interfacing you’ll find that it shapes easily along the curve.
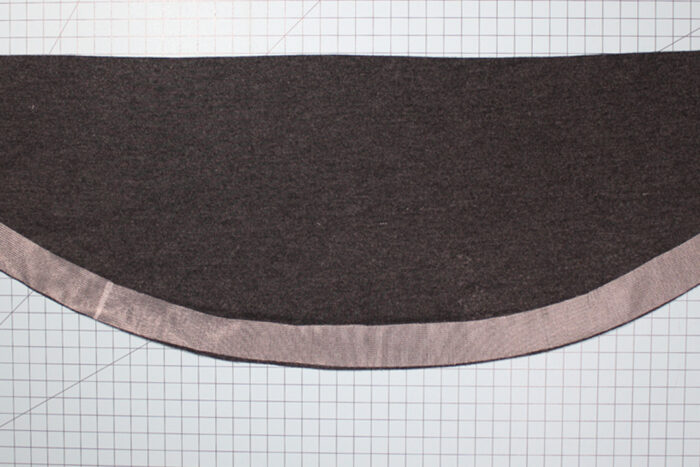
Serge the raw edge of the hem.
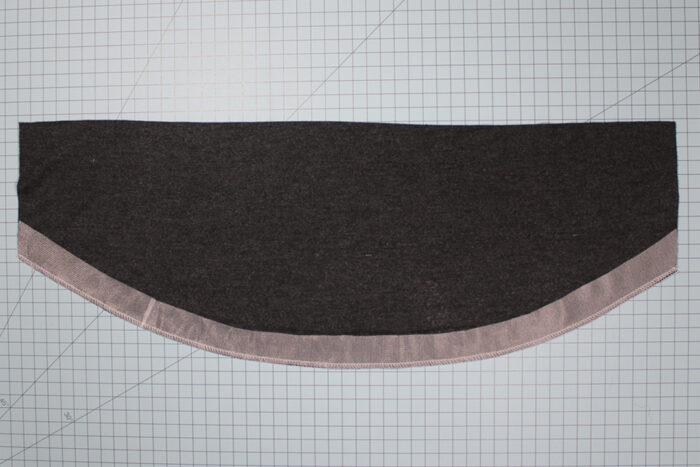
Press the hem up along the edge of the interfacing. Because you cut the interfacing the width of the hem, you’ll have a sharp line to fold against as you press.
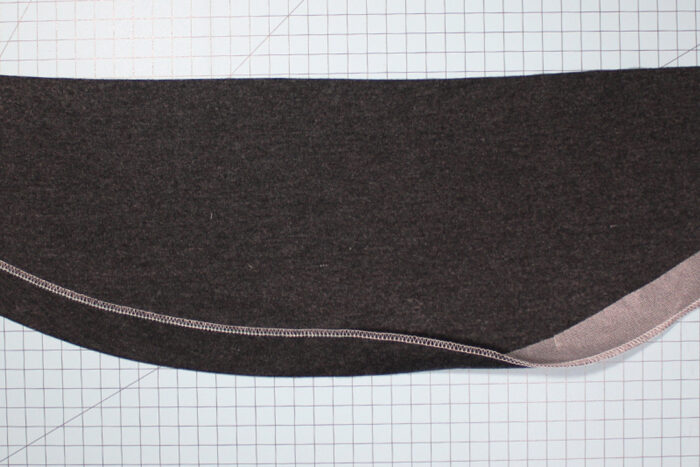
Once pressed, topstitch or hand-stitch the hem in place.
This is a simple technique you can use to stabilize any sewn seam as needed, even woven fabrics. As always, you’ll need to experiment with different interfacings and stabilizers to gauge which one works best for your fabric’s weight and the result you want.
Editor’s note: To find out more about the two-piece ensemble Gilbert created for the 2022 Threads Digital Ambassadors’ Luxury Loungewear Challenge, read his first installment here. You can also see what his three challengers created and who was voted the favorite here.


Log in or create an account to post a comment.
Sign up Log in