


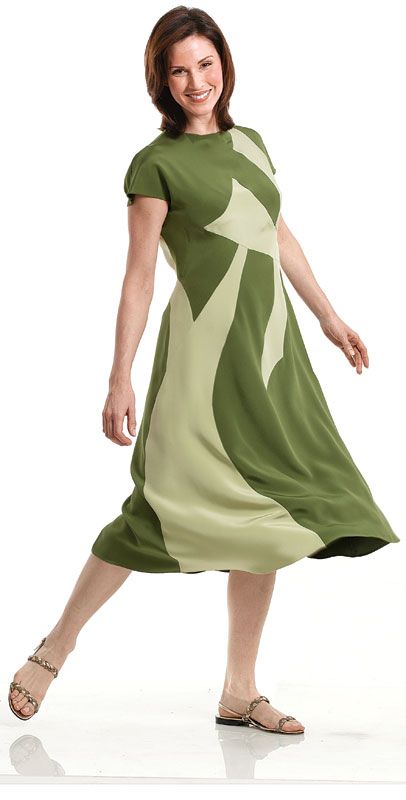
Dramatic insertions replace darts and, in some cases vertical seams in this all-bias, 4-ply dress.
We are so excited that Threads author, Pamela Ptak, made it to the Project Runway stage. In celebration of this accomplishment we wanted to share with you one of her past articles from the pages of Threads.
by Pamela Ptak
excepted from Threads issue #113, p.48
When I was studying couture sewing at Maison Sapho in New York City, I learned a wonderful technique for adding decorative motifs to a garment while maintaining the draping characteristics of the original fashion fabric. This method essentially replaces a specific area on one fabric with a second fabric that is cut on the same grain, so that the flow of the garment remains undisturbed by the seemingly incidental seams used to attach the second, insertion fabric. I recognized this as the perfect way to add visual excitement to simple garment styles, without adding any layers or bulk. This technique requires attention to fabric layout, marking, and cutting, and some basic hand-sewing, but it’s otherwise almost suspiciously sensible. If you understand appliqué, then you’ll have no trouble understanding couture insertions.
Hand- and machine-sewing work together
Although a couture insertion ends up replacing a portion of the background fabric, it starts out as an overlay applied to the right side of the background and stitched temporarily in place by hand. Once the insertion is anchored, you cut away the base fabric from behind it, and sew the seam that joins the insertion to the garment by machine. Careful clipping, pressing, and finishing of the seam allowances (use a hand-worked overcast stitch to minimize bulk and retain the fabrics’ flexibility) complete the process, and yield a supple insertion with smooth, flat seams.
Match fabric characteristics for perfect results
A couture insertion can be created in straight grain or in bias clothes and can take on any shape you desire. It can be completely surrounded by another fabric, like an island, or open to the edge of the pattern piece on one or more sides, like a peninsula. The most difficult version of the insertion is a complex shape with corners and curves set into a bias garment.
As you plan your design, take note of any seam allowances you’ll need to add, on both the background and insertion fabrics. Either mark them when tracing the patterns onto the fabric, or simply leave a margin (on insertions I prefer a width of 3⁄4 to 1 inch) around each insertion section. Avoid placing insertions much closer together than 1 inch or so; the background fabric—especially if it’s cut on the bias—can lose stability if the insertions are spaced too tightly.
When selecting fabric for a garment with a couture insertion, you must be sure that the characteristics of the insertion fabric and background fabric match, even if they are not the exact same type of fabric. In particular, they must have similar easing behaviors, or the seams can pucker, either immediately or eventually. Further, it’s essential that, when you arrange the pieces, the straight grain of the insertion be precisely aligned to that of the background fabric.
If you’re interested in trying your hand at couture sewing, this is a wonderful technique to experiment with. It offers endless design options, and will exercise your hand- and machine-sewing skills.
Insertions can substitute for dart and seam shaping
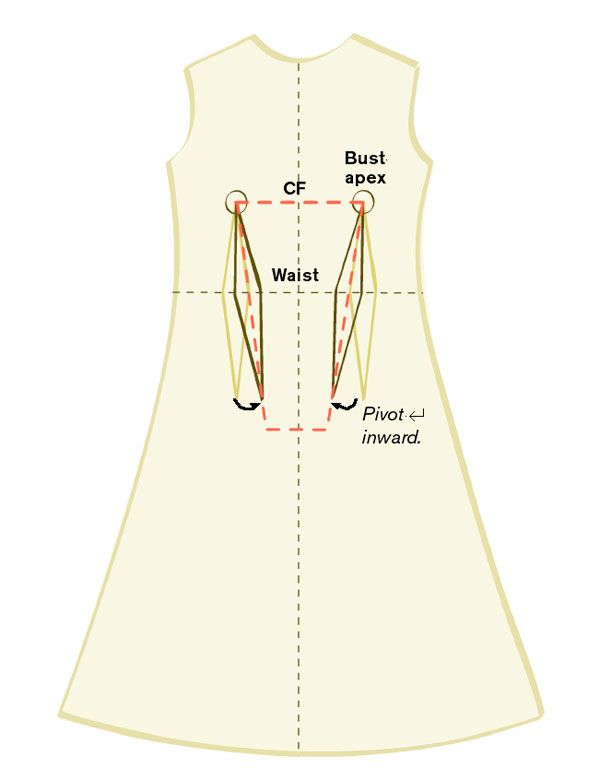
A couture insertion doesn’t have to be the exact shape of the flat background fabric it replaces. In fact, you can opt to incorporate dart or seam shaping into the insertion’s seams. For instance, an insertion that covers the center front of
a bodice can be used to replace vertical darts, as long as the outside line of the insertion comes within approximately 1⁄2 inch of the apex of the bust. You’ll need moderate patternmaking experience to make these changes, since you’ll be pivoting
and then deleting darts. Here’s an example.
Trapezoidal insertion on dress front
Trace the insertion pattern onto the dress front pattern, aligning the insertion upper edge with the bust apex. Pivot the lower points of the vertical darts toward the center front, so that the dart foldlines lie exactly on top of the sides of the trapezoid. The outer dart legs represent the seamline for the garment piece; the inner legs represent the seamline for the insertion piece. You may gently soften these lines to create a smoother transition; once sewn and on the body, the insertion seams will give the illusion of being straight.

Prepare fabric and patterns for perfect insertion placement
Begin with a garment pattern that features large, open areas. Draw your insertion shape on pattern paper, and add match points around its edge if needed (smaller insertions may not need match points). In these demonstration photos, the author uses a partial pattern for easy visibility; when working with an actual garment, always use a full pattern and a single-layer layout.
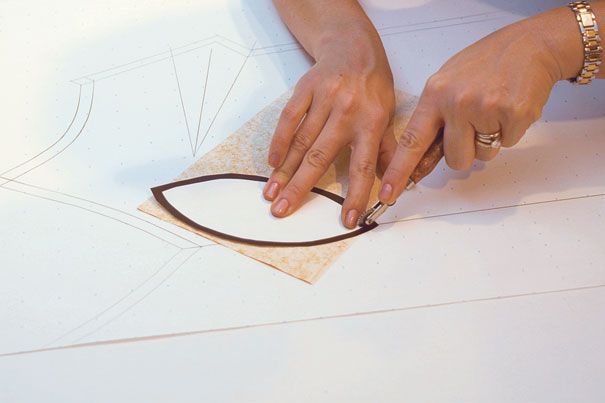
Transfer motifs to the garment pattern.
Position the insertion pattern (here with a thick outline) over the garment pattern, hold or pin it in place, and trace its seamline and match points with a tracing wheel and dressmaker’s carbon, marking the grainline if necessary for reference.

Refine the pattern lines.
Remove the insertion pattern, and refine the design lines by tracing over them, using a French curve as a guide.
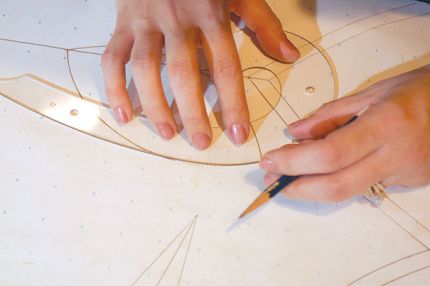
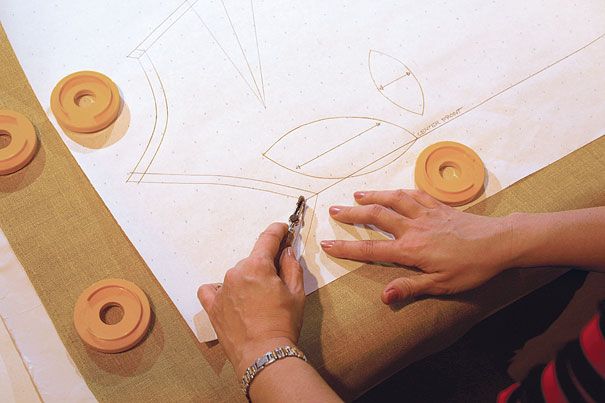
Trace patterns and motifs onto the fabrics.
Lay out the background fabric, right side up, over a large sheet of white dressmaker’s carbon (available from greenberg-hammer.com). Secure the pattern to the fabric with pins or weights, and trace the motif seamlines, match points, and cutting lines with the tracing wheel. Repeat with the insertion fabric, aligning the pattern and fabric grainlines precisely as for the background.

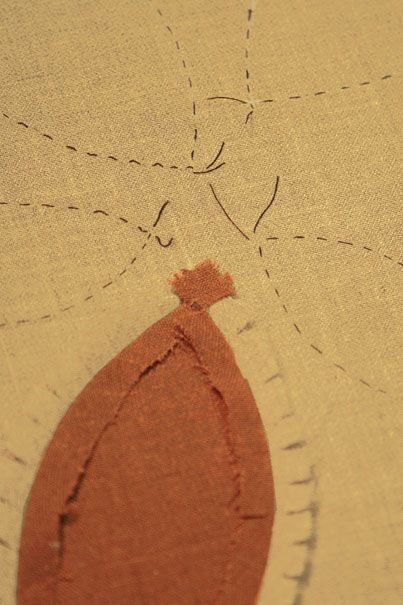
Thread-trace all of the markings.
Remove the paper patterns and turn the fabric wrong side up. Cut out the garment pieces, but don’t cut the insertion shapes out of the background pieces. Cut out the insertion pieces, leaving a wide margin outside the seam allowances to prevent distortion. With fine silk thread, thread-trace the motif stitching lines and match points on both the garment panel and the insertions.

Hand-, then machine-sew for smooth insertion seams
Sewing the insertion into the garment section is a multistep process.
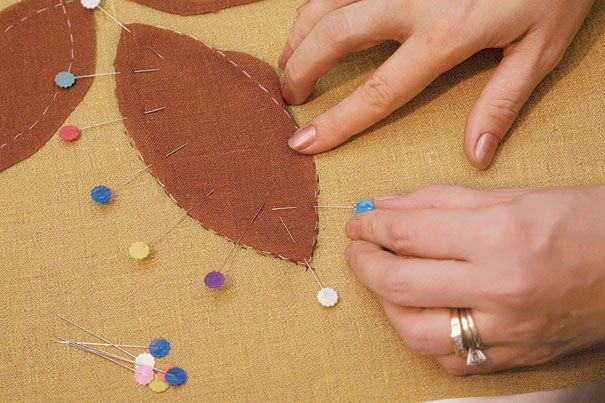
Pin the insertions to the fabric.
Pin the insertion onto the right side of the garment section, turning under the seam allowances as you go.

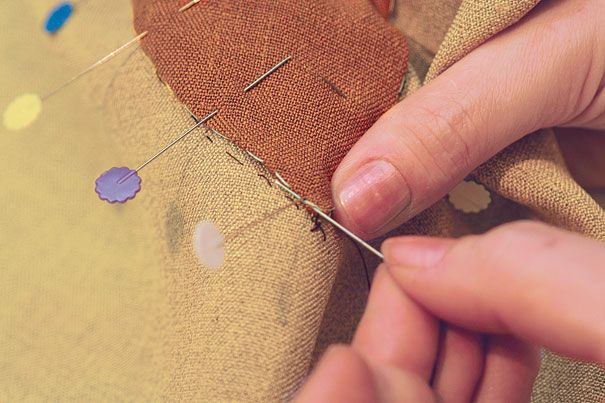
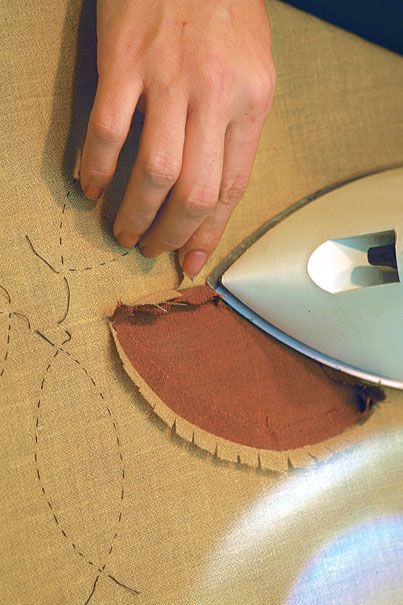
Hand-stitch the insertion in place.
By hand, slip-baste the insertion onto the garment, using very small stitches and a second color of silk thread. Take care not to shift the fabric as you sew. The stitches should be all but invisible when the insertion is fully attached in this step. Press the insertion flat.

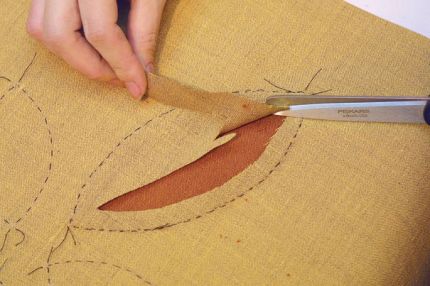
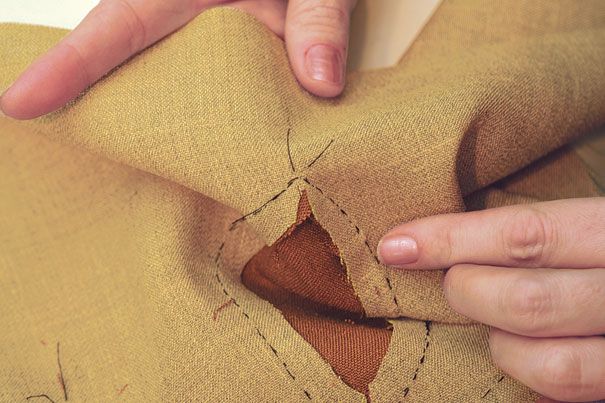
Slash and trim the garment fabric.
From the wrong side, slash the garment fabric behind the insertion. Trim away the fabric to leave a seam allowance of 3⁄4 to 1 inch, and carefully snip into any corners to release the folded insertion seam allowances.

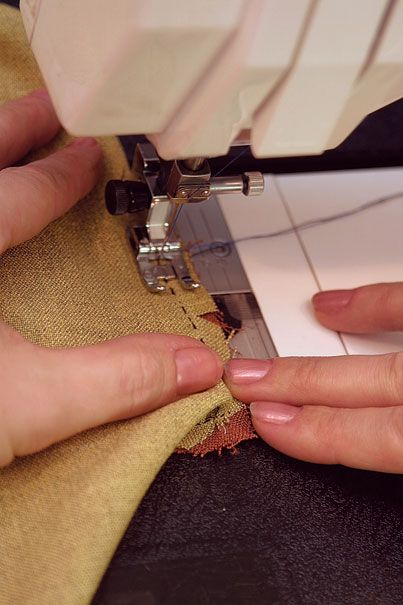
Machine-sew the insertion into the garment.
With the insertion against the feed dogs, stitch the insertion to the garment, sewing exactly on the thread-tracing lines. At corners, unfold the turned-under seam allowances and pivot at the exact corner. On any long bias seams, stretch the fabric slightly to match the expected easing of the fabric after the bias hangs out. Pull the thread ends to one side and tie them off; remove all silk thread tracing and hand stitching.

Clip and press for a beautiful finish
These final touches yield a smooth, flat insertion.
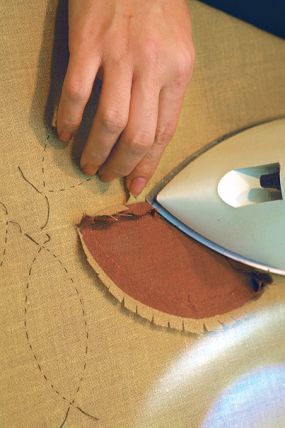
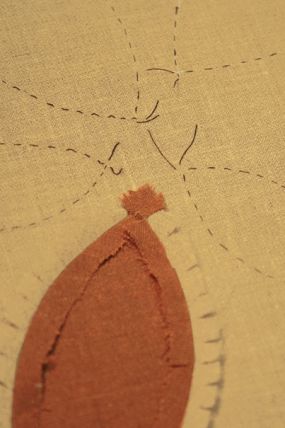
Press and trim the seam allowances.
On the wrong side of the garment, press the seam allowances open. If the motif includes points or corners, clip-notch into the inner seam allowance about 1⁄4 inch from the point; press the seam allowances as shown. This will ensure that the points and corners lie flat. Trim the seam allowances to 1⁄4 to 3⁄8 inch, and clip any curves.
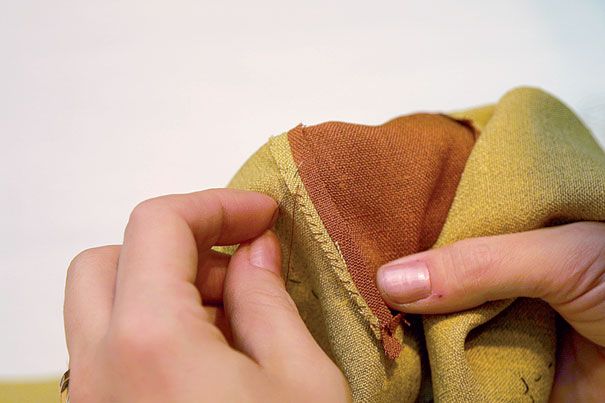
Hand-finish the seam allowances.
Finish all raw edges with tiny hand overcasting. Where the seam allowances have been pressed together at corners, overcast them together as well. Then press the insertion from the garment’s right side, using a press cloth.

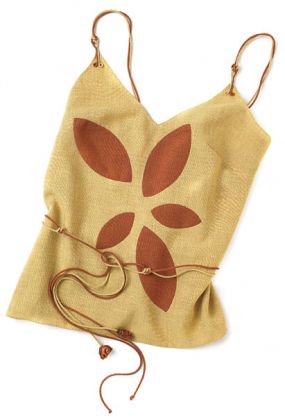
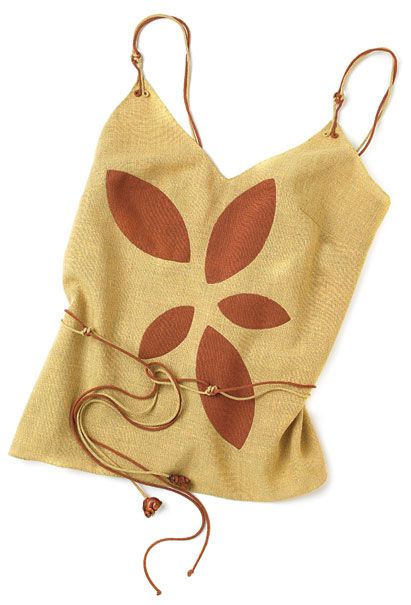
A few artfully placed insertions turn a basic linen camisole into a couture top—without disrupting the flow of the lightweight fabric.
Couturiers are taught, not born
The author (front row, in teal) learned the couture insertion technique at Maison Sapho School of Dressmaking and Design in New York City. Miss Alice (front row, second from the right), the owner of and instructor at the school, taught a full array of specialized draping and couture hand-sewing techniques, and insisted that having these in sample books would almost guarantee her students jobs in designer workrooms. Techniques like couture insertions aren’t usually taught at fashion design schools because the added hand-sewing they require makes them impractical for the mass production of industry sewing. However, this insertion technique continues to be used in haute couture.


Thanks for sharing this great article by Pamela Ptak. She is a wealth of talent and expertise, and I hope you print more from her.
Wonderful article and very inspiring - I'm pondering my pattern & fabric "resource center" for the right combo to use this technique. Too bad Pam didn't have sufficient time to show off her excellent skills. I think she was "awfed" way to early.
This looks great -- like it's part of the garment fabric, and it's so well done.These instructions are really clear and the photos are truly helpful.
I wonder if Pamela Ptak has written any books?
Thanks so much for posting this article!
Great article! Can't wait to try it. Thanks for the photos and concise directions.
I have enjoyed the many articles on sewing techniques.
Love the insertions. Can't wait to try it myself. The dress just seems to flow beautifully. Thank you for the wonderful inspiration.
When I first considered the concept of "insertion," and knowing how the corners are hard to make lie down flat, I was skeptical; but after reading the brief article and the way the "insertion" was described, it sounds like a great fashion option, and one I will put under my hat for future design use. Thanks for all the great ideas!
Keep up the good work. Ideas like these are just great. I've utilised ideas like these before and go raving revues.
Thanks a ton for this. I made a kameez with neckline detail using this and it turned out pretty good.