


Nothing makes a garment look homemade faster than a poorly sewn and cut buttonhole. Next time you are snoop shopping, check out the buttonholes on different price levels of ready-to-wear garments. Once you learn the secrets to great looking buttonholes, yours will be better than the designer garments.
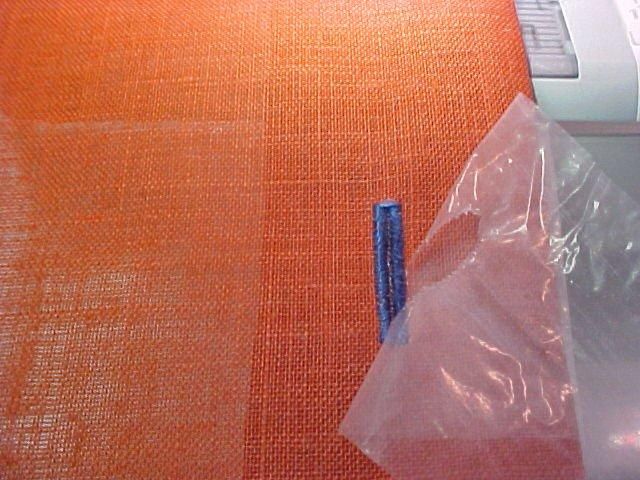
1 Wrap a water-soluble gel stabilizer over the buttonhole edge covering the buttonhole placement on both the right and wrong sides of the buttonhole before stitching. This reduces the friction between the presser foot and the fabric. It also prevents fabrics from pulling down into the throat plate. The water-soluble stabilizer on the underside also seals the inner edges of the buttonhole.
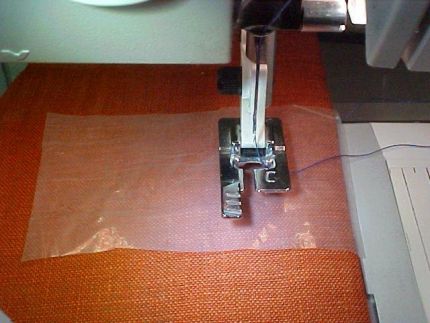
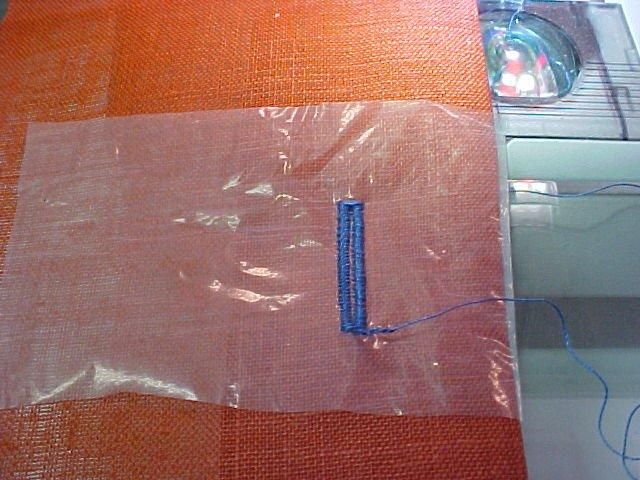
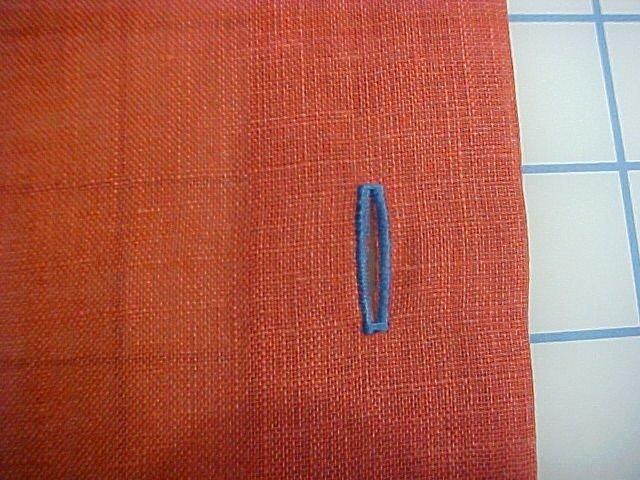
2 Machine sew the buttonholes.
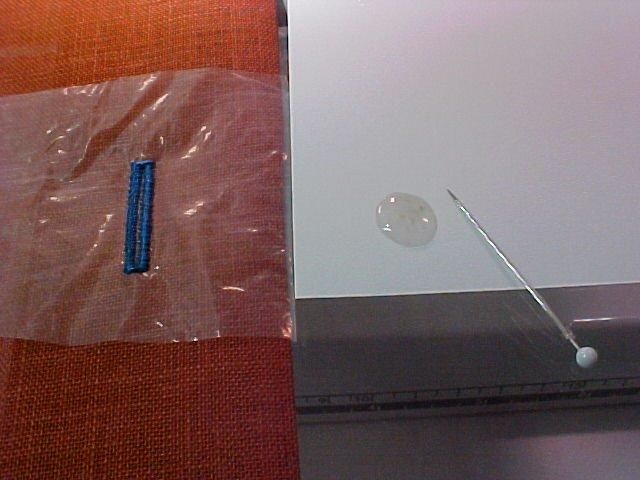
3 Place a ‘dime size’ of liquid seam sealant (Fray Check) onto a Post-It note. Dip the end of a straight pin or toothpick into the liquid and run a bead of sealer along the inside of the uncut buttonhole and let dry.

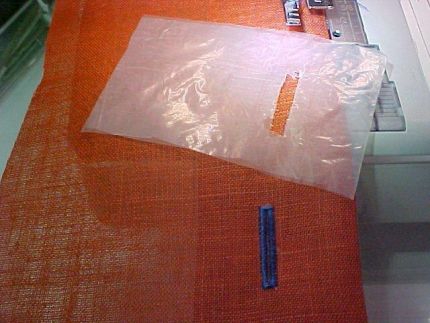
4 Remove the stabilizer. It will just tear away from the finished stitching because the needle perforations made while sewing the buttonhole created a dotted line to tear along.


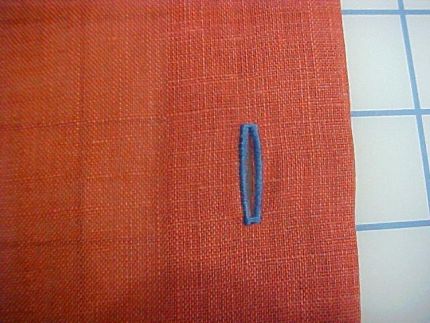
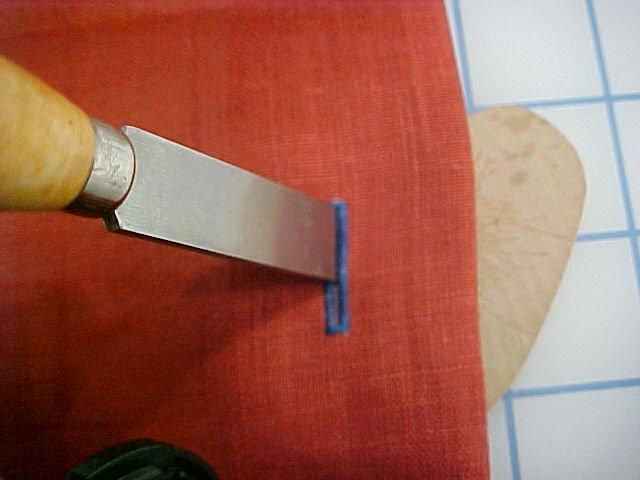
5 Cut the buttonhole open with a block and chisel. Place the chisel on the buttonhole and cut the opening by working from the outside edge toward the center at both ends.

6 Check the buttonholes for any loose threads. With small sharp embroidery scissors, snip any loose threads along the inner section of the buttonhole.
I will also ‘clean finish’ ready-to- wear garments. I check the buttonholes, ends of seams for loose threads and trim them off. It increases the price of a garment, whether one of your designs, or purchased.


Thanks, Louise. This was very helpful.
Wonderful, thank you.
OH !!! Goodie Goodie !!! This is a great idea,thanks a million,the problem is I am a french person and in Montreal I wonder where I could get that gel,do you think it's available in Québec,Canada,if not is there anything else I could use.
Ghislaine
I also add a light weight fusible such as Misty with the interfacing. This helps reduce/eliminate fraying once button hole is cut.
Why didn't I think of it all the years I was sewing for others. I am finally ready to retire, but I am sure I will use this on my own garments.
User 1120582..............One Canadian to another. Just go to any sewing store that carries embroidery supplies. Ask for water soluble stabilizer. I use it all the time
WOW! I was totally averse to making button holes - and would rather make bound buttonholes than machine made! Or just put snaps instead of those dreaded machine-made ones. But YOU have changed that for me forever! Can't wait to do another "perfect" set of machine-made one!
Never thought to finish with Fray Check. Great idea. Thank you for the great tip.
brilliant! my buttonhole confidence just went up!! thanks.
brilliant! my buttonhole confidence just went up!! thanks.
Fantastic ..I have 5 shirts waiting for me to do buttonholes but keep putting off doing them as I know they let down my garments standard.Thanks
Excellent advice. Thank you!
I would recommend trying Fray Block (rather than Fray Check), as it dries without stiffness in my experience. The toothpick is a great suggestion and is so helpful to those of us with a little tremor to contend with.
I have always been complimented on my machine made buttonholes. Now they are going to be even better.
This is so smart! Why don't you publish this is the magazine so nobody will miss this great tip?
Floriani Heat Away will work wonderfully well, too. Once pulled away it will remain under the buttonhole stitching, even when washed!
Louise, you are just the fox! Camielle
love the idea of fray check,I also use machine embroidery
thread to make my button holes,they come out with less bulk
This is a great idea! Thanks!
This is a great idea! Thanks!
This is a great idea! Thanks!
What machine foot is that in the photo? It doesn't look like the buttonhole foot I use for a computerized buttonhole.
Thank you for information never thought of using water soluble stabilizer for buttonholes.
Thank you Louise. I have a cardigan waiting to be put together I will use this tip for sewn buttonholes. I have been a Passap Knitter for many years and many times I have thought about trying this method. Now I can!!
To USER274141: Sew grosgrain ribbon as a facing on both buttonhole and button sides of your cardigan before creating buttonholes. Done this many times and it adds structure to the buttonhole side and prevents sagging on the button side. Hope this helps.
I was just glad to see someone using a Husqvarna machine rather than an Oh so expensive Bernina! Nice to see a lovely manually done buttonhole too - though there are many machines that will make a lovely automatic one. Though I've made a zillion buttonholes Louises "finishing" touches are new to me and will be immediately incorporated into my future technique - thank you for sharing!
For buttonholes that will experience stress (such as my pants waistband), some buttonhole feet have a single tooth at the top and bottom. Thread can be wrapped around the back tooth, running under the foot, and crossed in the front tooth. The satin stitch for each bar of the button hole covers the thread, producing a firm, almost puffed appearance.
I've also in a few cases doubled the thread in the single needle to produce the thickest satin stitch possible - I've used this for children's and men's coats.
If you have access to silk thread, it makes truly beautiful fine buttonholes and wears really well. Learn from my experience however, and don't use embroidery thread!
Ghislane, It's available at Fabricland in Ontario if that helps. Thanks, Louise, should have read this after my disaster buttonhole of yesterday!
I love the idea and will try it today, and I happen to have the same foot, wonderful!
As a shorty, I almost always have to reposition buttonholes. Rather than mark the garment, I go a step further and mark the buttonhole placement on a placket length strip of stabilizer and pin it in place. Its easy and accurate to mark the stabilizer with a fine point permanent pen so I end up with lovely, perfectly spaced buttonholes.
Thank you for such excellent advice and helpful comments from Marjory. I copy the excellent tips onto my computer in my sewing files.
wow, this came just in time - i am putting in buttonholes for a shirt (for a sewing class) and have never been very successful with making professional looking buttonholes. Looking forward to trying this! Thanks Louise!
More great tips and advice from Louise, I wish you'd write a full book on sewing and professional looking results for the home sewer. Note: If you iron Fray Check while it's wet or damp it won't go stiff or hard, stays soft and pliable.
Excellent ~ Thank you so much!
This is the answer to many bloopers. Thanks
This worked wonderfully on a doll jacket I was making. It was even a stretch knit, and it worked perfectly! (i had interfaced the buttonhole area with tricot knit fusible) I have beautiful buttonholes on my doll jacket - which truthfully I was dreading. Now I can't wait to make some on my own garments! Thank you Louise :)
Wish I'd read this before my first set of button holes were added to a dress this weekend.
Wow! Thank you for the info on gel stabilizer. I had never heard of it. Now that I have seen this tutorial, I am looking forward to some real success with buttonholes in future!
Thank you. I thought that I make good buttonholes with silk thread. Now my buttonholes are "really" good with your tip.
No expensive Bernina here, but a used Viking for under $200.
Novice here...I cut the buttonhole first. Ugh! Any tips on how to proceed? Thanks so much!