


Make a long bound buttonhole to house multiple buttons. It frames and unites them.
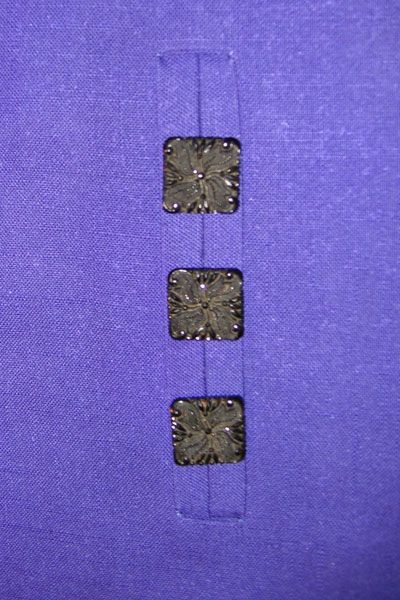
A friend recently gave me four jet Victorian buttons. I want to use them in an unexpected way as a closure and remember a method I learned years ago from Lois Ericson. I’ll show you how she sews one extra long bound buttonhole and then divides it into a series of holes. It frames the buttons and offers several options for embellishment. This is how she does it:
First, decide where you want to place your buttonhole. Then, determine the overall dimensions of your buttonhole. It should be long enough to hold all of the buttons you intend to use with added length for space at the ends and between the buttons. For the version shown here I used a button window (the edge around the buttonhole) that measures 5 1/4 inch long and 3/4 inch wide. Cut a fabric rectangle for the lips (the fabric sides of the bound buttonhole) 2 inches longer than the buttonhole and three times the buttonhole width plus two inches. As with all buttonholes, it’s wise to support the buttonhole area on the garment from the wrong side with fusible interfacing. With all of that done, you’re ready to make your buttonhole:
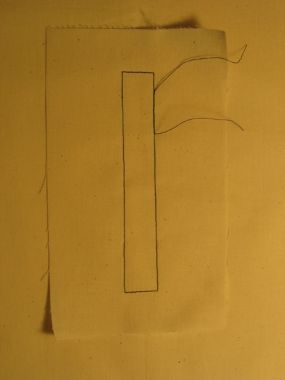
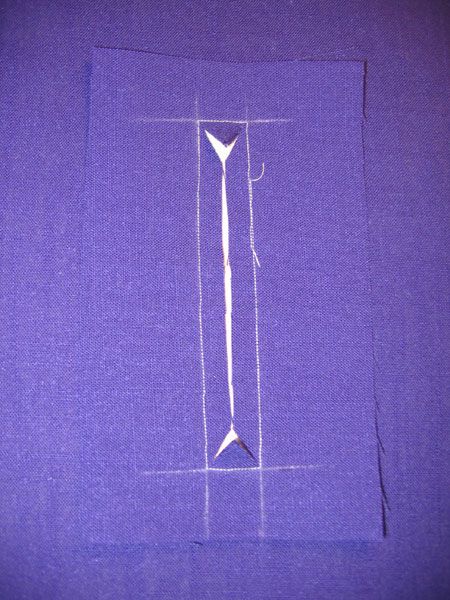
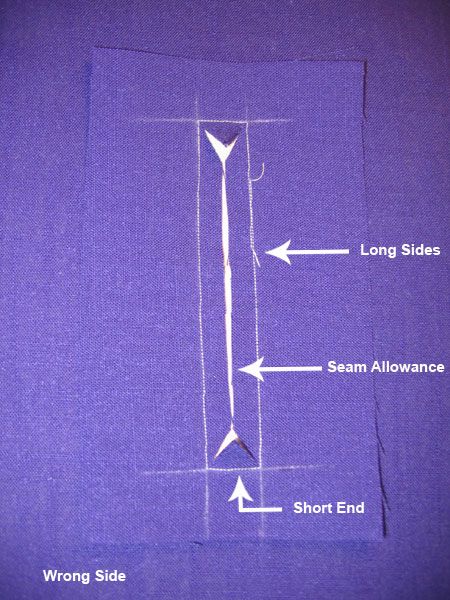
1. Center your fabric rectangle over the location of the buttonhole with the fabric’s right sides together. Starting on a long side, stitch the finished window shape. Overlap beginning and ending stitches but don’t backtack.
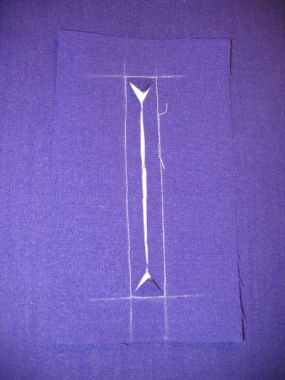
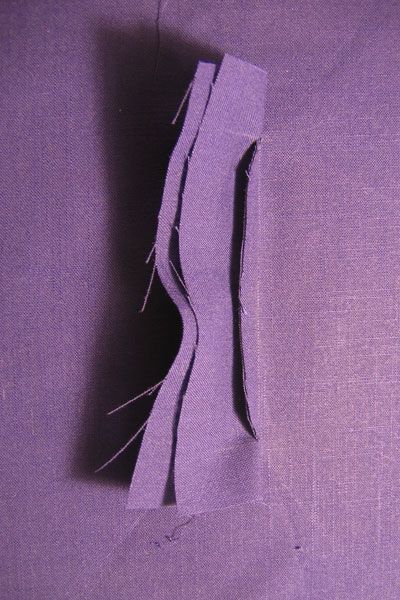
2. Cut through both layers down the center and diagonally to each corner as shown.
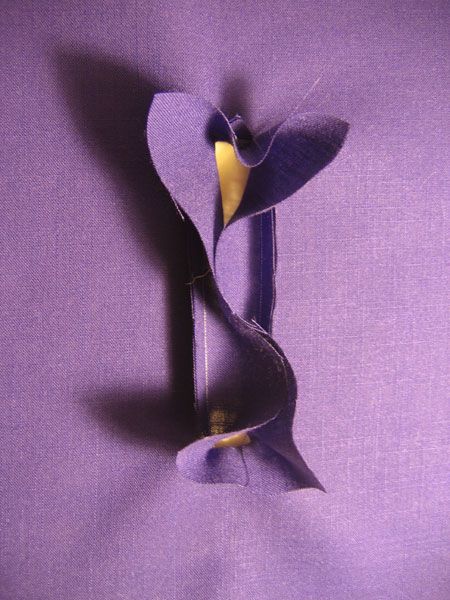
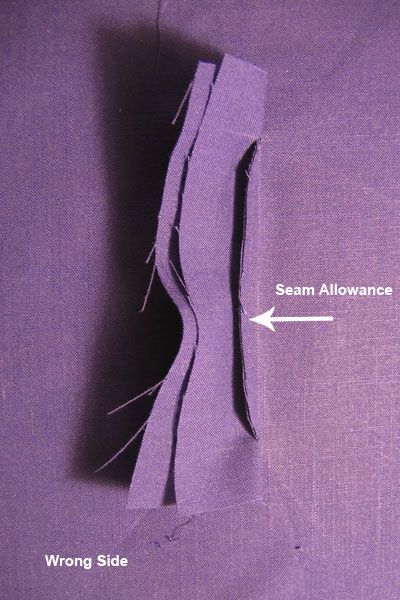
3. Turn the rectangle edges through the window. Pull rectangle to the wrong side and press the short ends of the window to a crisp edge.

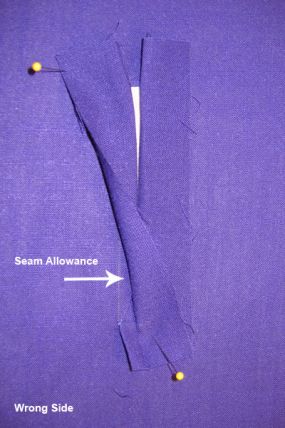
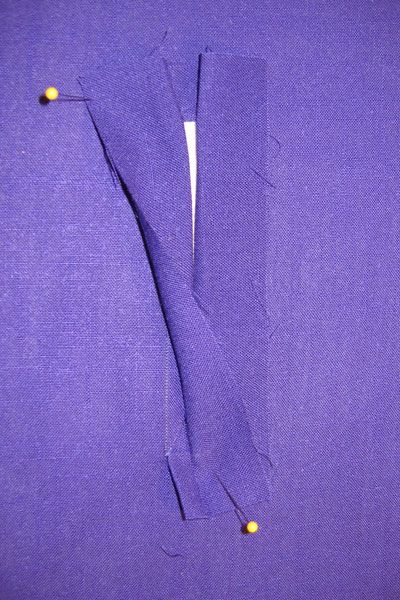
4. Press the seam allowance over the rectangle on the long sides toward the center of the window.

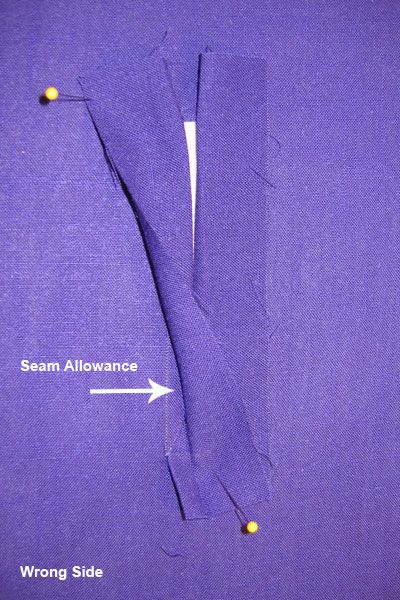
5. Fold the rectangle fabric over the seam allowance for the length of the rectangle.
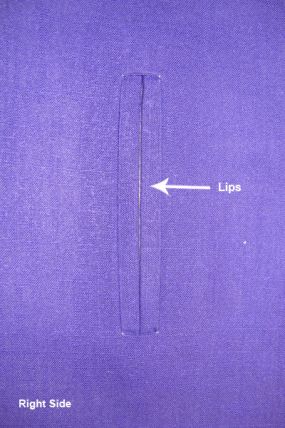
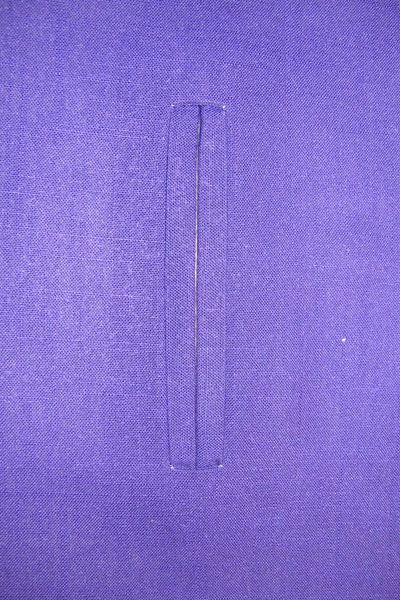
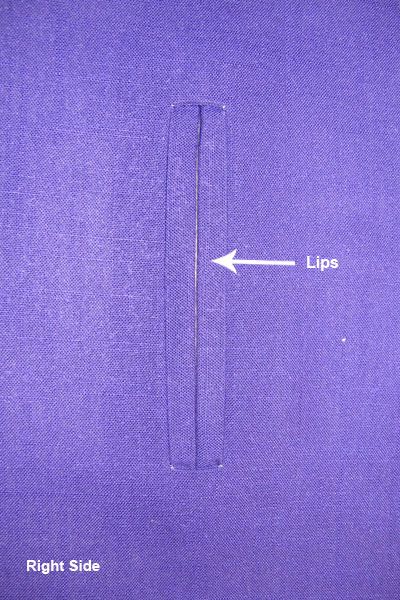
6. This is how the right side looks at this point. Fiddle with the fabric to get the corners square and the lips straight and press crisply.
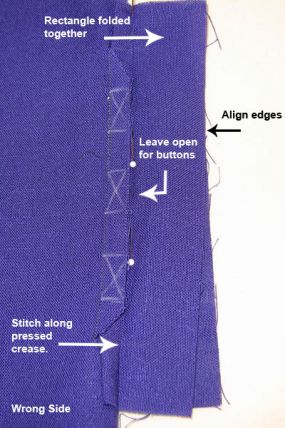
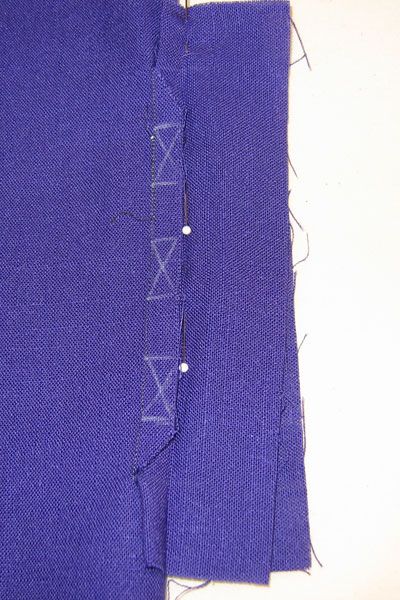
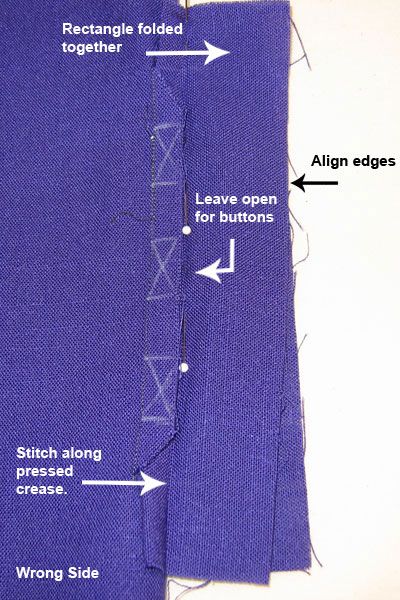
7. Back on the wrong side, fold the lip edges back together and mark the buttonhole locations on the seam allowance as shown. Then starting at one end of the rectangle, sew along the center crease (shown here with pins) through both layers skipping over the buttonholes and backtacking at each break. Then smooth your fabric back into place and give it a good final press. Hide the wrong side of your buttonhole under a facing or inside a lining. Sew buttons on the opposite side of the garment to align with the holes.
Do you have some buttonhole tricks you’d like to share?


The different colored fabrics confuses. Also, it would be useful to make more steps out of 5 6 and 7 to get the confirmation of results expected....as well as the final result. thanks, love this buttonhole, essential for Miyaki patterns,
I agree with xlinda: pictures 5,6, and 7 are not at all clear - are they mixed up? Which color is the right side? I don't understand where (or how) to stitch the closed sections closed (this isn't shown in enough detail to see). But I love the idea - one big bound buttonhole is easier to make than three matching small ones!
I love the concept, but wondered if you could show a picture of the garment? I can't quite picture it in my mind?
The image under step 6 is the wrong image. It is identical to the image under step 3. What is needed is a new image taken from the right side. Also the image for step 7 looks like it is for a single welt opening and must come from a different project.
Oh! I see. This is a variation on a technique that I saw on a DVD of sandra Betzina. After you've created a bound buttonhole you bold the lips back over and sew them together leaving the buttonhole part open. Sandra Betzina does this with an extension piece. On the center front of a blouse you add the extension and you leave open the places for the button.
this is pretty confusing to follow from the directions and the photos.
Samples should always be done on light colored fabric to show the detail. I agree with previous comments. Not enough information. It is so annoying to have a good idea with bad instruction.
What a great idea! I will give it a try on my current project.
Thank you so much for the creativity you share.
Hey Ms Neukam, Wanna fix?? This Would be very helpful!
It would also be helpful if contrasting thread was used in the samples. I also found picture #6. to be from the wrong side, not the right side as the instructions refer to. Perhaps a few more pictures would help explain this process better.
Please do fix this--I'd love to try this with some of my grandmother's antique buttons, but these instructions are way confusing and the photos are not right, as others have noted.
I have made thousands of bound buttonholes in my career as a dressmaker and find these instructions perfectly clear. What a great idea, thank you!!
The pictures look fine to me. I use this technique for bound buttonholes / pockets and this seems fairly straight forward. As far as I can tell, the pictures are in order, and correctly oriented for right / wrong sides. This is one of those that you just have to sit down and try... it only takes a few minutes, and the results are wonderful!
In step 7, the part to the right of the seam allowance with buttonhole markings, is the buttonhole lip rectangle itself. The lips have been opened back out and now are being sewn together ALONG THE PRESSED LINE OF THE CENTER OF THE LIPS. After this step the lip seam allowance (where you see the raw material edge) can be folded back again, folding along the creased (and now partially seamed) line of the center of the lips -- right where they were folded before. It took me awhile to figure this out, but it makes sense, now that I realize that the piece of material with raw edges on the right is actually the buttonhole lips, pulled back on the wrong side.
We left at the crack of dawn yesterday to drive the two hours from our quiet little Connecticut community into bustling Manhattan to buy the fabric for the next magazine issue. Even there your questions reached out to me, but this is the first chance I've been at a computer to answer.
You're right, one photo was wrong Online, strangely, it didn't show the same way on our end. We fixed that. I've also added labels to the images to help. With the exception of the first step image, which is sewn on natural muslin, all of the images are sewn on the same sample. My trusted camera, which I’ve used for years, just didn't cooperate that day and for some reason changed colors almost with every shot. The images are labeled right and wrong side now, which should also help you maneuver. All of the samples were stitched with white thread on medium purple linen (actually, the only stitching shown is the original rectangle).
As shown in this blog, this buttonhole is a sketch of an idea. You can turn to any of your sewing books and use any bound buttonhole technique to make an extra long buttonhole. The excitement is in exaggerating its length for many buttons. I think the real problem you’re having is in seeing how to unfold the rectangle after it has been pressed into lips so you can sew along the crease to define the buttonholes. The crease aligns with the seam allowance edge so it’s difficult to see in the photo so just follow the pin heads. Another option is to leave the lips folded and pressed and hand stitch from the wrong side to define the individual buttonholes. You can also stitch bar tacks across the slit to define the buttonholes.
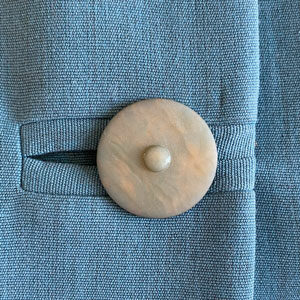
Take two pieces of scrap fabric and try it. You’ll see instantly how this goes together. I didn’t make a whole garment to show this technique. I have used it before and I’ve seen it on other people’s creations. Usually the buttonhole is vertical to close either an asymmetrical or symmetrical garment. It looks great on blouse weight fabrics with delicate buttons, jacket weight fabrics with artistic buttons, and even on coats with leather binding and wooden buttons. Enjoy!
A basic question: Where/how would you use this? In the middle of a blouse? To close a pocket?? I'm having a hard time justifying what seems to be primarily an ornamentation, with little or no practical use.
This traditional, tried & tested patch method looks perfectly clear to me and the photos are good but, yes lighter fabric and contrasting thread would be helpful. I do think it could work equally well with the two strip method(which cuts down on bulk at the short ends), also with the 2 strip method the series of openings could be created before the strips are attached.
Love this idea.
I think this is a fabulous idea. Thanks for a great decorative as well as functional buttonhole. The directions are great! Get out a piece a fabric and make your own sample. If you are holding actual fabric, making cuts, and sewing while you read I think you will find this very simple to do. Be patient follow each step don't get ahead of yourself.
I have used this method twice and I love it. It looks very professional, clean and smart. It does well in a contrasting color as well. Thank you so much for this technique. I found your instructions easy to follow and your pictures very helpful!
I recently learned how to make a triangular bound buttonhole. Thread should do a tutorial on these. Super cool looking and really not very difficult!