


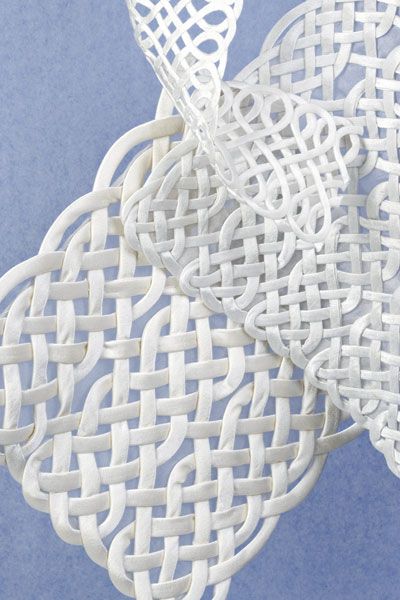
Traditional Celtic knots from clip art books found on Amazon.com are transformed into modern embellishments using silk cord.
One day while browsing in a fabric store, I came across an appealing piece of English trim made from charmeuse bias tubes laid out in a design reminiscent of interlaced Celtic patterns. I decided to use this technique to make embellishment pieces for cuffs, collars, and pockets starting with Celtic designs from clip art. It’s not that complicated, as long as you get your work mapped out initially. I will show you how.
Plan your motif
Patch pockets make a good initial project because you can easily adjust the rectangular shape as needed to accommodate the design. To get started, assemble enough silk charmeuse to make the tubes you need, pattern paper, a permanent marking pen, basting thread, pins, sewing thread, and a hand-sewing needle.
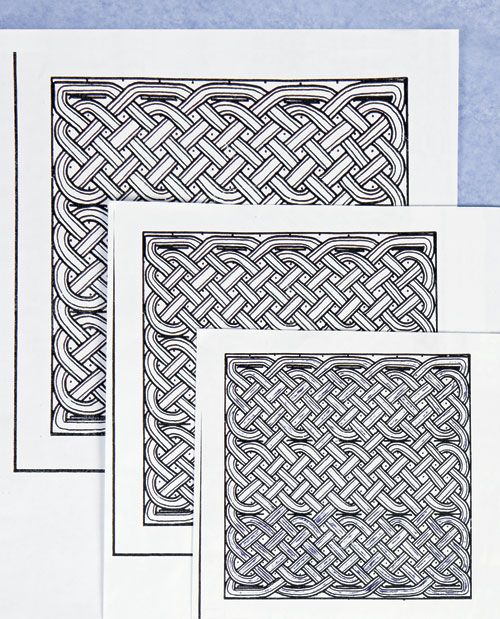
1. Choose or draw your knot pattern. It’s easiest to find an existing pattern. I selected three interlacing Josephine’s knots and photocopied the design, reducing and enlarging to get the scale I wanted. For this example, the finished tubes were no larger than 1/4-inch wide. The repeats in the design work perfectly to enable the right pocket size.
2. Make multiple copies of your selected Celtic design. Then, you can adjust the pattern interlace as many times as you need to make the shape you want. To expand the width of a Celtic knot, overlap the original with a second copy of the motif. Be sure to align the interlacing on the base pattern and the added pattern. Follow the same method to expand or reduce the length and width to suit your desired design size.
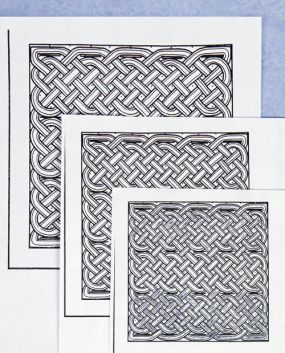
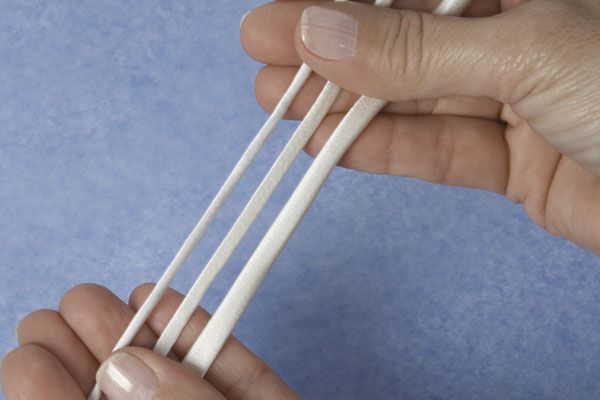
3. Experiment with bias tubes in various widths to audition the design. The design work and bias tubes must be sized right to work together. It is necessary to experiment back and forth between pattern sizes, just as you would test the stitching gauge for knitting.

Make the tubes
Cut generous seam allowances when making bias tubes, because it makes them easier to sew and gives them a subtle loft when turned. These steps produce the finished 1⁄4-inch-wide tubes used for this patch pocket.
1. Cut charmeuse bias strips 1 1/2-inches wide. The amount of silk charmeuse fabric you need depends on the size of the pockets and the design, but if you make the longest tubes possible, you have fewer joined strips throughout the design.

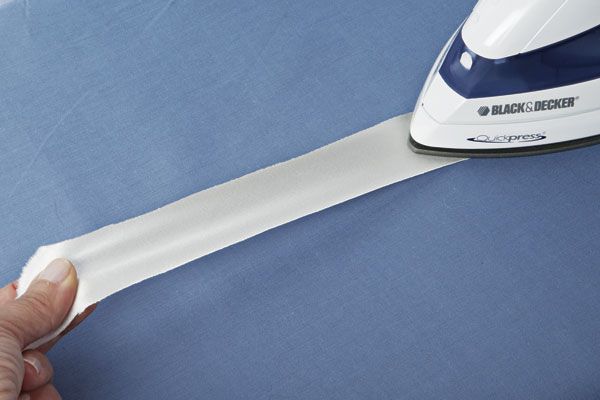
2. Press the strips to remove some of the stretch. Place the strip on the ironing board, hold the iron on one end of the strip, and pull the strip taut as you iron it. This will cause it to stretch.

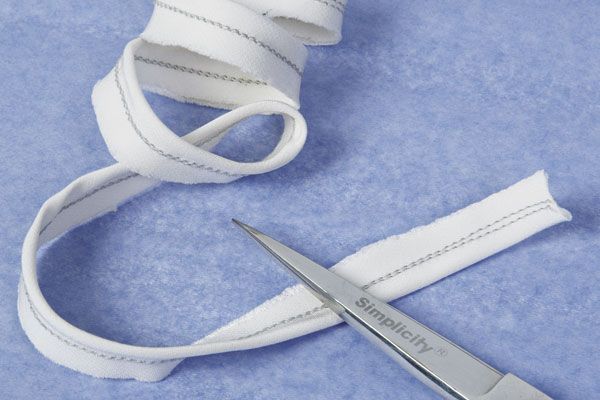
3. Sew the tubes. Fold the strips right sides together and long sides aligned. Stretch the fabric slightly as you stitch 1⁄4 inch from the fold. Stitch another row a stitch-length away from the first. This second row makes it safe to trim the seam without it coming apart. Trim the fabric close to the second stitching row.
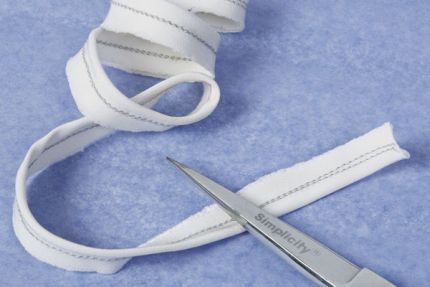
Sew the strips, and then trim the fabric close to the stitching line.
4. Press the tube flat. Turn the tubes right side out using a tube turner or any favorite method. Keep the seamline to one side of the flattened tube. This is now the wrong side.

Prepare a template, and stitch the design
In the final stage of making your pocket, you’ll turn the paper design you created into a template to follow when mapping the tubes.
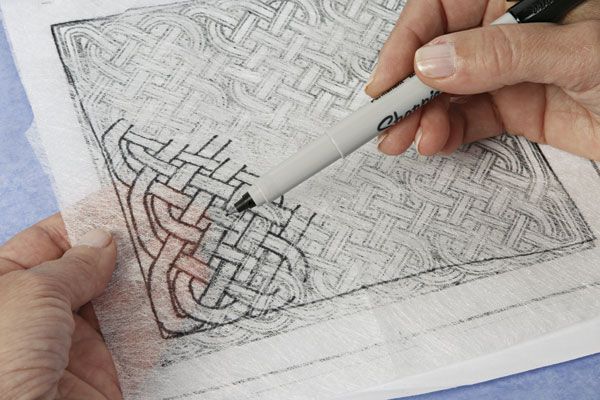
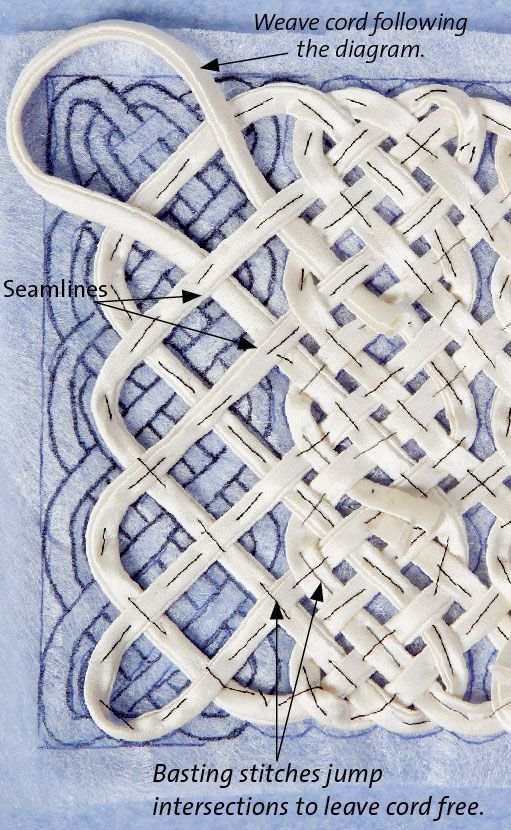
1. Transfer the motif. Trace the design onto pattern paper with a permanent marking pen. Mark the tube edges so you can see the crossover and under intersections clearly. Soften the curves at the corners so the bias tubes can make smoother turns.

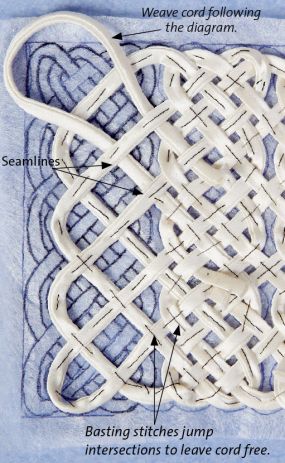
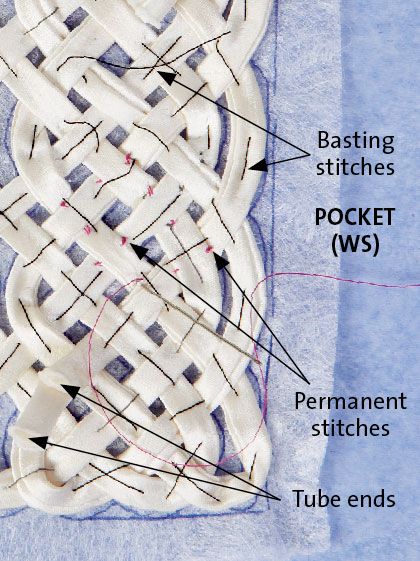
2. Lay a tube end over the template. Start within the panel rather than at the edge. Avoid joining the tubes at the outer edge where it’s more noticeable. Work with the design wrong side up to ensure the tubes begin and end invisibly from the right side. Start and end the tube at an intersection when it is going over another tube to keep the joined tubes hidden from the right side. Pin the tube down, following the template’s over-and-under pattern.
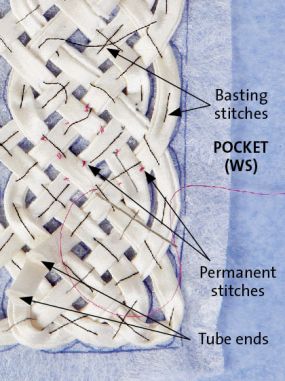
3. Baste the tubing. Baste the tube to the pattern without closing an intersection with a stitch where tubes cross. Repeat this process until the whole design is basted. When you come to the end of a tube, add a new one by sewing the two ends together under an intersection so it won’t show from the right side. Continue until the design is covered.
4. Stitch the intersections. After all the tubing is basted in place and the ends sewn together, tack the tubing together at every tube intersection (wherever they cross each other). You are still working from the wrong side, so none of these stitches should show.
5. Finish the panel. Remove the basting threads from the template, and steam the design from the wrong side. Press gently over a towel to pad the tubes. Hand-stitch the finished design to a premade pocket. Fold the design edge back so you can sew the wrong side of the design to the right side of the pocket.
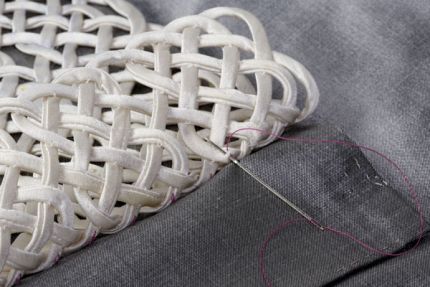
Hand-sew the Celtic knot panel in place.
by Susan Crane
excerpted from Threads #153, p. 69


This is STUNNING! I've drawn and painted Celtic knotwork over the years, and it never occurred to me to try this. I imagine it requires a little patience, but the result is so, I'm going to say it again, STUNNING! This would be a terrific way to decorate vintage-style blouse/cardigan/dress. I'm impressed!
How fabulous! I decorated my wedding dress with rouleaux tubes in Celtic knot designs. A four-strand plait embellished the edge of the skirt and train, and the cuffs and bodice front featured more complex designs. I also used faux pearls interwoven with the tubes. This was 20 years ago, and seeing this technique has brought it all back to me - all those hours of work hand-stitching many metres of duchesse satin rouleaux. It was worth it.
I've always been fascinated by Celtic knotwork and this is AWESOME! Can't you see this on a christening dress? I'm a beginner with heirloom techniques, but I could also see working this into a lovely blouse. Thanks!
Something new to try. Thank you. I appricate the ideas for advanced sewists and well as beginners.
Dear Ms Crane,
Your intricate and amazing Celtic knots made me want to find a needle and sew anything. Your directions were superb and I plan on saving this idea. Thank you for another delightful addition to the always amazing creations at Threads.
I have incorporated celtic knots into several sewing projects over the years. This is THE BEST SET OF INSTRUCTIONS I have ever seen. Thank you so much.
I LOVE Celtic Knots!!! I have only seen rouleaux tubes used once before...I'm so happy to have this example and directions!
Hi! I have done this work many times.....and I must congratulate you, because your instructions are really wonderfull!!! Thank you for taking all the trouble, thank you!!!
this would be awesome as a window treatment too. Either with a background fabric behind it or alone, as a valance or a shade. Might be fun to do with soutash or another stiffer type of cording too.
celtic knots tend to be my focus such as embroidery and starting woodcarving but this is incredible, must learn soon. thanks