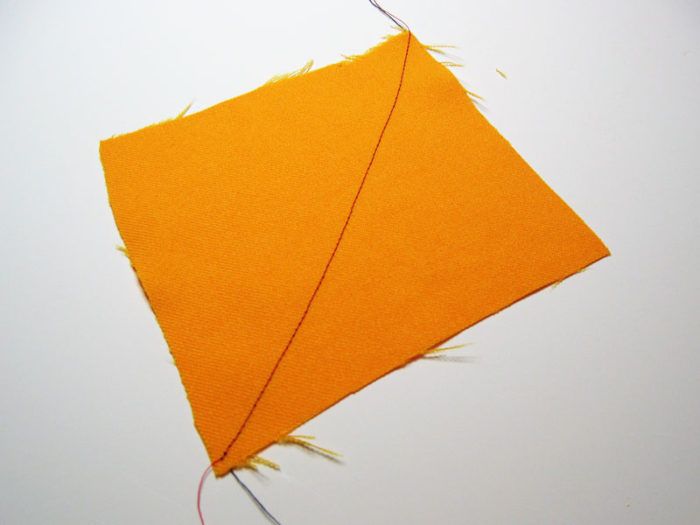
Good tension produces a smooth stitch without puckers.
Good sewing machine tension produces smooth, even seams rather than puckered seams, but sometimes it’s hard to determine the adjustments necessary to produce perfect tension.
Here are a few sewing machine tension tricks that will help
If your tension isn’t right, first make sure that you’ve been timely with the home maintenance your machine requires. If you haven’t oiled and/or lubed your machine in a while (or done whatever maintenance is recommended), it’s wise to take care of that first. Each machine has different requirements for home maintenance, so check your manual for the details specific to your machine.
In addition, whenever you have any sewing machine problem, tension or otherwise, make sure you are using a new needle appropriate for your fabric. Your thread should be suitable for the fabric and the needle. Don’t use old thread, because it may be brittle and complicate your efforts to obtain a good tension setting.
If your tension is still off despite a new needle and appropriate thread, try this:
- Cut a 5 to 7 inch on-grain square from your fabric.
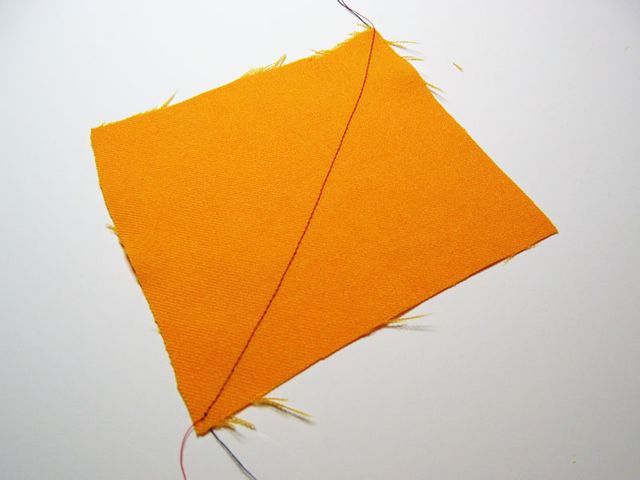
- Stitch a line of straight stitches from one corner to the opposite corner (on the bias).
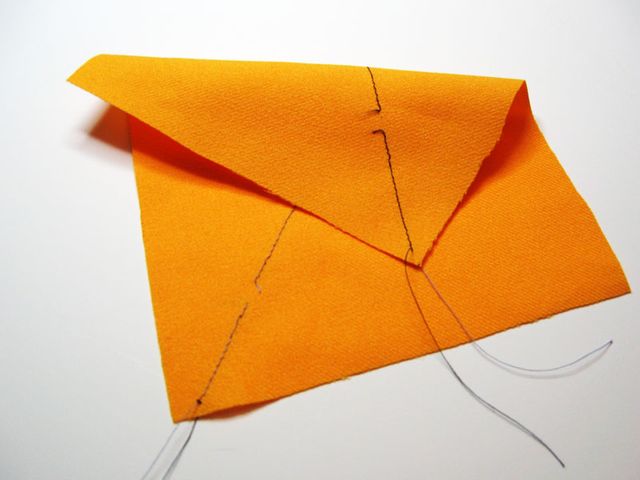
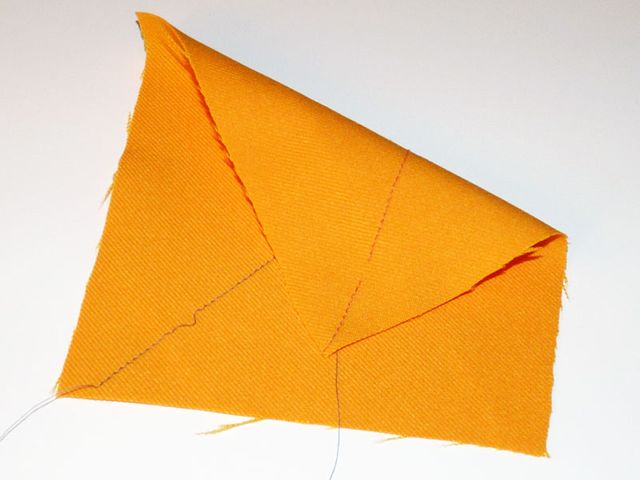
- Hold the square at opposite stitched corners, and pull the corners apart until you feel the thread break.
- Examine the position of the broken stitches. If the top and bottom threads break in exactly the same location(s), you have perfect tension. If only one thread breaks (usually in two different places), that thread is too tight.
- Either slightly loosen the tight thread or slightly tighten the other thread. Be sure your presser foot is down when you make the adjustment. Since many older machines don’t recommend adjusting the bobbin’s tension, you might have to make all adjustments with the upper thread.
- It’s probably not necessary to make a large adjustment; start small. After you’ve made your adjustment, remove the stitching in your square and try again (or cut another square). You will get closer to perfection with each attempt.
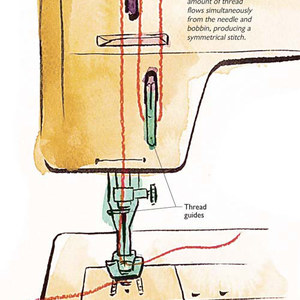
What should perfect tension look like? The stitches on the right side of the fabric look exactly like those on the wrong side. On the top side of the fabric, the bobbin thread is barely visible between smooth, even spool-thread stitches. Likewise on the bottom side the spool thread is barely visible between the smooth, even bobbin stitches. If you have difficulty determining which thread is which, try using a different color thread of similar weight in the bobbin. It will help you determine which thread needs to be adjusted.
If these adjustments still produce a poor stitch, you may need to have your machine’s timing checked by a professional sewing machine repair person.




You must always have your pressure foot down when adjusting your machine tension. If you just try adjusting it willy-nilly with the foot up it is sure to mess up your machine. I come from a long line of dressmakers, and have a degree in design. I got one of my sewing machines as a graduation gift in 1978, and even using the machine professionally, it has never had to be services. I just maintain it by oiling it regularly.
Yes, you're right about the presser foot, of course. I've added that to the blog post. You're also correct about taking good care of your sewing machine. So many people I've talked to over the years have NEVER even read their machine manual to see if they're supposed to oil or lubricate their machine and have never done a thing.
I bought my machine in 1966. It was not the top of the line at the time, but the next one down. I've tried newer machines (and even bought one when we moved and my foot pedal was lost for a while), but nothing can compare to that machine. I take good care of it following the guidelines spelled out in my machine handbook. Unfortunately, I have had to have service a couple of times when parts broke, but each time it is serviced, the repairman tells me what a good machine I have--a real keeper! I agree!
I have had a problem with my thread bunching on the underneath material. I have tried the tension control and stitch length and nothing has worked. Could it be the needle or the thread. The thread does seem brittle, maybe too old. Help, I am making a quilt for my grandson and can not get it finished.
I never knew that I should have the pressure foot down when I adjust the tension. I have an old Bernina "Sport" which I bought new as an extra machine "long, long ago". I do have the machine regularly serviced, and haven't ever had a repair, but the machanic always tells me to "not touch the tension" when I pick it up. It just has a + - dial that is really impossible to read in increments. This will be a useful way for me to test the tension should anything go awry, without getting any comment from the machine tech!
What? What? "Put down the presser foot before turning the tension dial?" That needs to be the first sentence in every sewing machine manual and how-to on tension! Over the past 40 years I have wasted hundreds of dollars getting my machines repaired to fix the tension but have still had problems! This instruction must be so basic that nobody thinks to mention it, so they don't! Thanks, Threads, for finally solving my problem!
I love your website, by the way, it is a vast source of information!
I have been so frustrated for the past two days with the tension on my machine. I was going to take it to the repair shop tomorrow, but I am in the middle of a project and it would probably be a couple of weeks before I'd get my machine back. I'm SO happy I came upon this site. Changing the tension with the presser foot down solved my problems! Thank you, thank you, thank you!
thank you for mentioning the pressure foot. i used to sew quite abit, but then got too busy. i'm trying to get started up again. i'm so glad .i found this site. i do remember that keeping your machine oiled is so very important. also, keeping the area under the sewing plate clean and free of fuzz and lint elps too. i love your site!
Thanks so much for this instruction. Tension adjustments have always been a mystery to me and I actually gave a machine away after many attempts to get the tension right. The test swatch makes perfect sense and I will use it!
There is no such thing as a pressure foot on a home sewing machine. And, possibly commercial machines as well.
Some home sewing machines have a pressure adjustment of the presser foot which can be changed. Less pressure for knits and sheers,for example.
I think I can make the point a bit more clearly, Spice. It is a PRESSER foot, not a pressure foot. It is called PRESSER foot because it gently presses on the material around the needle so that it doesn't get all wadded into a bird's nest and, well, y'all get the picture, LOL.
What if you have a machine that doesn't require oiling? ( I wish it did!)
I do have a vintage machine (my heavy duty one) and that does require oiling occasionally; but my main one does not require oiling.
Like Pinky57, I also gifted myself with a sewing machine after graduation from design college in 1973. Sears Kenmore Model 1803. Still in use today, joined by a Viking Husky 170 and an Omnistitch 1000. I maintain all my machines with a regularly scheduled oiling, and have never had a professional servicing in over 40 years of dressmaking, draperies, and crafting.
Re the Tension Test, I wanted to point out that according to my Kenmore manual, the test needs to be done with mercerized cotton thread and the bias line stitched 1/2 inch from the edge. Attempting to use cotton-coated polyester thread will drive you to drink, it will never break when you pull the swatch. Also, the threads do not have to break in the exact same spot, but both top and bottom threads must break simultaneously. Once the tension is established you can then use your chosen thread.
Been a reader since the 1st issue, L-O-V-E your magazine, and am so delighted to see so many Millennials rediscovering the art of sewing and creating a unique vision.