


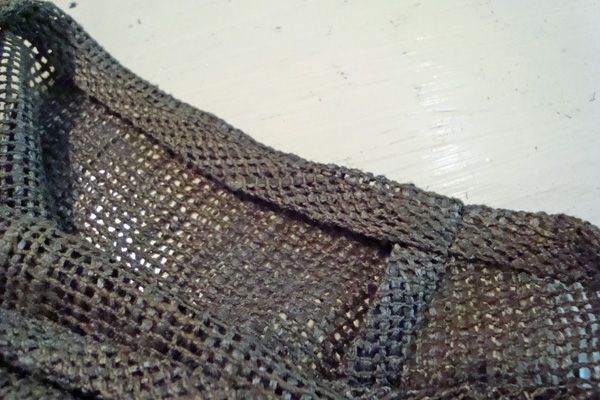
Three edge finishes
I’ve become a proponent of the “less is more” school of finishing. Today’s fabrics are so beautiful in and of themselves that a simple edge is all they need. With these techniques, you can eliminate the traditional facings on the armhole edges of sleeveless garments and still have beautifully finished results. I’ll show you three edge finishes that work beautifully on summer garments: folded bias facing, a baby hem, and scalloped edging. Plus, I’ll share a great tip for reinforcing buttonholes and buttons.
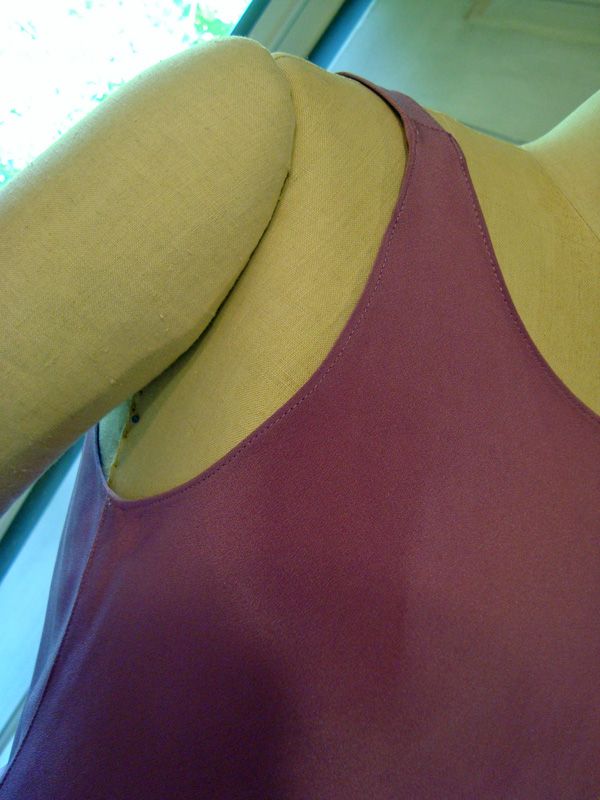
Folded bias facing
Start by cutting a bias strip of fabric that’s slightly shorter than the length of the circumference of the armhole plus a seam allowance at each end. It should be 1 to 1½ inches wide plus twice the width of your seam allowance. Sew the strip right sides together at the ends. Fold in half with wrong sides together and press. Sew it to the armhole, right sides together. Trim and grade the seam. Press to the inside and tack in place at the shoulder and side seams by hand or by stitching in the ditch at the seamlines.

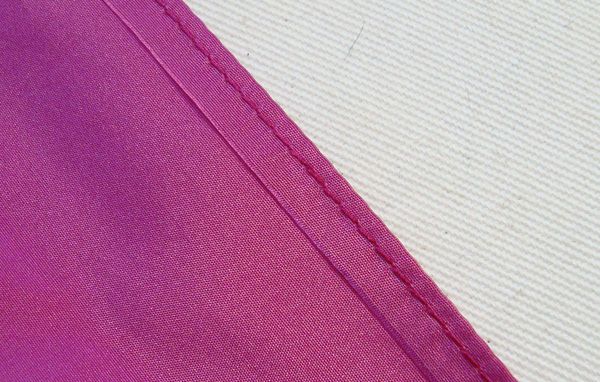
Baby hem
This is a foolproof way of doing a narrow machine hem. I bless the day that I learned it because it’s useful for so many things.
To finish an armhole, press in the edge along the seamline and sew close to the fold.

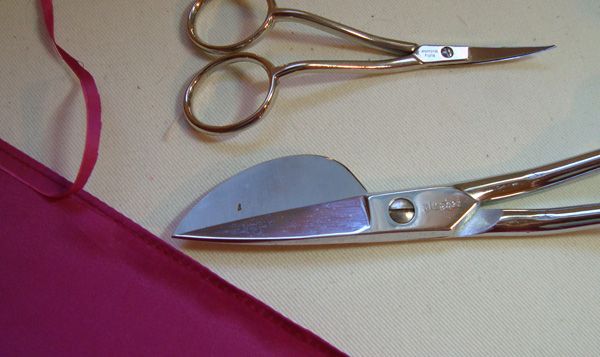
Trim away the excess fabric close to the stitching line. Appliqué scissors work well for trimming.

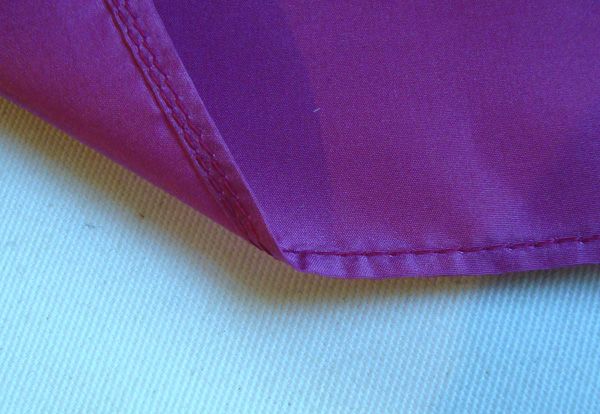
Fold the edge in again and sew in place. When you’re finished, you may see the two rows of stitching on the wrong side, but only one on the right side of your garment.

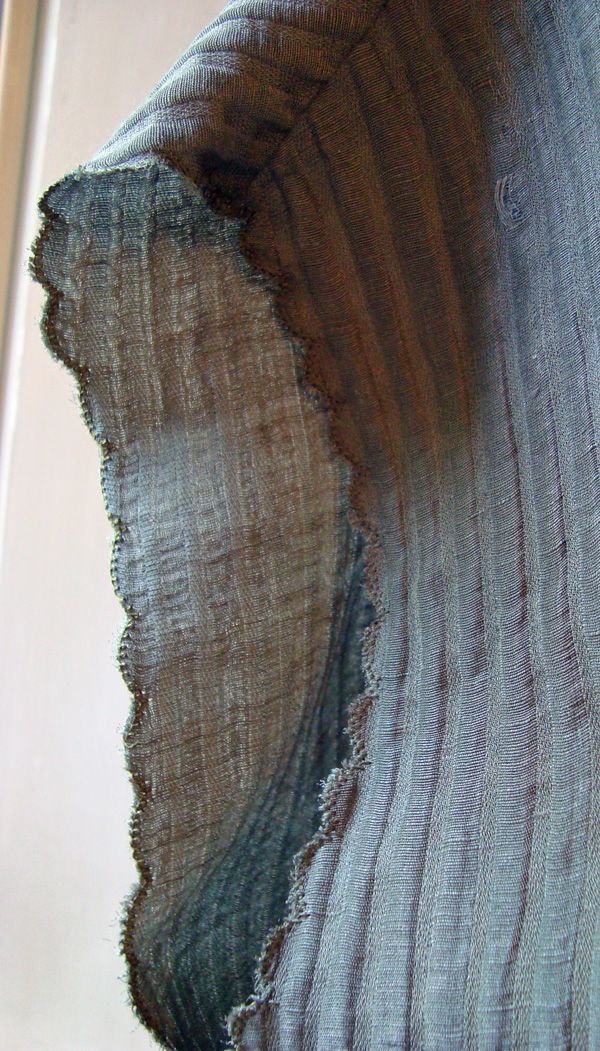
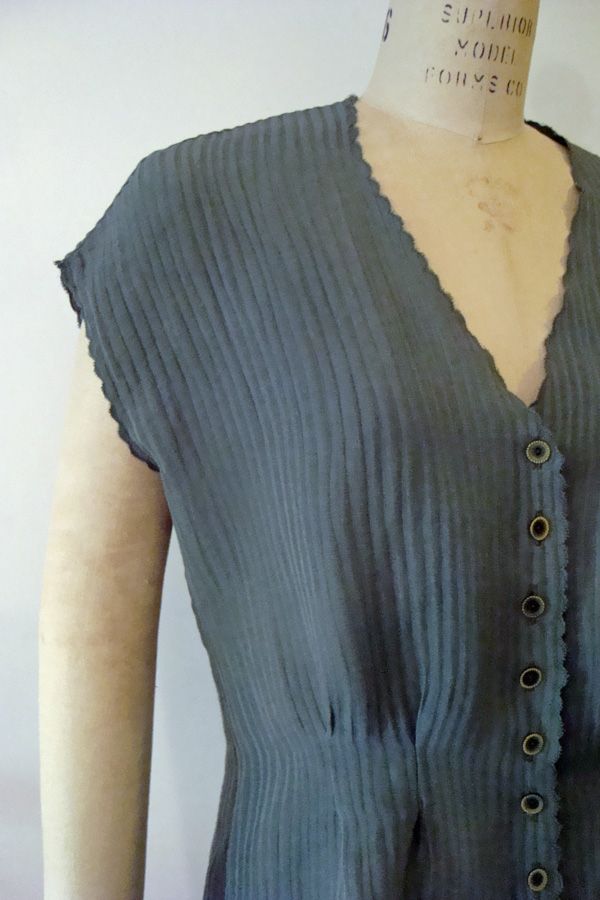
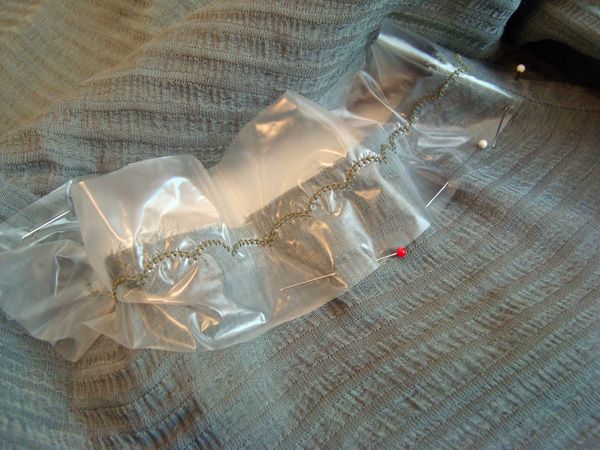
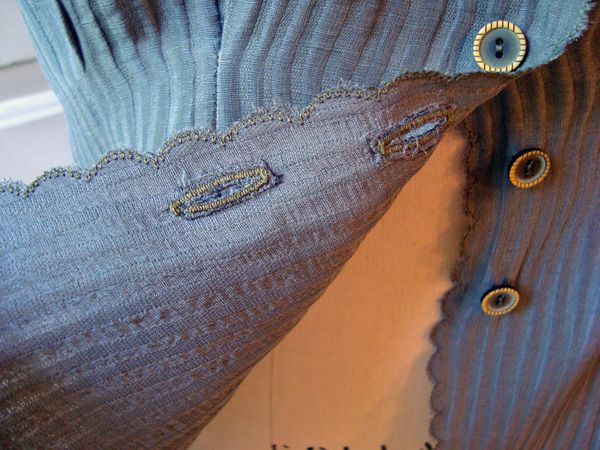
Scalloped edging
This is a great way to finish the opening and bottom hem edges of a garment, too. I used the decorative scallop stitch on my Bernina sewing machine. Most machines have a similar stitch. First I sewed and finished the shoulder and side seams.

Pin strips of stabilizer to the wrong side of the garment. I used a water-soluble stabilizer to keep my top at light as possible. You could use a lightweight tear-away product as well, but some of that will always remain under your stitches.

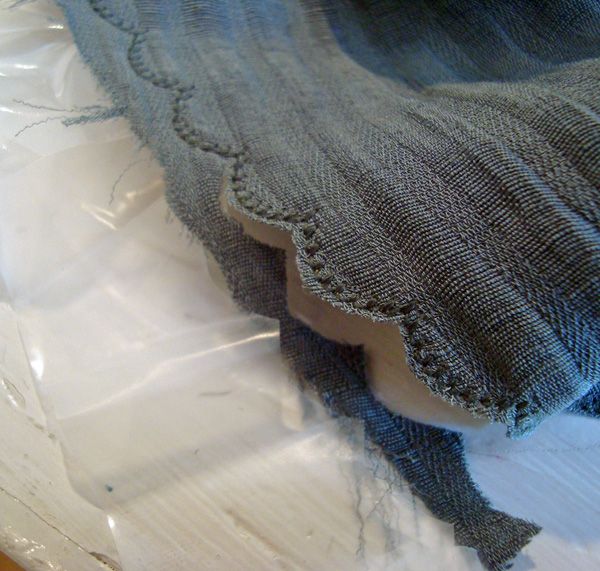
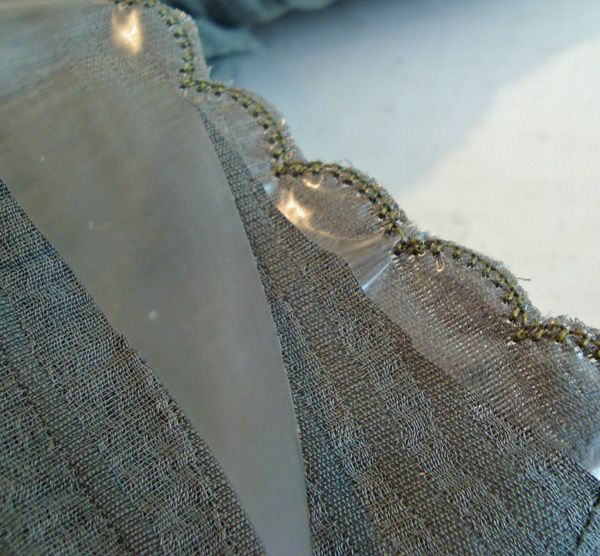
Sew along the armhole seamline using your programmed stitch. Trim away the excess fabric along the outside of the scallops.
I trimmed away much of the water-soluble stabilizer before placing it in a water bath to soak away the remaining strips (check manufacturer’s instructions for the correct procedure for the product you’re using).

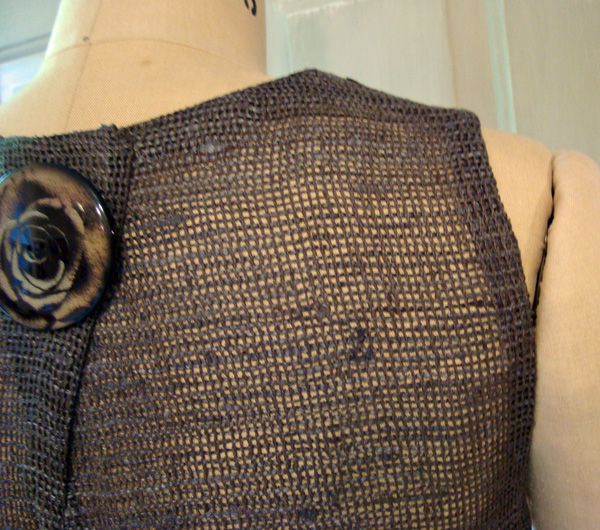
Tip for reinforcing buttonholes and buttons
It’s always important to reinforce buttons and buttonholes. Here’s how to do that when you don’t have a traditional facing.
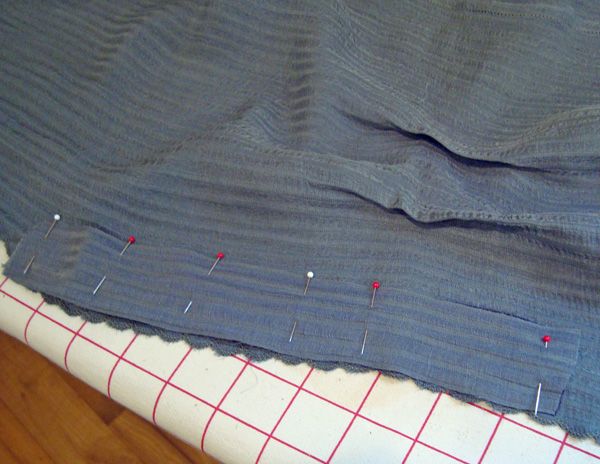
Fuse some lightweight interfacing to a strip of fabric and pin it to the wrong side of the garment behind the buttonhole markings.

Sew the buttonholes and trim away the interfaced fabric close to the stitching. Reinforce the button side, too, before sewing on the buttons.


Thank-you for the great ideas!
I love the silk burlap! Does it itch? Can you let us know where you got it?
The finishes are simple and elegant. Thanks.
Yes! Where can we get silk burlap and the pattern?
I really appreciate learning about these techniques. Thanks so much! I'm with you for the school of "less is more".
Thank you for the tips. I love Threads and the fact that the authors really enjoy sewing and love to pass on their knowledge. Keep up the good work.
Thank you for the great ideas on finishing. I love the scallops and can think of a few other stitches on my Bernina that might work, too. The button and buttonhole reinforcements should work well on garments. Once again a big thumbs up (as Siskel & Ebert would say) on your finishes and tips. This is a very worthwhile e-newsletter--as opposed to most I receive.
Thank you Threads for bringing Mary's facing tips. I too agree that "Less is More" and love to see the contributors to your magazine willing to offer updates and change.
I am in the wrong category, but where can I find maternity patterns? I am trying to sew some mternity tops for a short, heavy friend, but can't find suitabl maternity patterns. Have mothers-to-be given up sewing for themselves? Thanks!
Dear SewLady - Butterick makes a maternity top pattern, No. B4201, in sizes from 8-24. You can see it at:
http://butterick.mccall.com/b4201-products-1419.php?page_id=370
Simplicity has several patterns which can be seen at:
http://www.simplicity.com/Search.aspx?SearchTerm=maternity
You can also try eBay for older maternity sewing patterns. Good luck!
Dear Sew Lady, Go to http://www.sewingpatterns.com and type in "maternity" in the search field (no quotes). You'll find a good selection, some that can be downloaded and printed out.
And after the birth, http://www.elizabethlee.com has wonderful nursing patterns.
The silk burlap is wonderful and it absolutely does not itch! It's very soft and drapey. I got it at Waechter's in Asheville, NC http://www.fabricsandbuttons.com. The pattern -- well, that's my adaptation of a tent dress pattern. But, when you use any of these finishing techniques that don't require facing patterns, you can adapt patterns with sleeves as well. Just eliminate the sleeves and cut the armhole so it slants toward the shoulder. Check to make sure the underarm seam is not too low.
This is just what I am looking for. I am already useing some of these ideas but you have showen me an even easier way of doing them as well as a new one. Thank you, thank you
Dear KathleenSews ~
Thanks for the nursing pattern sites! These tops or dresses will make a great "New Baby' gift for my daughter! Baby Ginnie was just born last Thursday!
And since they live in Florida, the light-weigt finishes will be very useful, too ~
Bright Blessings, all! Kharmin
Great ideas at just the right time as I am currently working on sleeveless tops to wear under jacket for work. I never think to use my machines decorative stiches, so it was nice to see that technique. I also love Waechter's unique fabrics.
I love these ideas! Great article and I'm sure many of us will use these ideas for a lot of things!!!!
Good ideas, well explained, & I can probably do all 3 using my Featherweight & attachments. Thanks.
On the baby hem, I agree that it is very fast, but if you notice the first seam is folded on the seamline then stitched at that point. After trimming, the seam is turned in again and stitched. If you turn it the second time, as I see it, the edge finish will be narrower than intended by one seamline.
Love everything you presented. This was SOOO timely! I will definitely use all three techniques in addition to the button/buttonhole hint. Thanks.
Hi, I'm inexperienced. I am not sure I understood the bias strip installation instruction.
Why do you sew the ends of the bias strip together before pressing it in half lengthwise and sewing it to the garment?
What if your measurement is off by just a hair and your facing is too small for the armhole? Wouldn't it be easier to cut a bias strip that is probably a little too long, then sew the strip to the armhole, and when you've got the strip sewn right side to right side all the way around the armhole, THEN cut the second end of the bias strip to match the first and sew them together?
Wow-How creative. The ideas will be very helpful. I also love the silk burlap. I have used the folded bias facing on children's dresses. Can't wait to try the scalloped edging. Thank you.
I love all three of these ideas, but have two questions. I, too, am wondering about the baby hem: If the first turn of the fabric is on the seam line, won't the second turn make the armhole larger than originally intended? And, what kind of fabric was used in the reinforsed buttonhole demo? At first I thought it was a searsucker, but when looking at the close-ups more carefully I don't think it is. Where was it purchased?
Great tips, and I love the silk burlap material. Thanks!
I'm so glad this post has been helpful.
Let me answer a couple of your questions. First, you don't necessarily have to sew the bias together initially at the ends, you can sew it around the armhole and then connect it. But you should seam the ends and press that seam open, instead of overlappying them, in order to create a smooth line at the underarm.
Next -- yes if you follow my directions you will be taking in the armhole slightly. It's such a small amount, however, that it probably won't make a difference. But, if you're concerned, make the first fold 1/2 in. from the outer edge. The second turn of fabric should be about 1/8 in. and that gives you the full seam allowance.
Great tutorials ! I've learned more since accessing this site than I have in 30 years of sewing!
Excellent tips. Thanks!
Cennetta
Excellent tips. Thanks,
Cennetta
Great ideal, thanks for the tip
I love the scalloped-edge armhole. I often wonder what to do with the various stitches on my Bernina when it comes to dressmaking. Thanks for the very handy article.
Great Mag. & great tips, For the lady who was new to sewing, You can lay the bias in place and finger press the 45 degree angles making a crease, join the creases and you have a perfect fit for the facing. I do this for my quilt bindings
every time and it works.
Great ideas! Thx for sharing. Love the use of wash away stabilizer and using the scallop stitch to create a finished edge. I will try some of my other "fancy" stitches to create a finished edge.
How great is that ,Were do you get silk Burlap, Love Less is more too.
Waechter's in Asheville, NC went out of business February 2014.
I haven't found any silk burlap that is garment worthy anywhere. Any tips would be greatly appreciated. Thanks in advance!
So that's how you do scalloped edging! Brilliant. Thank you for these tips.
Claudia