
The Perfect Blouse: Hem Design Options


Sandra Miller demonstrates hem design options in this episode of The Perfect Blouse series. She shows several choices using the View B shirt from The Blouse Perfected pattern by Cutting Line Designs. However, this process can be used on many other shirt patterns.
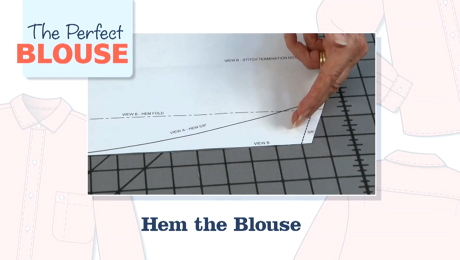
Fashion a vented mitered shirt hem
The hem on View B features a 1 3/4-inch turned-up hem and side vents with mitered corners.
To create the miter, fold right sides together, raw edges matching just at the corner. Sandra explains how to stitch, keeping a 3/8-inch seam allowance. Then trim the seam allowances at the corner and press the allowances on a point presser and use a point turner to turn to the right side. Stitch the shirt hem from one front edge to the other, including the mitered side seams.
Create a simple, clean-finished sleeve hem
This hem design option can work on sleeve hems that do not have a placket and cuff.
Simply stitch a flat-felled seam and a clean-finished hem, which enables you to roll up the sleeve without any raw or serged edges showing.
To accomplish this start before stitching the sleeve’s underarm seam. Staystitch 3/8 inch from the sleeve hem edge, and turn and press at the stitching. Then crease and press at the second hem foldline that was indicated on the sleeve pattern.
Sew the sleeve underarm seam and then make deep clips into the seam allowance at the marked dots on the sleeve’s lower portion. On the seam’s (or sleeve’s) back side, trim the seam allowance to the stitching. Then fold and press the front seam allowance over the trimmed back seam allowance. Edgestitch in place. Turn up and edgestitch the sleeve hem.
Coming up
Our series host takes another look at a finished View A blouse…


Log in or become a member to post a comment.
Sign up Log in