

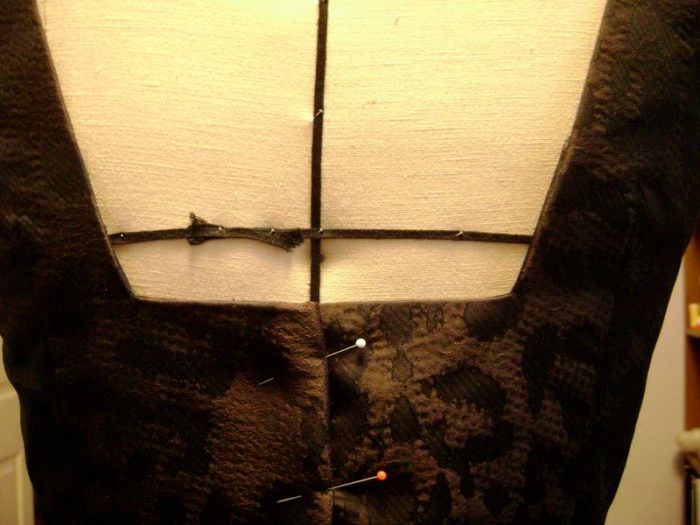
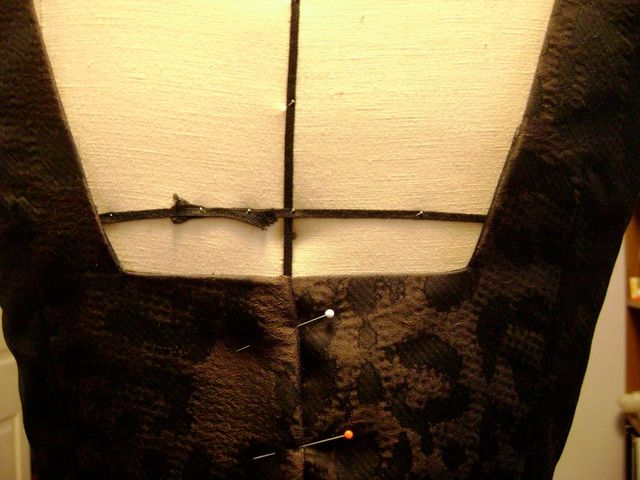
I was working on a dress the other day that has a square neckline at the back. Across the front, it features a boatneck, and at the shoulders, the neckline drops vertically then squares off before the two sides meet at the center back.
I generally don’t use separate sewn-on facings. Instead, I leave a wide seam allowance, staystitch the seamline, then turn the seam allowance back and catchstitch it to the underlining to hold it in place. It’s a standard couture treatment.
Of course, curved seamlines need clipped seam allowances. When there’s a sharp angle, the seam allowance clipping needs to go into the corner.
While the seam allowance will eventually be covered with the lining, the clipped corners remain vulnerable. Once the seam allowance has been clipped and folded back, there’s not of lot of support. The underlining helps, but a chunk of fabric is missing. Further, it’s hard to control the raw edges of fabric that’s been clipped, especially with fabrics that fray easily. Even with the lining in place, it’s easy for tiny threads to work their way out from under the lining and become visible.
In this case, there’s a subtle and easy solution: a small piece of silk organza (or something similarly firm and lightweight) can be used to create a facing where it’s needed—at that clipped V.
I’ve made some samples to illustrate the process.
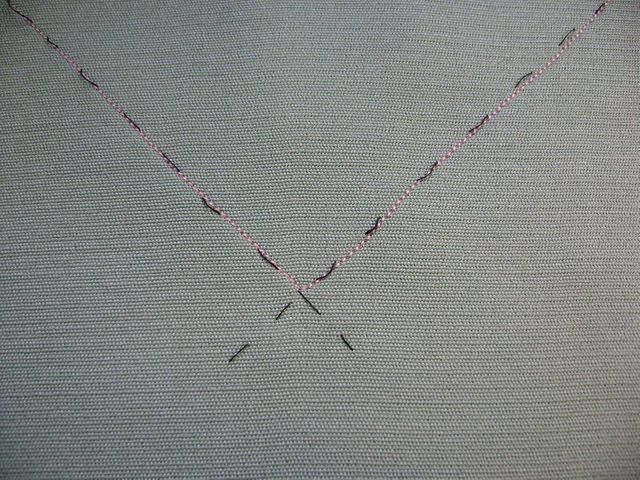
The standard treatment
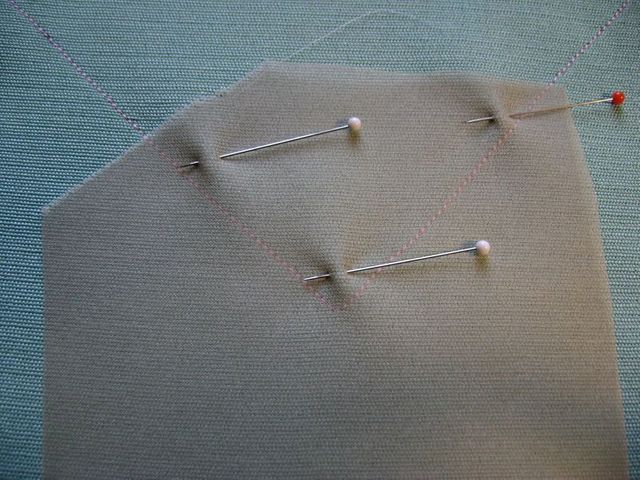
The fashion fabric and silk organza underlining have been hand-basted together along the stitching line.
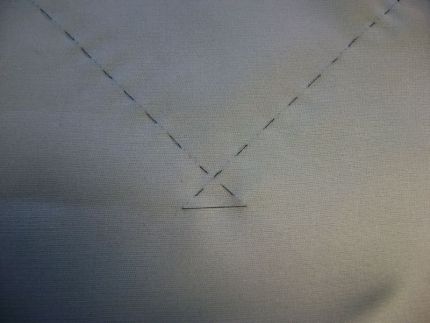
The seamline is then machine-staystitched.

After stitching, the basting is removed.
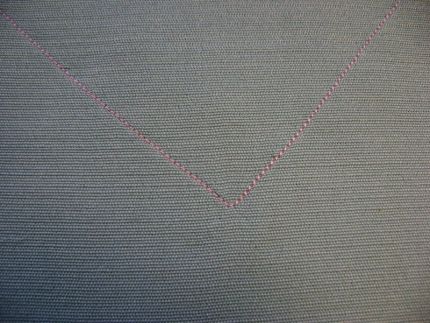
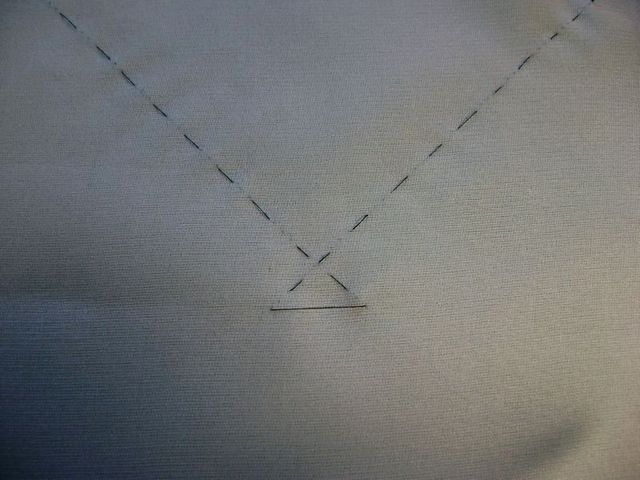
The V has been clipped, into the corner, as close to the staystitching as possible.
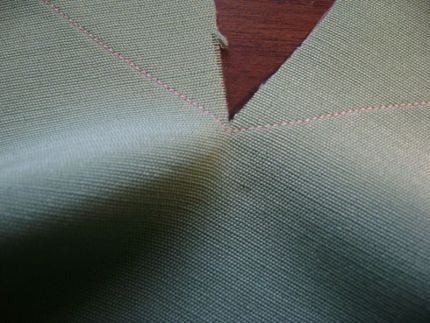
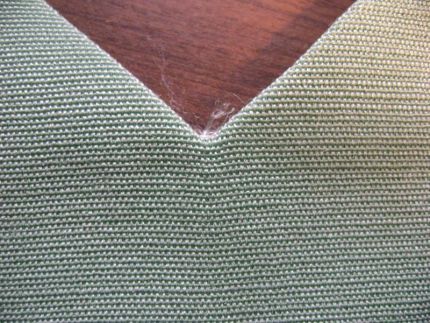
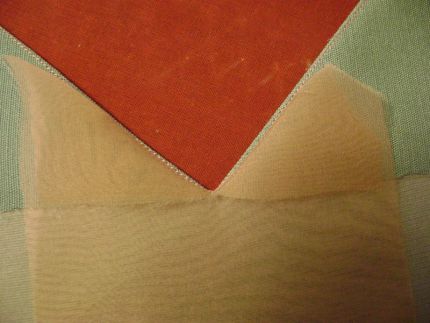
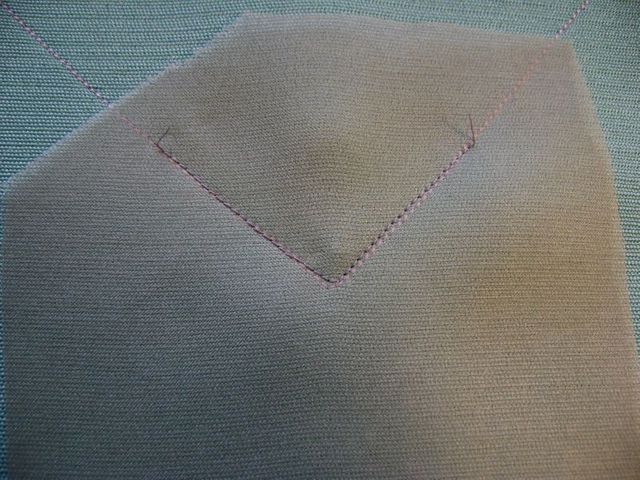
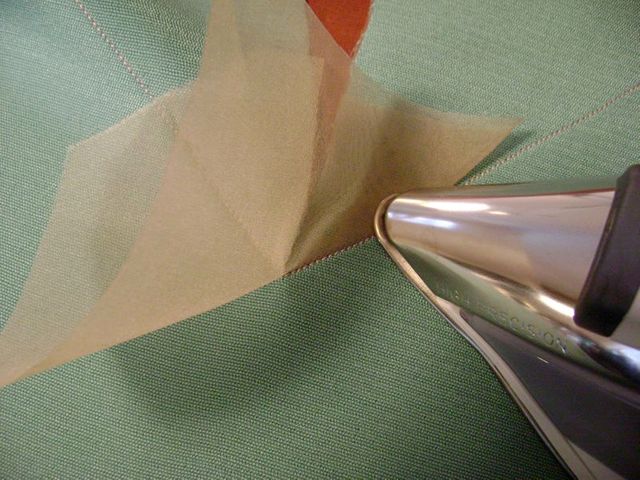
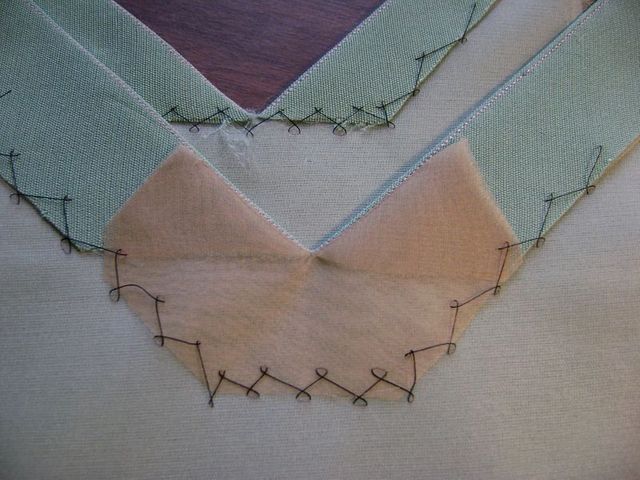
After pressing, the seam allowances have been catchstitched to the underlining; the corner is already beginning to fray.

The fraying is visible from the right side.
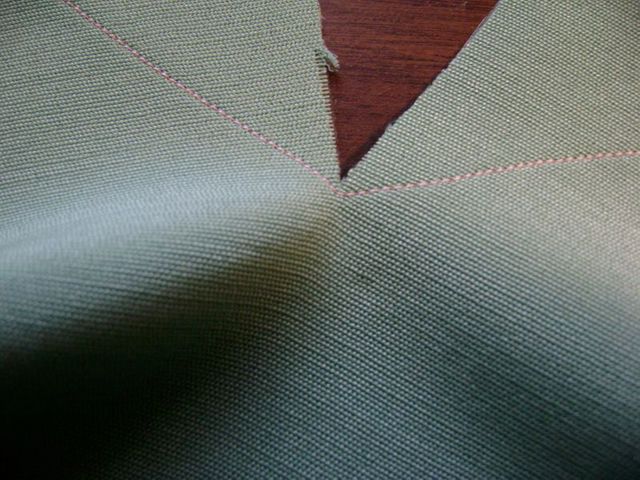
Improved method
A small piece of silk organza, serving as a facing, is pinned to the right side of the fashion fabric.
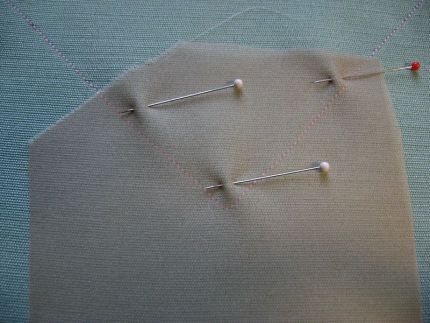
It is machine-stitched into place along the staystitching line.
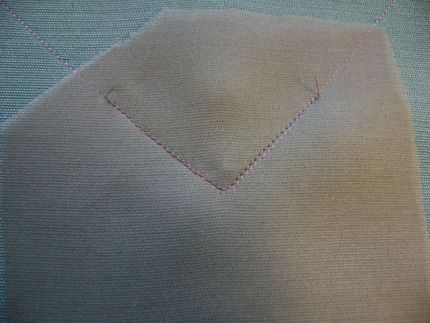
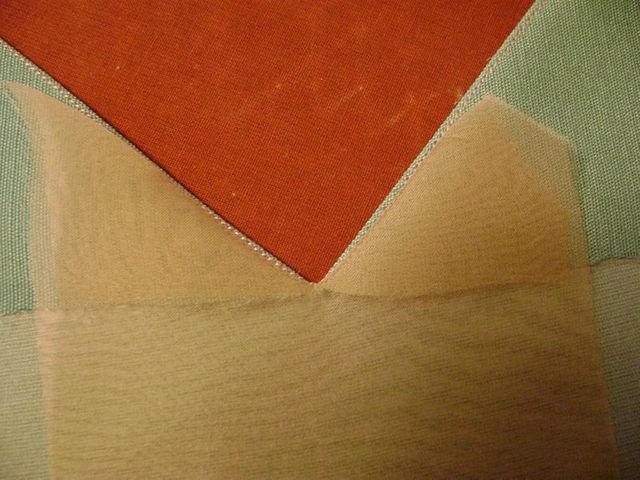
Then it is clipped into the corner as close as possible to the staystitching.

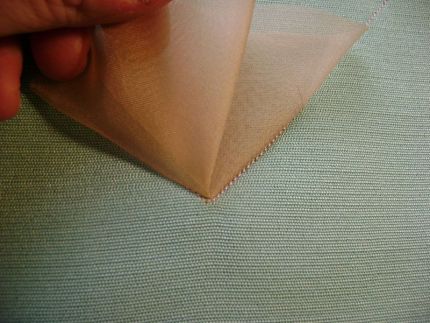
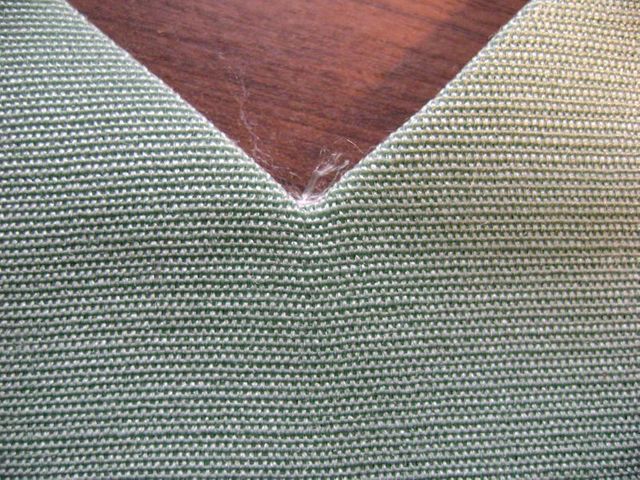
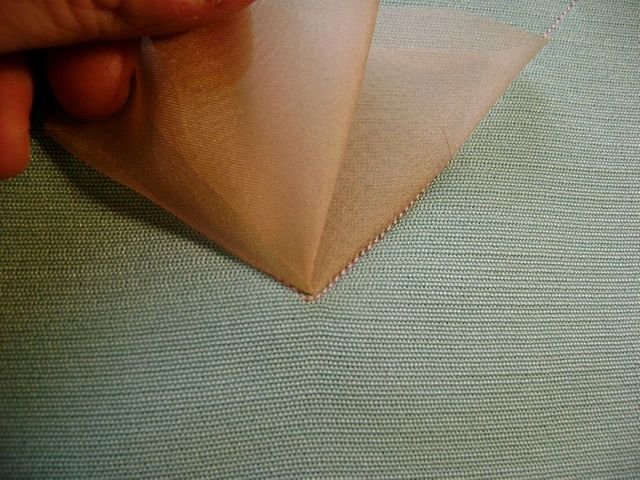
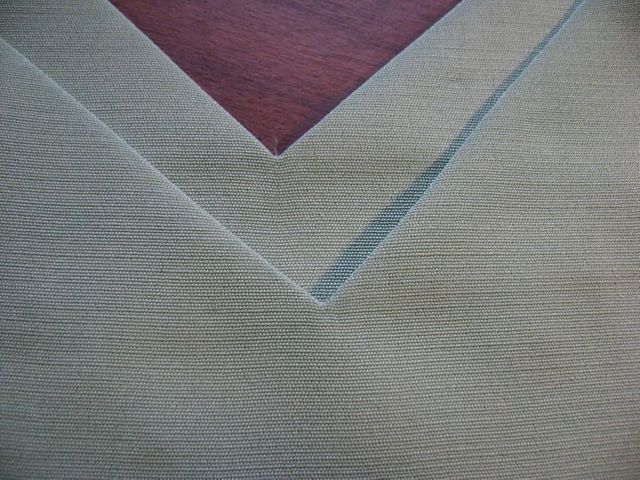
The facing is folded back; organza is so crisp and well-behaved that it works beautifully as a facing.
The organza is first pressed in the direction of the seam allowance, then it is pressed again along the seamline.

The facing is pressed on the wrong side
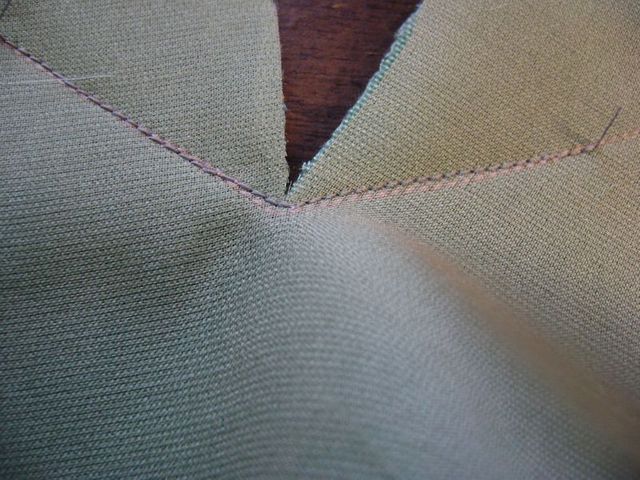
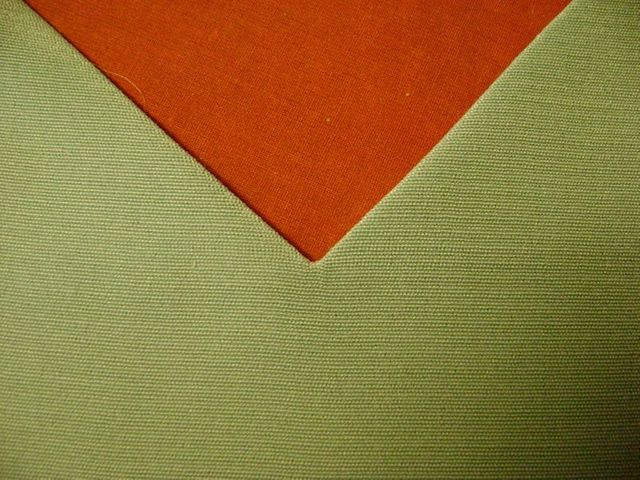
Voila, a secure, cleanly faced V has been created.
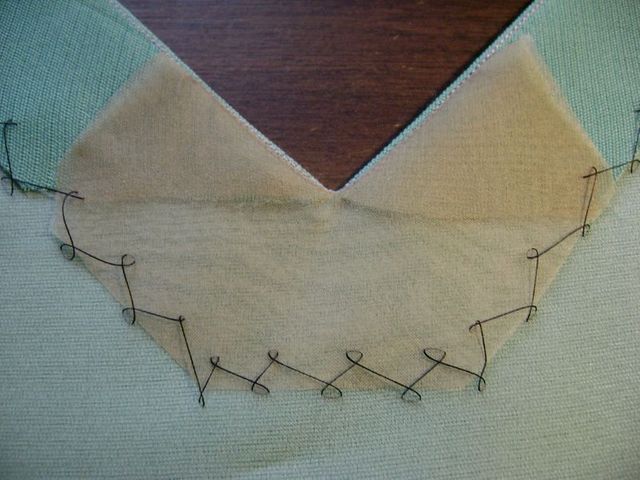
The facing is catchstitched to the underlining.
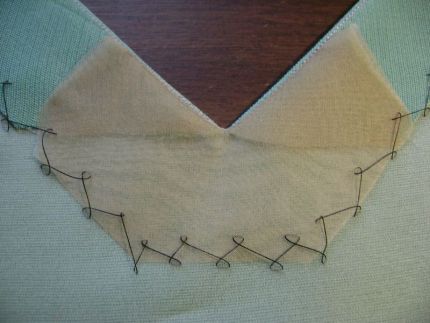
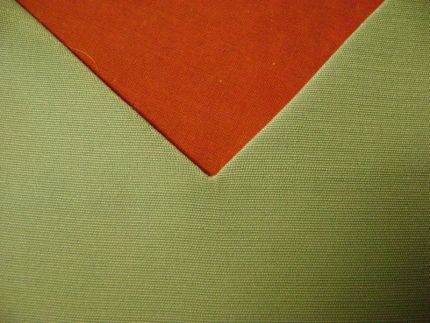
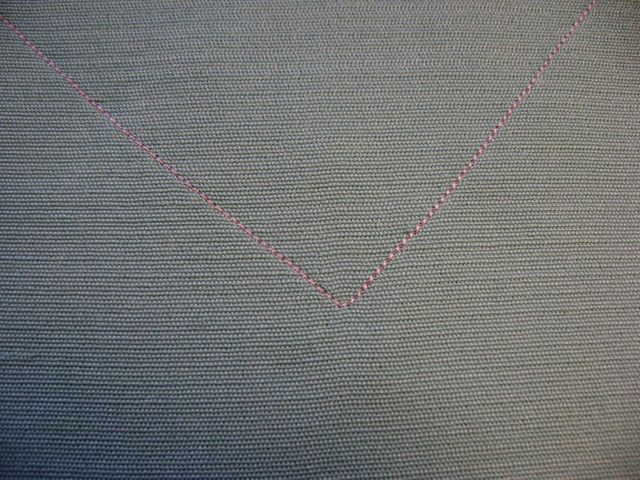
The wrong sides of the two treatments show one with a partial facing and one without.

On the right sides of the two treatments the difference is subtle, but you can imagine that the faced treatment will hold up better over time, with no chance of fraying. The extra layer of organza lends a bit of support as well.


Leave it to Susan Khalje for sage advice, understandable know-how, and long-lasting results one can be proud of.
Excellent tutorial. Thanks, Ms. Khalje.
great tip, can't wait to use it the next time I make something that has facings!
Beautiful! Those little touches make all the difference in a high quality garment.
This tutorial was wonderful. The frayed vee is an experience that many of us can relate to. Thank you for the excellent advice! The description was well written.
I am also going to try this on my doll clothes! I make and sell them, often discarding one here and there because of this problem. Nice! Nice! Nice!
This can be used in another application: an insert of embroidery using the fashion fabric as a frame or focal point insert for a pillow. Thanks for the great tip!
Perfect timing for this article. I'm going to make V1254 which has a v keyhole in the front. I've been stressing about how to make that opening secure. I'll use the organza mini lining. Thanks.
This is a wonderful tutorial. I am wondering what book I'd get to know more about how one attaches the lining in this scenario. I am unfamiliar with couture methods, using machine-methods to attach lining.
I also make and sew doll clothes and this is an excellent tip, love the idea of using silk organza. Thank you
Great idea Thanks. I will use it lots.
This tutorial is excellent. Thank you Susan!
Thanks for the excellent tip. I just wonder if the silk organza will fray or if you finished the edges.
Susan,
When I snip into the corner I find it really helpful if I put a fine pin or needle a
across the angle of the stithing. This sves you from snipping one thread too far
Liz
Would it be possible for Susan to explain further how she would go on to attach a lining - surely it wouldn't be left like this on the inside? I would be keen to see her treatment of attaching lining to cover the edge because I personally do not like to see the facing
I have used a similar mini-facing for the V's in a knit shirt. I really don't like clipping anything that close.
Thank you for sharing!
Thank you for this tutorial. I can see myself using it often. Where can I find other tutorials that you have written?
Silk Organza is wonderful for all sorts of things. I first saw this technique used by Charles Kleibacker at Ohio State University. He used silk organza for all sorts of stabilizing situations.
Visit http://www.threadsmagazine.com/profile/SusanKhalje to see all of the tutorials Susan has written for the website. You can also find Susan's articles, as a contributing editor, in each new issue of Threads magazine.
Thanks for all your kind words - nice to know you'll find this useful!
And certainly, all of the inner workings will be covered with the lining - and we did do a couture lining article ages ago - I'm afraid you'll have to consult the archives to fine that one!
But basically, the stitching line of the lining is staystitched, it's turned back then fell stitched into place, then it's understitched (by hand) about 1/2" below the edge. An upcoming article deals with this a little bit, too.
This is a really great tutorial! I use organza, too, for lots of projects, most recently to interface a collar on an almost sheer blouse. I especially appreciate the photos in this article. As a visual learner, these helped me really see and internalize the instructions. Thanks so much.
Thanks for another wonderful tutorial. Subtlety provides the excellence in our sewing.
Surely this isn't 'finished' yet..? And there will be another lining or something which will cover all of this messy stitching up??
I have a personal thing about making-it-look-as-good-on-the-inside-as-it-does-on-the-outside and even the catch-stitching here looks like a beginner's attempt.
Nice technique but I'd be ashamed to have this photographed.....
At least suggest pushing the loose corner edges of the organza up underneath the underlining so they're not hanging loose—I can see this tenuous 'patch' shifting or being torn off with the first time this nice slim, basic sheath dress is pulled on and off (besides the crisp material being scratchy against the skin)—or tell us what else is going to be done with this garment's insides, please.
If you see my earlier post, you'll see that I refer to the lining treatment. Clearly this is much too fragile to be left uncovered.
Saving this one for when i DO have time to sew!! Thanks
Susan - Ah the wonders of silk organza! Thanks for the sweet technique -- comes in handy for me as I'm working on a project needing it. As to certain comments here that certainly this isn't finished yet . . . etc. -- at the very beginning of your article you say that instead of a facing you use a wide seam allowance which will eventually be covered with the lining.
Alas, online communication is oft read and responded to a wee bit too quickly
Thanks so much for this super clear explanation. I love how you showed the before and after. Thanks again and hope to read more articles by you.
Great technique, thanks!
Love the explanation and the beautiful photos, thank you! I think I've read something about this before, but in a way that made me think 'ugh, looks hard...'. This now looks easy - and it's just in time for a square-neck design I'm planning.
Not to detract from this in any way, but I am very curious to know how they deal with this issue in high-end manufacturing - and how do the results compare with the couture approach?
This is a great tip. Those little details definitely make or break a garment and this tip made the garment look so professional.
Wow! I thoroughly enjoyed learning this technique, Susan. Thank you!
Fantastic timimg finding this post. You just solved a problem on my little black dress front v and very low back v. Keep posting and I will keep following.
Fabulous tutorials, as always, by Susan Khalje. Her
videos are even more enjoyable with her gentle manner
and pleasant voice. Thank you, Susan, for all your
wonderful knowledge and applications!
Very innovative work...Really Appreciated work!