
Barbara Deckert, a dressmaker from Elkridge, Maryland, and author of Sewing for Plus Sizes, uses a form-making method that I’ve seen in sewing texts from the 1930s: Brown-paper tape from an office-supply store forms a body mold as well as duct tape does, then hardens into “papier-mâché” to become a pinnable form, which you don’t even have to stuff.
Once it hardens completely, the tape double is ultra-light, easily moved and stored, can be pinned into, covered with fabric or a tight T-shirt, marked with narrow ribbon or marker, used on a table or stand, or hung from a hanger. It’s probably the easiest and cheapest method of all…so what are you waiting for?
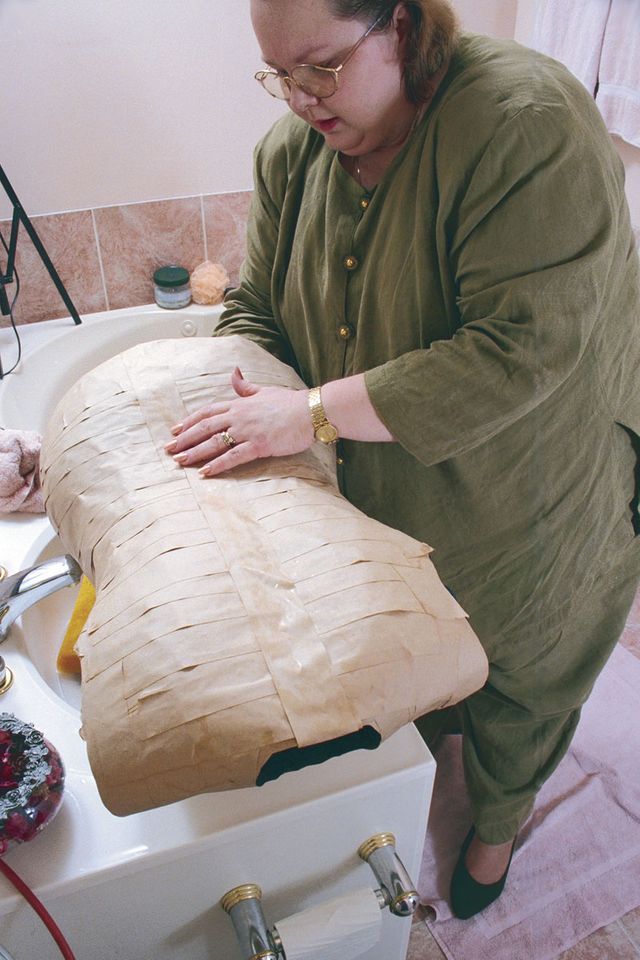
More dress forms:

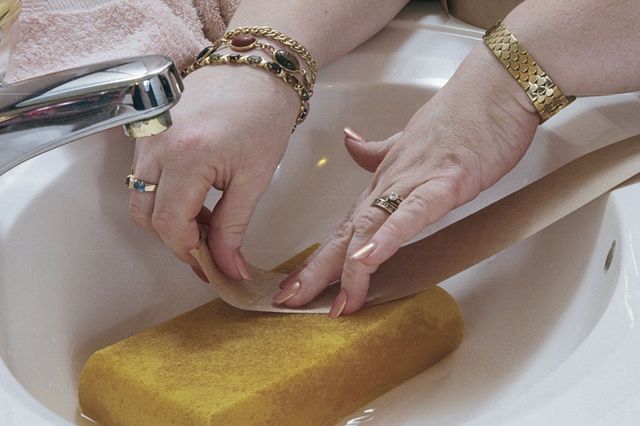
1. The bathroom or kitchen makes a good wrapping zone, since a wet sponge is the best aid to getting the tape properly moistened.

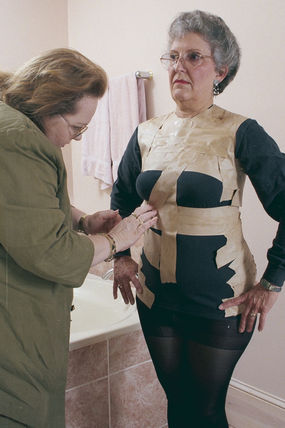
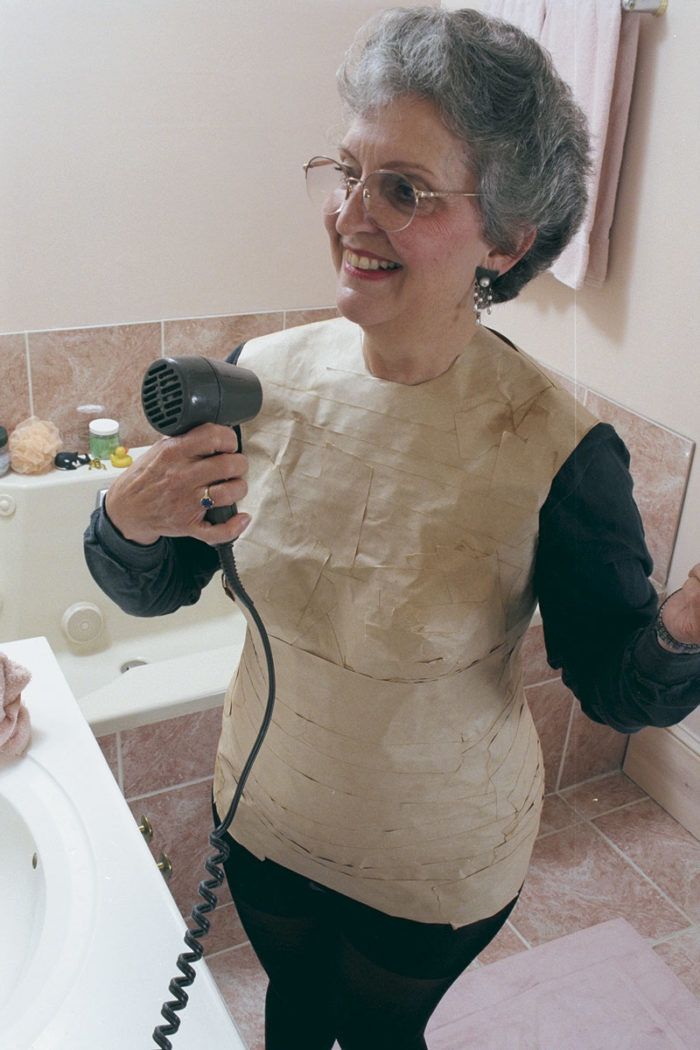
2. Start wrapping the snugly T-shirted, undergarment-clad wrappee horizontally below the bust, then above the bust.
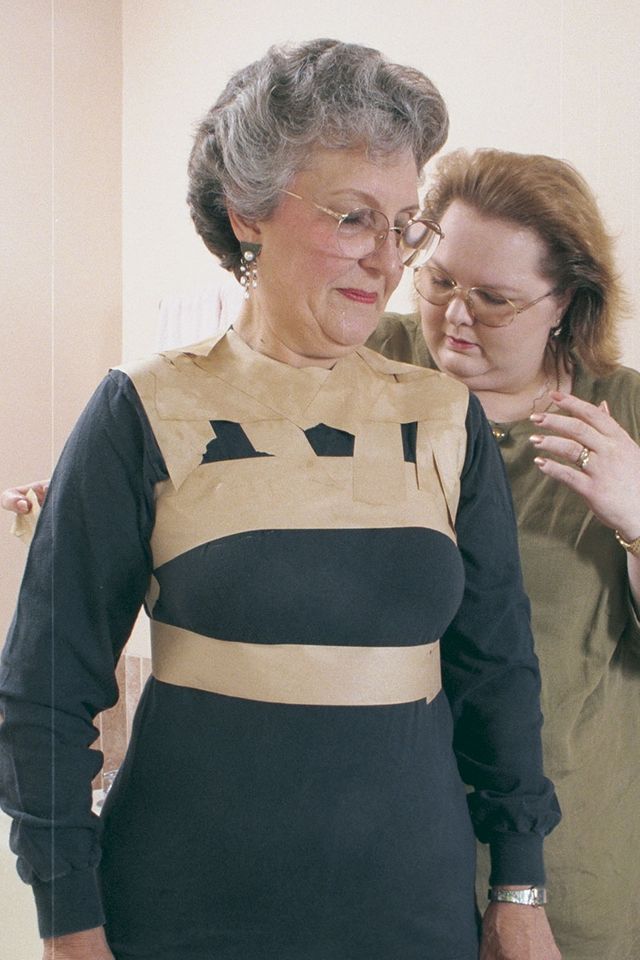
3. Next, form the neckline and armholes in the shape of a traditional fitting bodice. The “cross-your-heart” method works well in paper, too, as does shortening the tape in the bust area.


4. After three or four layers (alternating horizontal/vertical), you can use a hair dryer to speed the drying process.
5. Then (when the tape is hard enough to keep its shape but still soft enough to get out of) cut it up the back through the T-shirt, tape as with the other forms, and reclose by taping over the cut on the quite-stiff form.
from Threads #75, p.41


So interesting,so informative,so impressive,Thank You lauralee22
We did this over Thanksgiving for two of the bridesmaids for my daughter's friend's wedding. My daughter and I were wrappers. The bride and another friend cut paper tape strips. I was amazed at how quickly it went. Now, we can work on the dresses without having to worry about fittings for bridesmaids (one of whom will be going overseas!)
We used garbage bags underneath (so we didn't have to sacrifice any t-shirts and used duct tape to wrap above and below the bust and at the waist to shape the bag. Then we started layering the paper tape. The bag and duct tape easily peeled away after the form was dry.
Now I want to make one for myself! Thanks for all the information.
This seems like a great idea, but question...what do you do with it after it is dried? Do you stuff it? And, how to make it stand up? I am thinking about doing this to sew for my daughter when she is not here to fit. I really appreciate the info!
Just wondering, do you think that you could create the molded papier-mache by first creating the paper-tape dress form using the method described by coco1,then covering the inside of the paper-tape form in saran wrap or paper towels as described in the original instructions, and then molding the papier-mache over the paper-tape form?
This might make it a bit easier to obtain a mold without having to go through the plaster method which seems to be pretty involved. Anyone, please let me know if you think this idea would work. Thanks, csukel
What a great idea for a wedding party I'm doing all the gowns including my niece's wedding gown. I know this is a silly question but in regard to the brown paper tape, is this the gummed water activated tape that is used?
i tried with patex tape and it also worked out.
This method belongs to Madame Di Bello, that she patented more than 20 years ago. I had bought her books and her dress form kit in 1998. She was at the Sewing estival in Toronto up to five years ago. She was in her late seventies then. What a lady. She had a school of Haute Couture in Montreal- Canada.
I bought a vintage dressform years ago. The fabric covering was tattered, and when I took it apart, it was padded with cotton batting and old newspapers. The form underneath was made with paper tape. The newspapers are from Boston and WWD from Dec. 1930 to Jan. 1931. Pretty much dates the dress form. yes, I saved the papers!
We want to make one of the paper dress forms, but I cannot find the paper tape. Can anyone help me or tell me where to buy it? Need for daughters' wedding dress since she lives 5 hours away and can't come for fittings!
Weezie2 the paper tape is found at Staples or Office suppilys. It is for sending packages in the mail that need to be stamped with red ink. Sometimes you can get it at the Post office. But mostly at the office suppilys.
I have done the Plaster cast type of molding on my daughter for a costume piece of armor. I had to mix it and spread it on her. I had forgotten that you can buy the plaster impregnated gauze from medical supply stores. I would have been so much easier.
Using the Duct tape alone would be hard cause it doesn't hold its shape after cutting the front from the back. Using the plaster gauze strips make a "Mother Mold" to support it while the Papier-Mache drys. you still have to use the paper towels as a separator.
I made this form about 15 years ago and I loved it! I made mine exactly like this but did one extra, really important step. After cutting it off my body, and it had completely dried - I spray painted it with a clear lacquer - inside and out. I did about 5 thin layers of paint. After drying, it was very stiff and easy to use. I never put it on a stand - I just kept it in the corner on a table in my sewing room. I loved that form - I lost it when our house flooded.
what i would like to know it how do you pin into it? can you pin into it without ruining the form? or is there a way to make it so i could pin into it with out hurting anything
So i made this and was not happy with it. It added another 6 inches to my waist but not anywhere else. it also kept falling apart while i was putting it togeather. i would not recommend this design to anyone who wants accurate measurements.
Hi, I was just wondering how much tape you would need to make this if it was for a us size 6, and how long it takes to make?
I want to alter quite a few pants because I lost weight pant. I need attention especially to the knee & below the knee area to narrow the legs. Does anyone have any ideas on how to make a form or this? Thanks
I dont think that the paper mache method is any more involved then any of the other methods it just takes longer because of drying time
I have been sewing all my life,and have never heard of this at all. Wow I think it's fab,and wish I'd have known about it years ago,when there was not so much of me to wrap!
Great idea on the garbage bags Coco1, that's what I'm going to try.
I tried this this past weekend and had a lot of questions going in so I thought I'd post them because I'm sure I'm not the only one. Let me first state that my sister and I did this and are VERY crafty and found this difficult and disappointing.
Before you start:
THE TAPE-I had a lot of ?s about this.
*I could only find it at staples (I looked all over)for $7.49 and it was 120 yards of the brown paper tape with the criss cross threads in it. There was another tape that said paper tape but had a waxy coating on it, this will not work.
*I made a size 4ish form and still had about 20% of the tape left after doing 4 layers. If in doubt buy more and take it back if you don't use it, it will not be fun to run out half way through and possibly ruin it.
*This is obviously a 2 person job, pick a close friend or family member as you will basically be giving the model several breast & butt exams ;)Feeling them up for a couple hours definitely will be more comfortable with a GOOD friend or family member.
*You'll definitely want a companion tape like wide masking tape (1.5"-2")or duct tape.
*Get a couple sunday papers for stuffing it at the end
*This is essentially like wallpapering the glue on the tape gets really sticky, we started with a sponge and then just filled the kitchen sink with a couple inches and dunked it, it was less sticky on the fingers this way. It made a little more mess on the floor. (Just water drips)
*Model-put on some flip flops before you start, standing there so still will start to do a number on your feet and legs the extra rubber under your feet is a life saver.
THE PROCESS-
*To speed up the process I'd cut a stack of strips before you start.
*I used a trash bag not a t-shirt and it worked great.
*You'll definitely want to use a masking or duct tape around the main dimensions (hips, waist, around bust) first to make sure it is slightly more accurate. The brown tape doesn't hold really tight as the glue makes it a little slippery and it gets larger as you wiggle. Also did some criss crossing which helped hold some shape once we took it off.
*This took us about 2.5 hours, we didn't really dry with the hair dryer between layers. The first layer dried quick. The second wasn't bad,then we did a quick 3rd/4th layer and the dryer was making it hard to breath so it lasted about 10 seconds before I had to stop that because at that point I was light headed.
*I'm a healthy 27 year old and almost passed out twice! Once in the beginning and once at the very end. I'm not sure why, maybe the restricted breathing and the standing still or something but that was really unexpected and awful. So keep talking to a minimum I guess.
COMMENTS AND CONCERNS
*Once we took it off it completely lost it's shape and we had to work hard to get it back. It was so bad we almost scrapped it.
*It add 4-6 inches all over!! and as you know that is a totally different dress size.
*Once we discovered that it was super sized we took a tape and measured me and then the form and just overlapped the back where it was cut and squeezed it until the measurements matched and then taped the back up.
* Then we stuffed her with lots of newspaper since it was collapsing. (A pillow had to much resistance and deformed it again) To give it some weight and a little rigidity we stuck some wine bottles into the bottom and stuffed paper around it. This kept it from falling over while it continued to dry. I'm thinking once it's dry I'm going to fill it with the "Great Stuff" foam from the hardware store. I might insert a 1-2" PVC pipe in the middle so I can make a stand for it later.
* Once it was standing and somewhat the right shaped we did some more taping (masking tape) to give the paper form & strength and then one final layer of paper.
*The paper tape curled at the edges pretty bad.
*I'm going to get some modge podge and add a layer to help with that and make it harder.
*I will definately be adding a tight fitting t-shirt at the end for smoothness, durability and maybe easier pinning.
The results were disappointing but luckily we were able to salvage it, but it was a lot of work. If I were going to do it again I'd say do the duct tape one (I'd imagine it is a lot quicker) and I know it won't have the rigid shape so stuff the heck out of it.
@DT2006
I think that the 'waxy' paper tape you saw was correct since the paper tape uses a gum paste that is water activated and can appear 'waxy'.
Otherwise, I haven't tried this yet but I'm really itching to. Most likely going to go get the materials today, so I guess I'll update at a later time. :D
Has anyone found out a way to make the cage-like attachment to the bottom of the dress form to help with trouser fitting? All of these take alot of time & effort & I know that I use mine daily!! Thank you
So excited to find this article -- newbie to sewing and just can't put together the $$ for a plus size form.
Question: I'm a size 22-24 at this point -- how much duct tape or how much paper type will I require?
I haven't decided which route to go and definitely want enough supplies on hand at start.
Thanks all 8-)
i made a stand for my form out of PVC tubes and joins from a regular hardware store. it pivots and adjusts just like a real form stand. you can find all the instructions on how to make it here http://lulushion.blogspot.com/2011/06/making-of-form-part-3-stand.html and the best part is that is very inexpensive. Enjoy! :)
I made this dress form with my husband with the craft paper tape. We bought it online from DICK BLICK art supply. It was inexpensive, the shipping added some but if you can get it from their store you won't have that expense.
I found that dunking the tape made it too wet. If I used the sponge method it stayed dryish and kept its shape. After we cut it off I repaired it and any edges that popped up with another wet sponge. This helped in adjusting the size afterwards. It was a really good experience. I put it on a suit hanger that was taped to a PVC pipe "T". This is held up by an old Christmas tree stand. LOVE, LOVE, LOVE this form. I too got a little dizzy while making the form. (Glue?) It worked out though. Also, I pin into mine but I covered it with a t-shirt that is a size too small so it stays tight. I also put lines on it and they really help with pattern fitting.
I forgot to mention. Think Plywood when taping the layers. I other words tape horizontally, vertically, and diagonally. It took me 3/4 of a 600 foot roll but I put on 4 layers. I am an apple shaped size 22 so if that gives you some scale for your needs. Also if your husband does the taping the breast area usually gets a lot attention. Remind him to also do the areas like under the arms and stuff. Thanks to my hubby though, he rocks!
@briarose one blogger made a cage attachment with a old birdcage http://junk-fest.blogspot.com/2011/04/queen-in-making.html but I've seen a youtuber (w/ duct tape) just extend the form to the lmid thigh http://www.youtube.com/watch?v=cs8B4mRVeXU.
Hi everyone!
These articles on Threads were very helpful to me! I created my own dress form out of paper tape. I found it very successful- I'm sure it will aid my future fitting endeavours greatly!
I created my own tutorial that goes into a bit more detail about the process, and blogged about it here:
http://makingitwell.blogspot.co.nz/2012/03/i-made-my-own-dress-form.html
Please do visit, I'd love this to help someone! I'll do my best to answer any questions too :)
Good fitting luck everyone! :)
This method utilized in here work just Fine. I thank you guys Cause This is a very Old tradition That you are passing on to us. Even if we change one thing or two to make it our way just to take your time to share this with us is AWESOME. New generations need to learn how to do things like this and preserve the art of sewing.
I think, I like this method better than the duct tape version. It seems that the brown tape is more malleable to mold around our curves and lighter weight than the duct tape. I remember doing this in a sewing group in Las Vegas with duct tape and one of the girls got really overheated. We had to place cool wash cloths on her and fan her off to cool her down, so she would not pass out. I believe this method is much safer, because of my previous experience with the duct tape.
very informative thank you
I made a paper tape form about 7 years ago at a "More The Day Before" class at one of the Original Sewing and Quilt Expos. It was a class of 18 or 20 people and working in teams of two, in about 6 hours we all had dress forms completed and drying. We wore a clear plastic dry cleaning bag over our underwear. A little time with a hair dryer and then bandage scissors were used to cut the forms up the center back. We quickly and carefully taped them back together and hung them on hangers to finish drying. After getting mine home I sprayed it with clear craft sealant inside and out. Bought an old floor lamp at a thrift store, pulled out all the wiring (there was no shade to remove).The two "arms" of the lamp that held light bulbs held up the form in the shoulder area. I stuffed in a few crumpled newspapers up into the shoulder area, just to provide a more stable surface where the form rested on the lamp "arms". I loved using that form, unfortunately lost it when my house burned. As soon as I can talk a friend into it I plan to make another one!
in 1984 i made one of these with butcher's tape. I still have it but unfortunately it has not grown 10 sizes as I have. The tape was wet when it was removed from my body, but was thick enough that it kept it's shape. The kit came with a wide aluminum strip that was placed down the back so it was easy to cut it with a box cutter. After drying the length shrunk (as expected) so that was increased by an inch. It is still great after 30 years but makes me very sad. lol
growlie, same here, you are not alone! I also got one made by butcher's tape, but now it only looks cool and I can brag about it, thats it.
Very tricky method. I like it.
I can remember a neighbor coming to the house and "fitting" my Mother like this back in 1948. My Mom used this form for all of her life after that. She used one of my Dad's undershirts when she had this done - T-shirts for women were unheard of at that point. And my Dad installed a plywood base under the hip line and mounted it on a metal pole with 4 wheels attached. We called "her" Matilda. Oh, and she was stuffed....with lots of balled up newspapers. We used to dress her up and put her on the porch every Halloween.
I've made one out of duct tape, and the advantage this kind of tape would have is that if I stick pins into it, the glue from the duct tape makes them sticky. This tape would avoid that.
This is something not so common...really liked it!!!
very nice article , it really helped me to make my own dress form...
can we also make a mannequins like this ???
I think I the only one from South Africa, we don't have all the goodies you have but will try to make myself one